Luke wanted to make breakfast this morning so we looked at our list of Recipes 4 Growing up and decided to make biscuits and gravy. Luckily, I had all the ingredients!
We decided to do Drop Biscuits just to make things faster and easier because the boys have places to go.
Biscuit Ingredients:
2 cups flour
1 Tbs baking powder
1/3 cup shortening
1/2 tsp salt
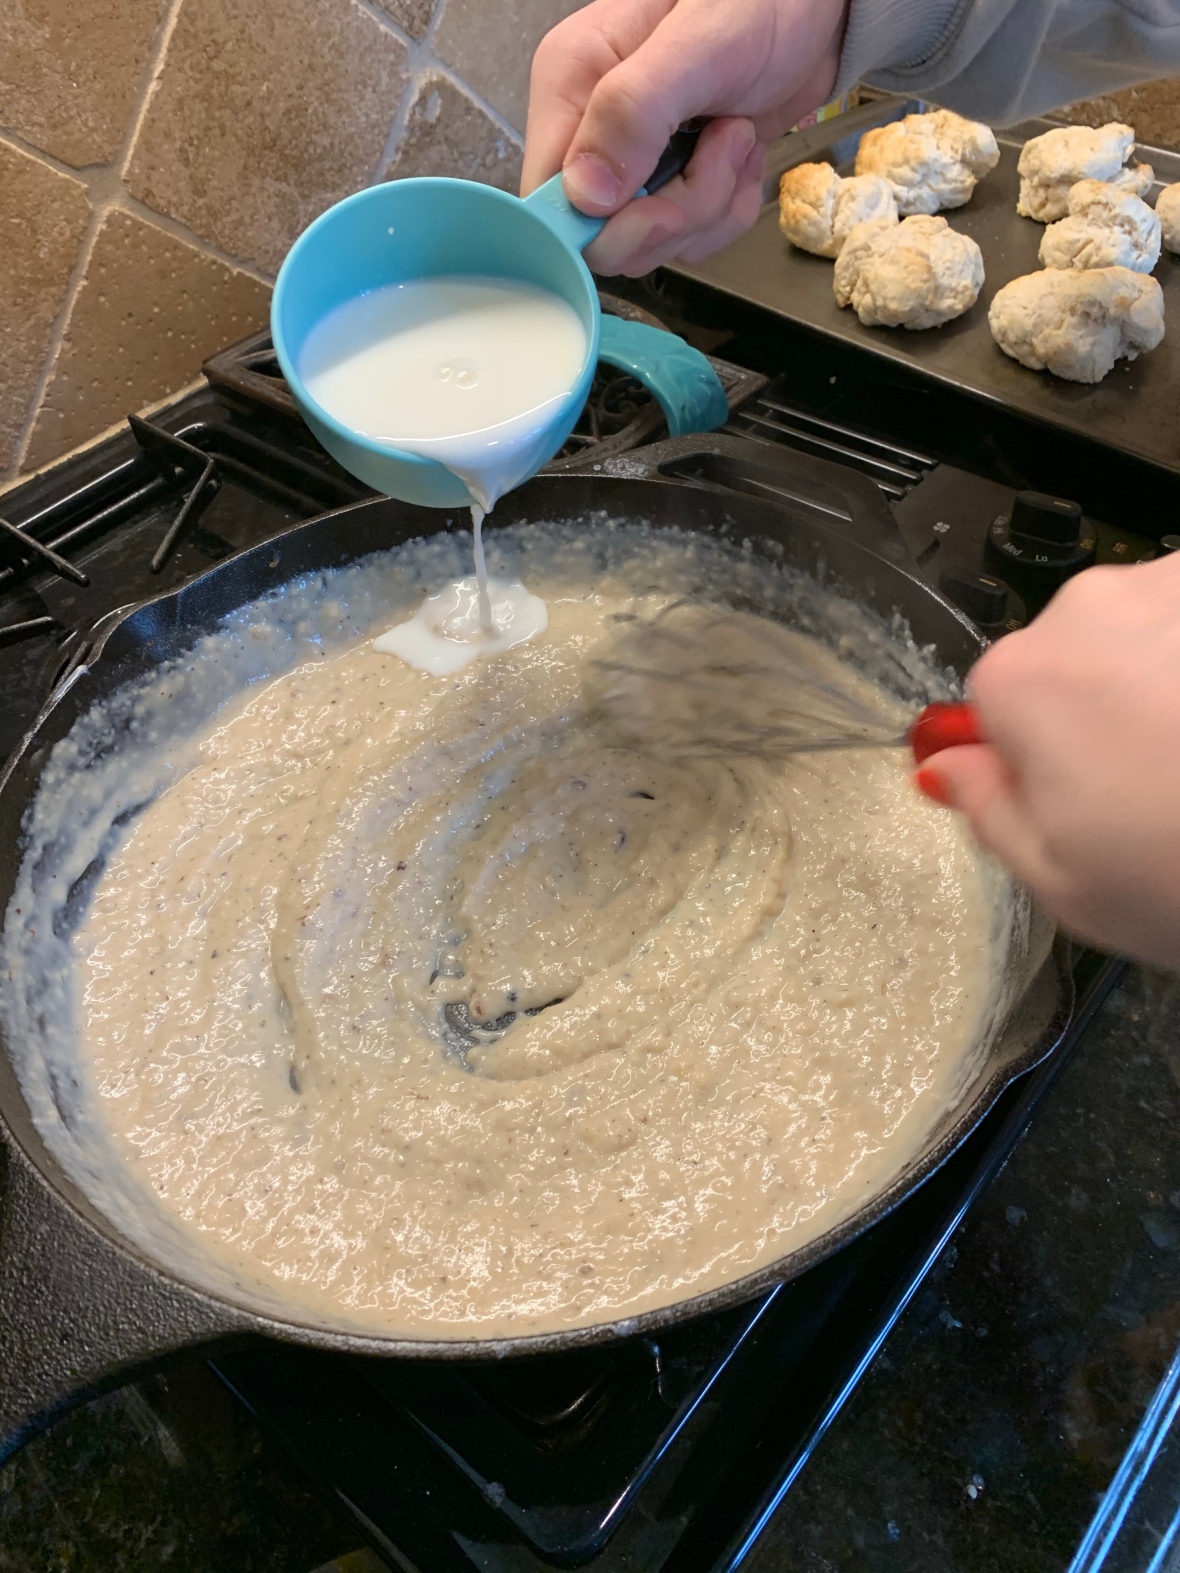
1 cup milk
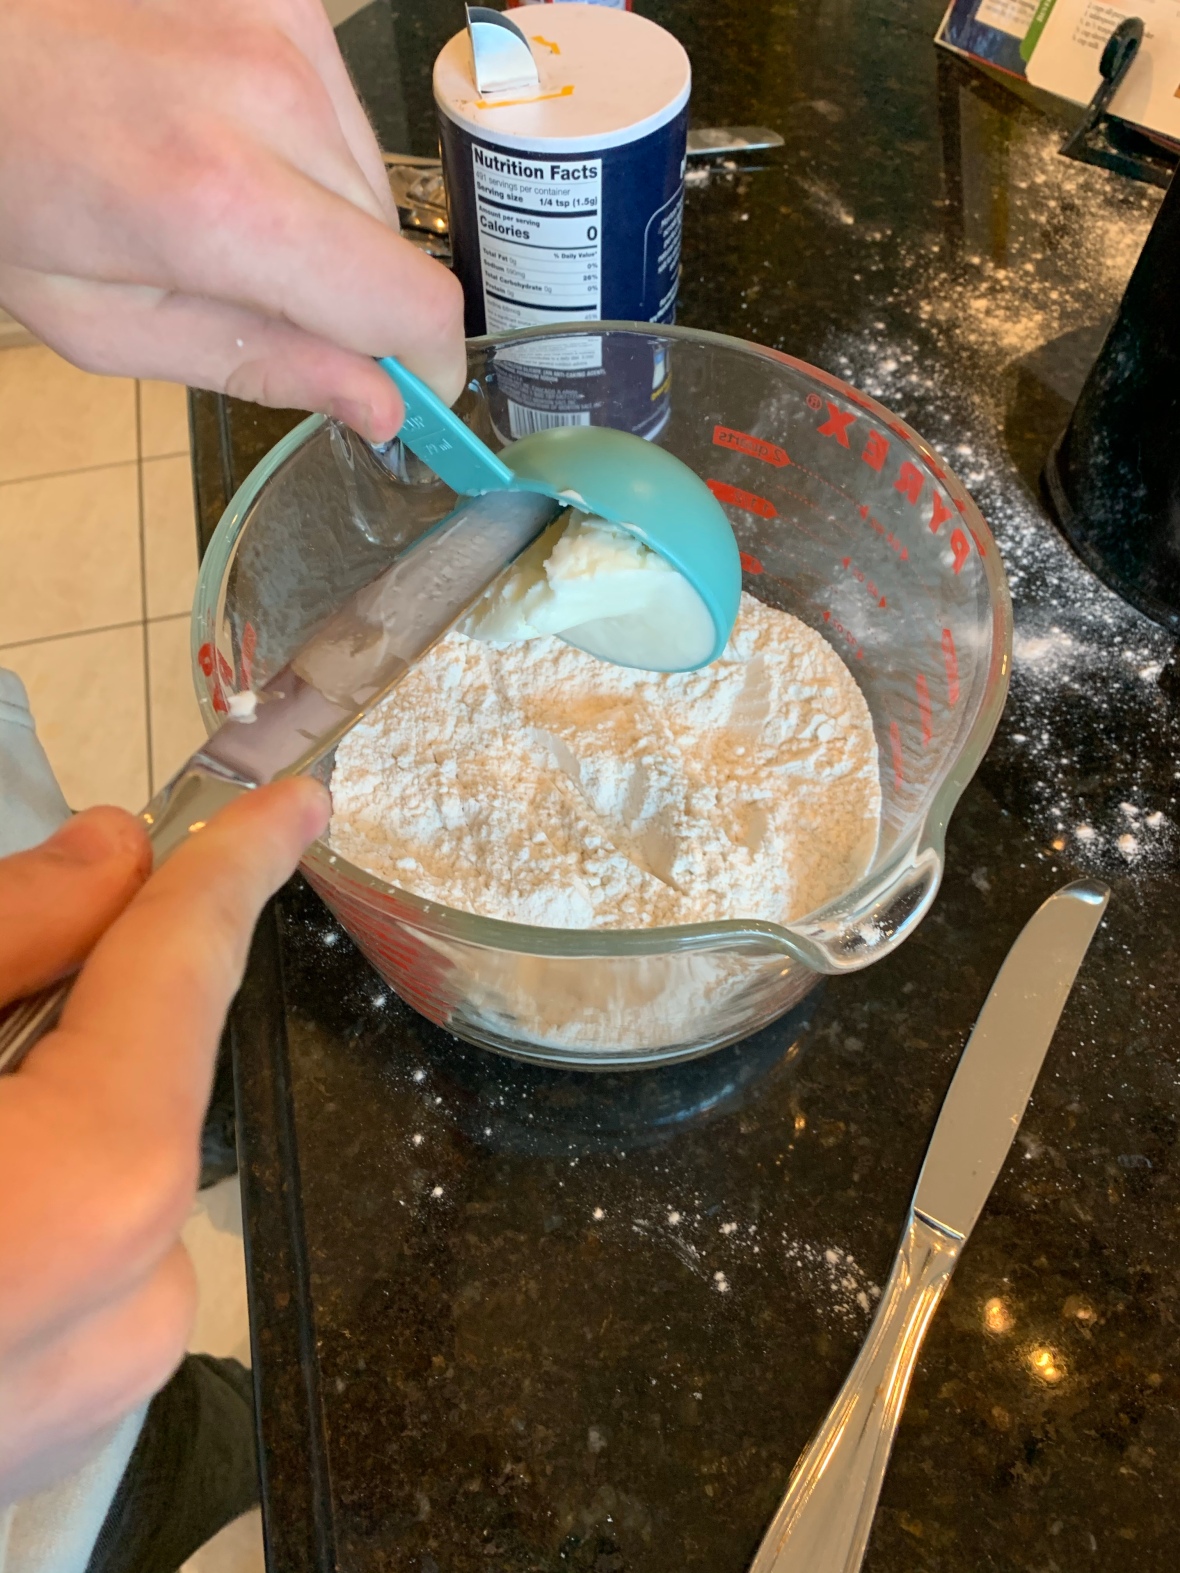
1. Mix together flour, baking powder, and salt.
2. Add shortening and cut in with a pastry tool until it looks like coarse crumbs. We didn’t have one so we used a metal whisk and it worked great.
3. Make a well in the center and add milk all at once. Mix with a fork until just moistened.
4. Drop balls of dough on to untreated baking sheet. Bake for 10-12 minutes I. Preheated oven (450 degrees).
5. Remove from oven when slightly brown.
Sausage Gravy
Ingredients:
1 pound pork sausage
3 Tbs butter
1/4 cup flour
3 cups milk
Salt and Pepper to taste
Directions:
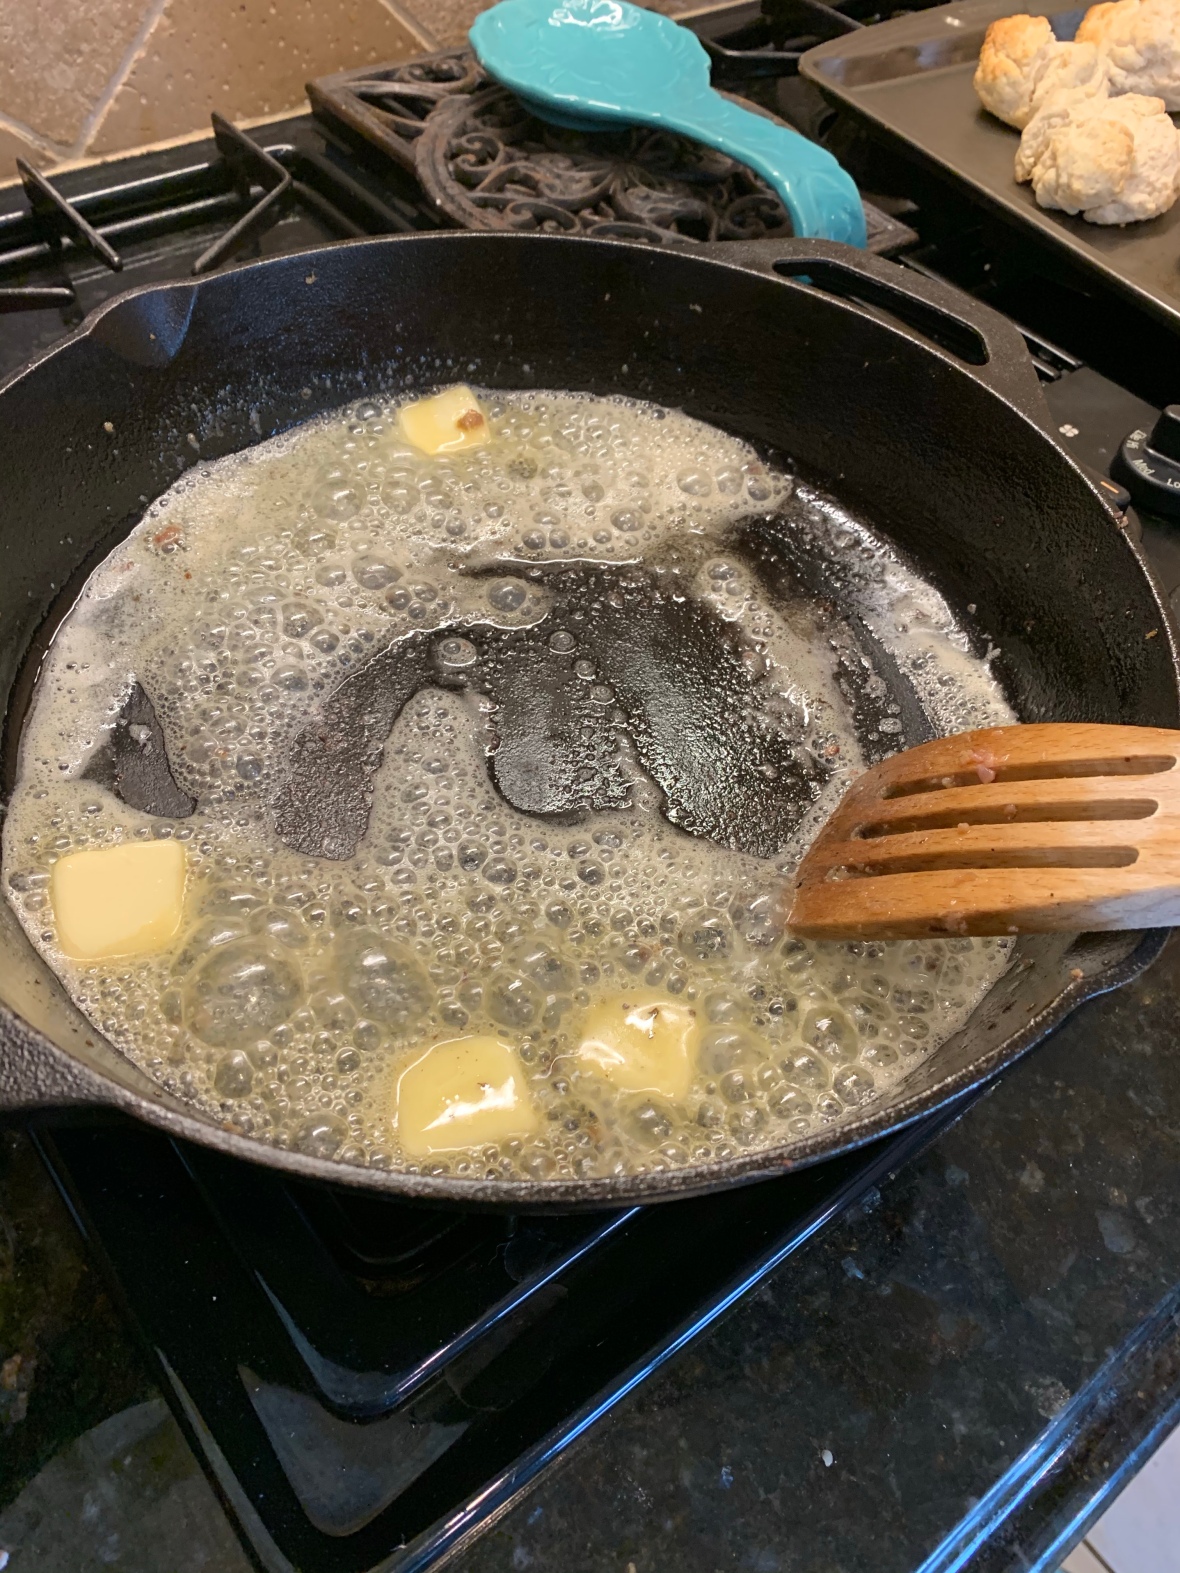
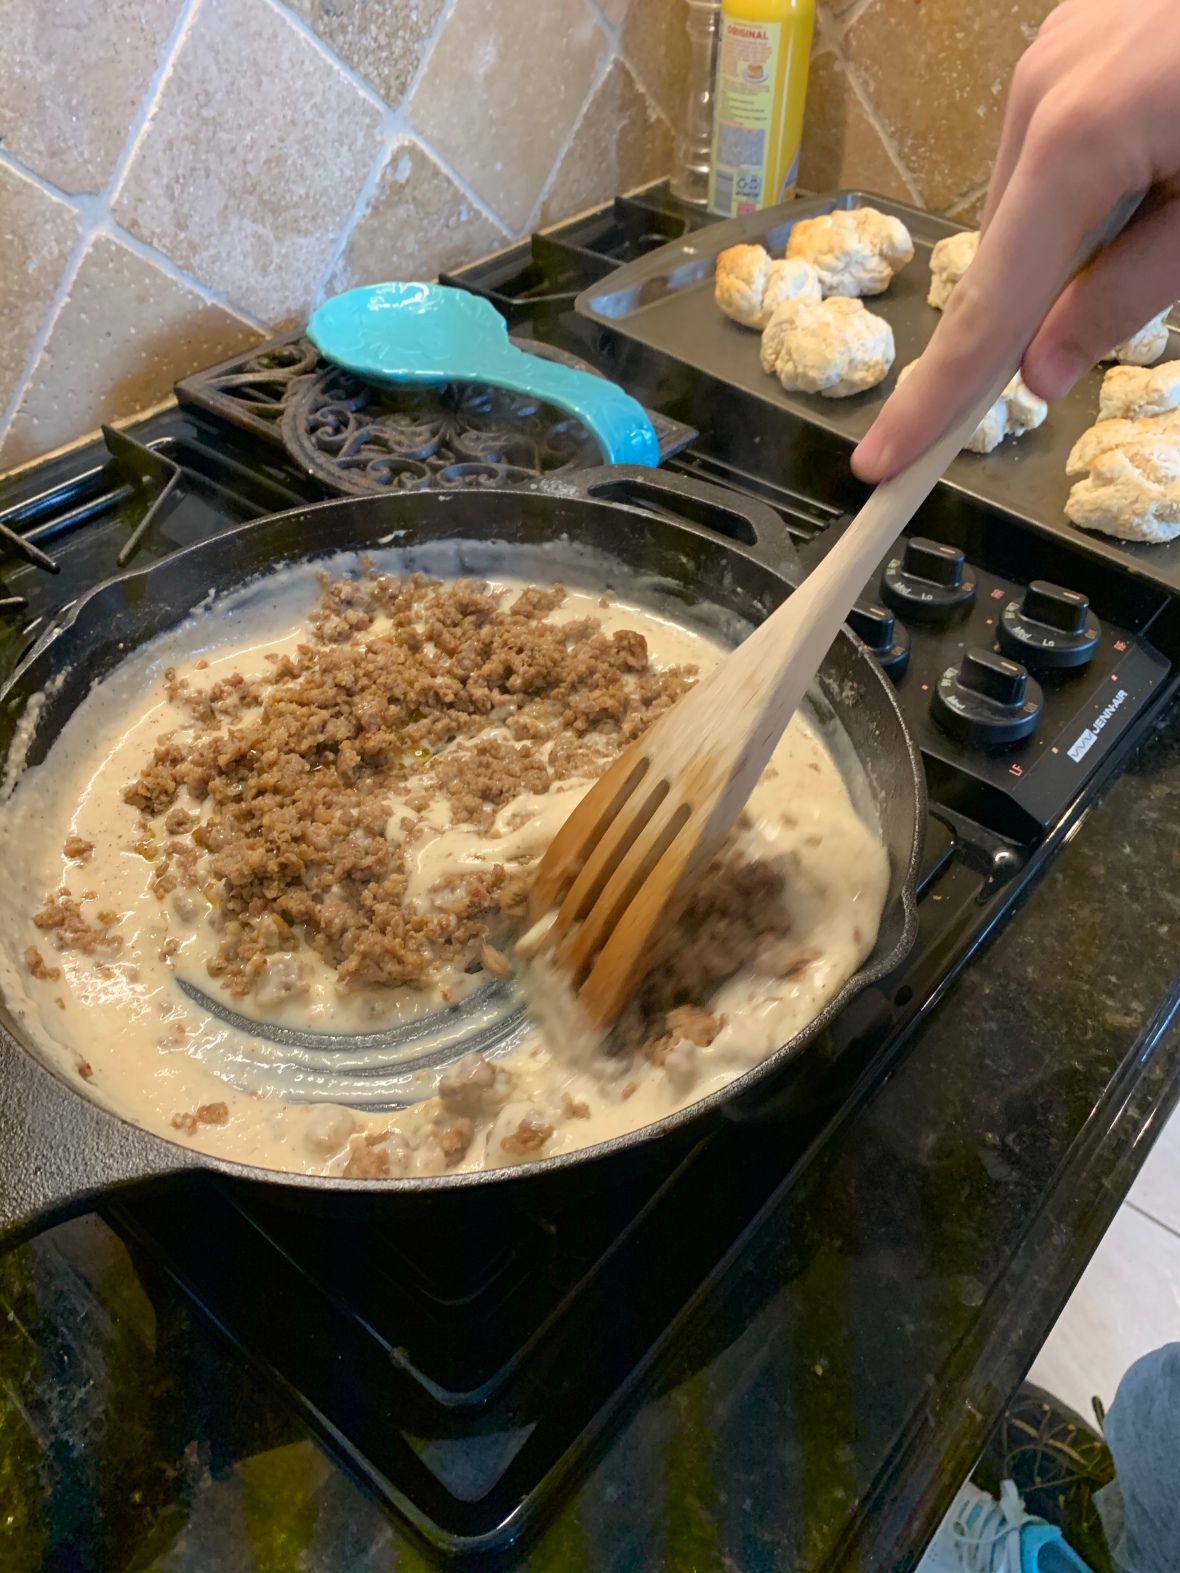
1. Brown the sausage in a large skillet.
2. Remove sausage from skillet with a slotted spoon and set aside. Leave any yummy bits of sausage and grease in the skillet and add melt butter in the same skillet.
3. Add flour and whisk until smooth.
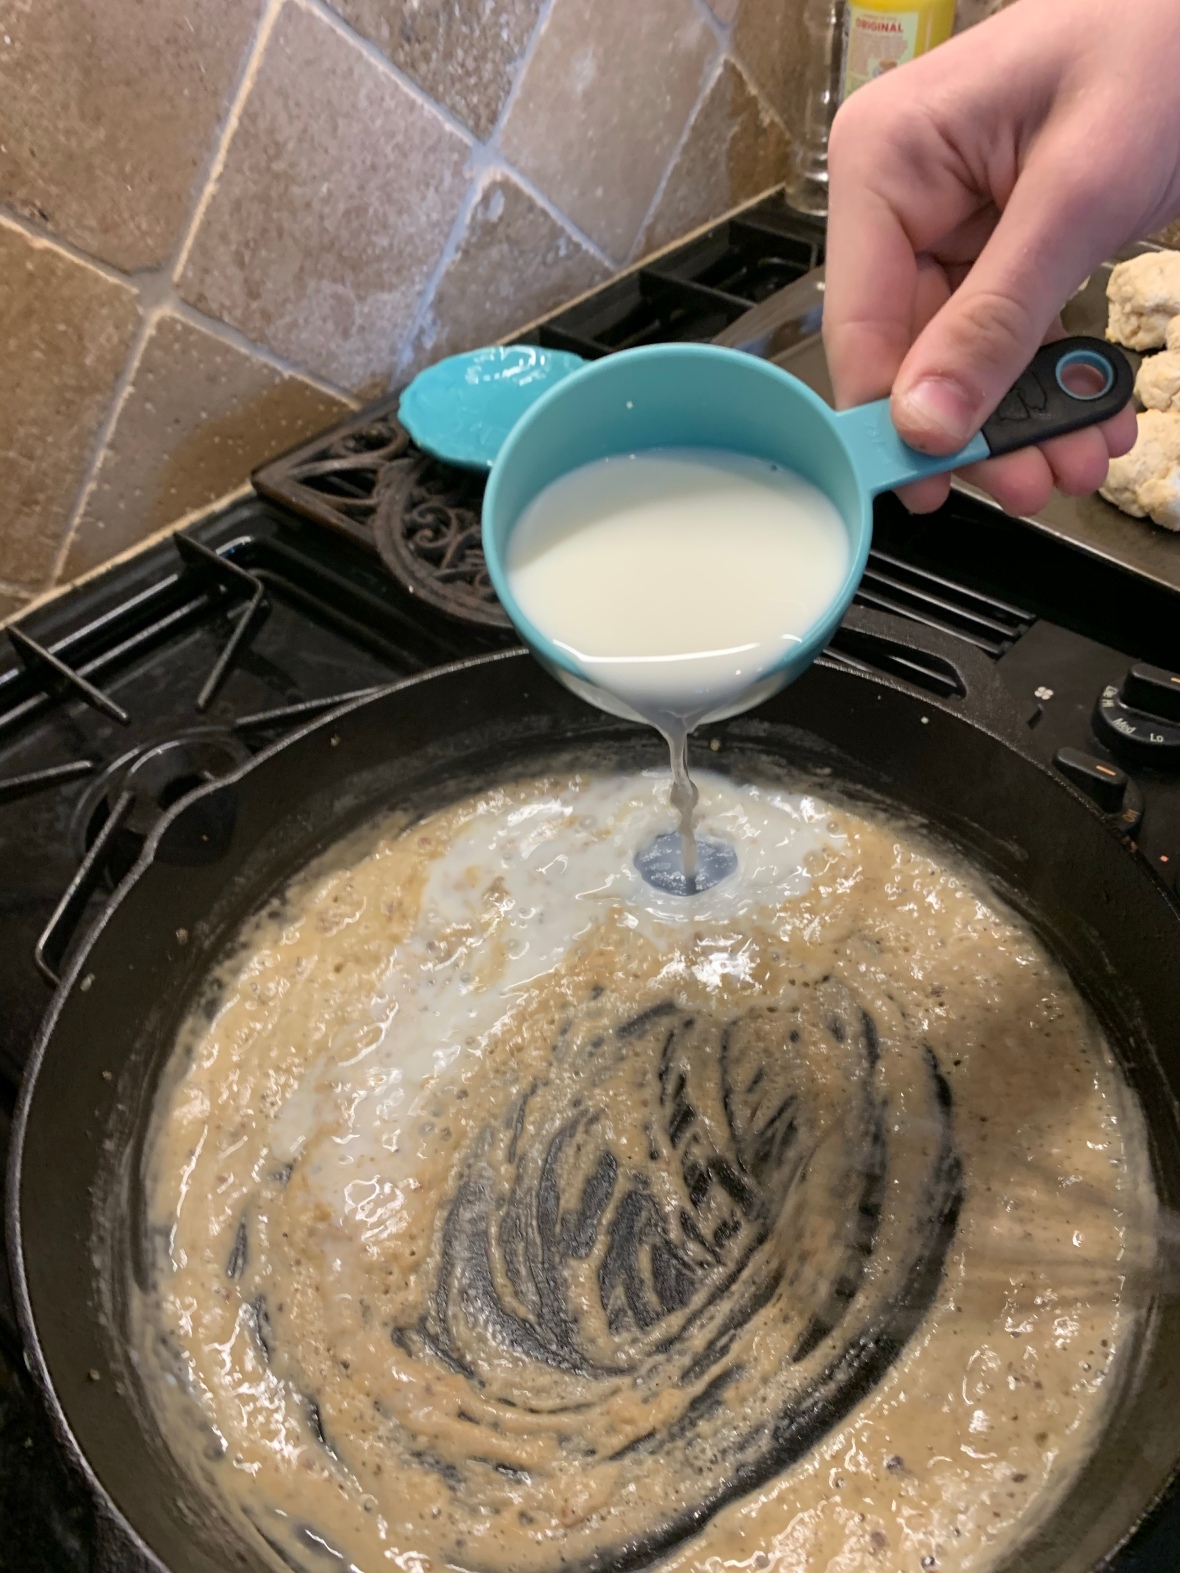
4. Slowly whisk in milk, stirring constantly until smooth and thick.
5. Season with salt and pepper to taste and then add the sausage into the gravy.
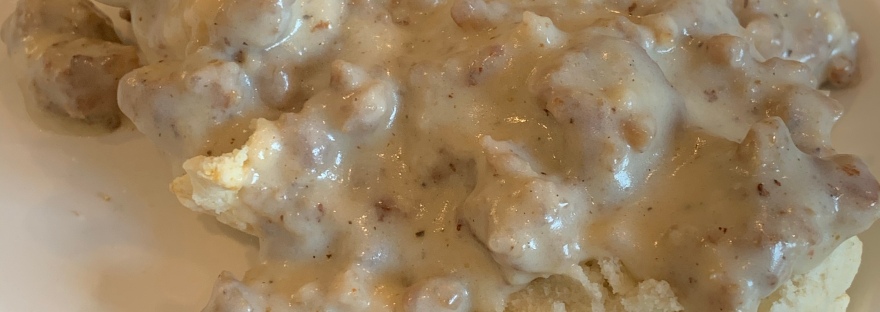
Serve sausage gravy over the drip biscuits and let it melt in your mouth. Heavenly!!!
Try to convince the dog he isn’t missing out on something tasty!
It’s mashed potatoes! Who doesn’t love mashed potatoes??? Well, for starters–my two boys are both completely put out when I serve mashed potatoes and they are forced to at least try it. And it’s soul-crushing every time they make a wonky, disgusted face as they choke down their single mushy bite. Maybe its the texture, maybe it’s mental, maybe they are just trying to be annoying. In any case, mashed potatoes ARE a staple and should be a staple in any house. They aren’t a staple in mine, but when we have them, Evie, Chuck, and I are in heaven!!!!
So, here’s the deal, I have to confess that over the past 4 years since moving to the Houston area, after 17 years in Fort Worth, every single batch of mashed potatoes I have made have been lumpy. Now, I only make them on special occasions so that’s almost worse because when the in-laws are sitting down to Christmas dinner, the last thing I want to do is apologize for my lumpy potatoes.
I’m assuming it has something to do with uneven heat or my failure to cut the potatoes into equal portions for even cooking times, but with this in mind, my last two batches have been stellar. I would also add, that a potato ricer (something I never owned, but my mom did) is actually the best way to make sure you don’t have lumps in your potatoes. I intend to purchase a potato ricer in the near future.
For our potatoes, we went with the classic method of peeling potatoes, boiling them, and mashing them with butter, cream, and salt. Easy peasy, right? Well, sort of. It’s truly amazing how any recipe can go off kilter with just a few missteps.
Ingredients: Yukon Gold Potatoes, butter, whipping cream, salt and pepper.
MASHED POTATOES RECIPE
INGREDIENTS:
2 pounds **Yukon Gold Potatoes, pealed and cubed
1/4 cup butter (half a stick, unsalted or salted is fine – just take into account when seasoning potatoes)
1/2 to 1 cup Whipping Cream (depending on your preference; substitute milk or half and half, if desired)
Salt and pepper to taste
INSTRUCTIONS:
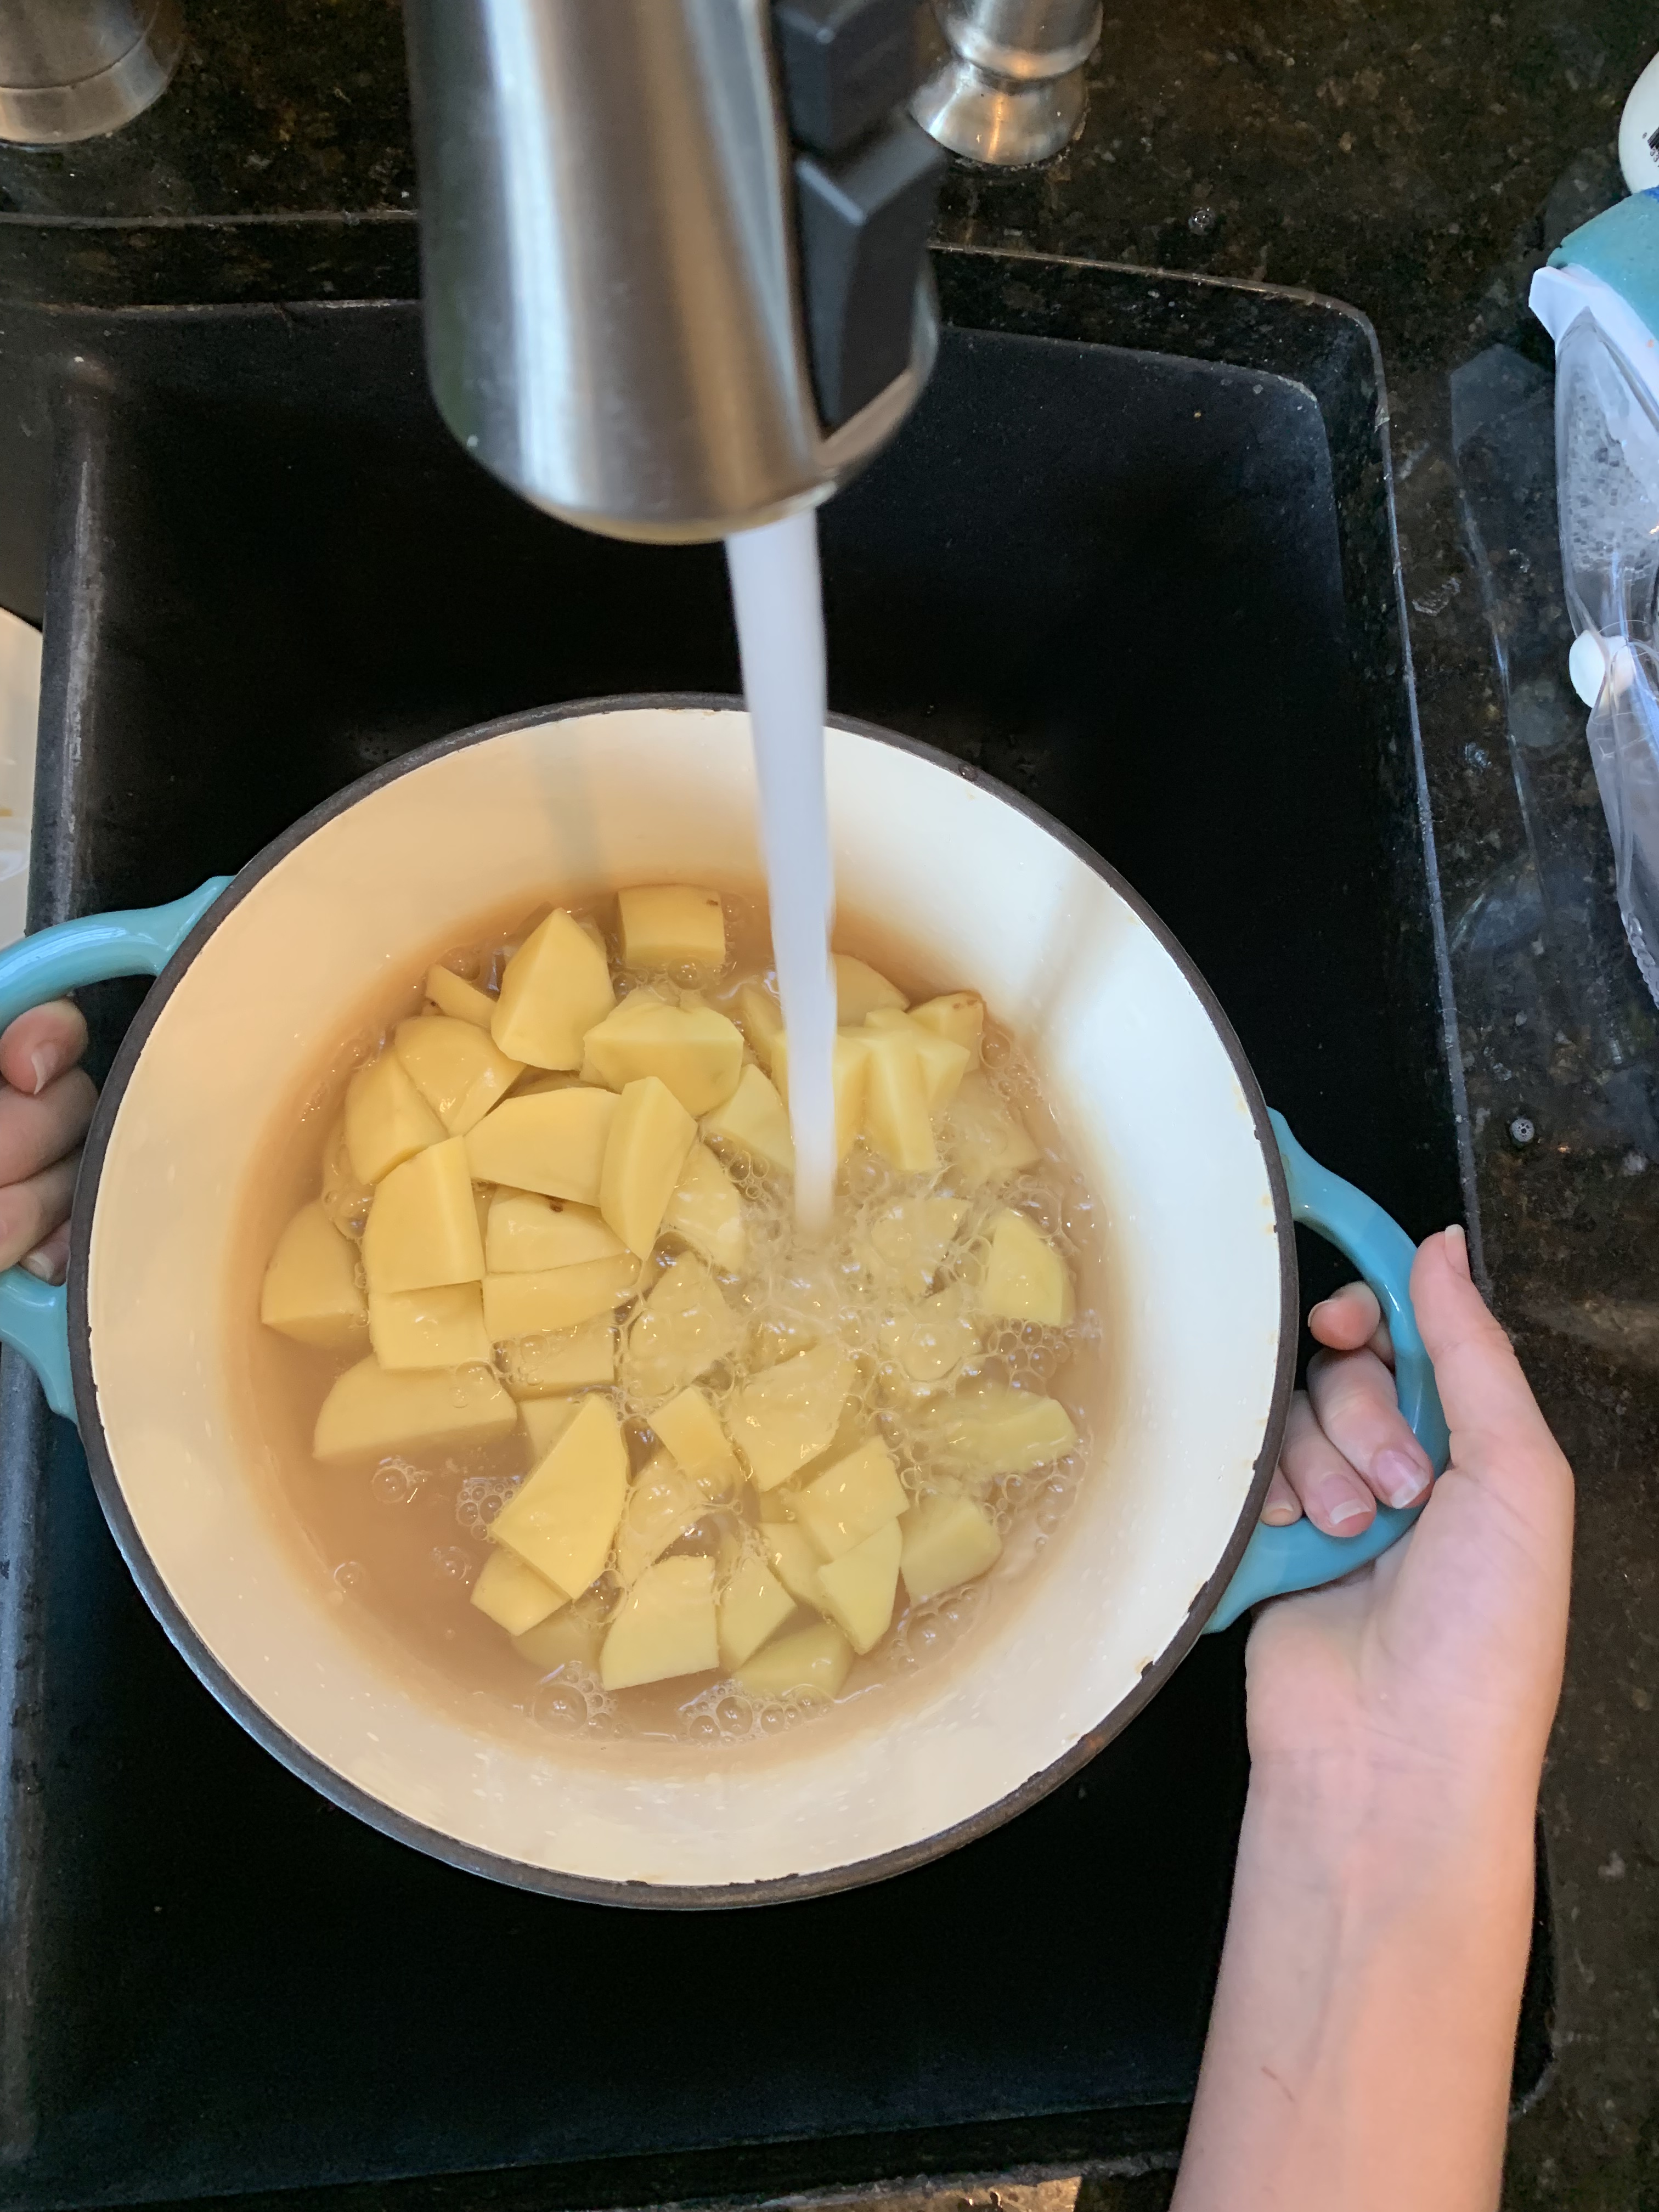
Peel potatoes. Rinse any remaining dirt off the peeled potatoes. Cut potatoes into 1-inch cubes and place in large pot.
Fill pot with cold water until all potatoes are covered and water is approximately 1-inch above the top layer of potatoes.
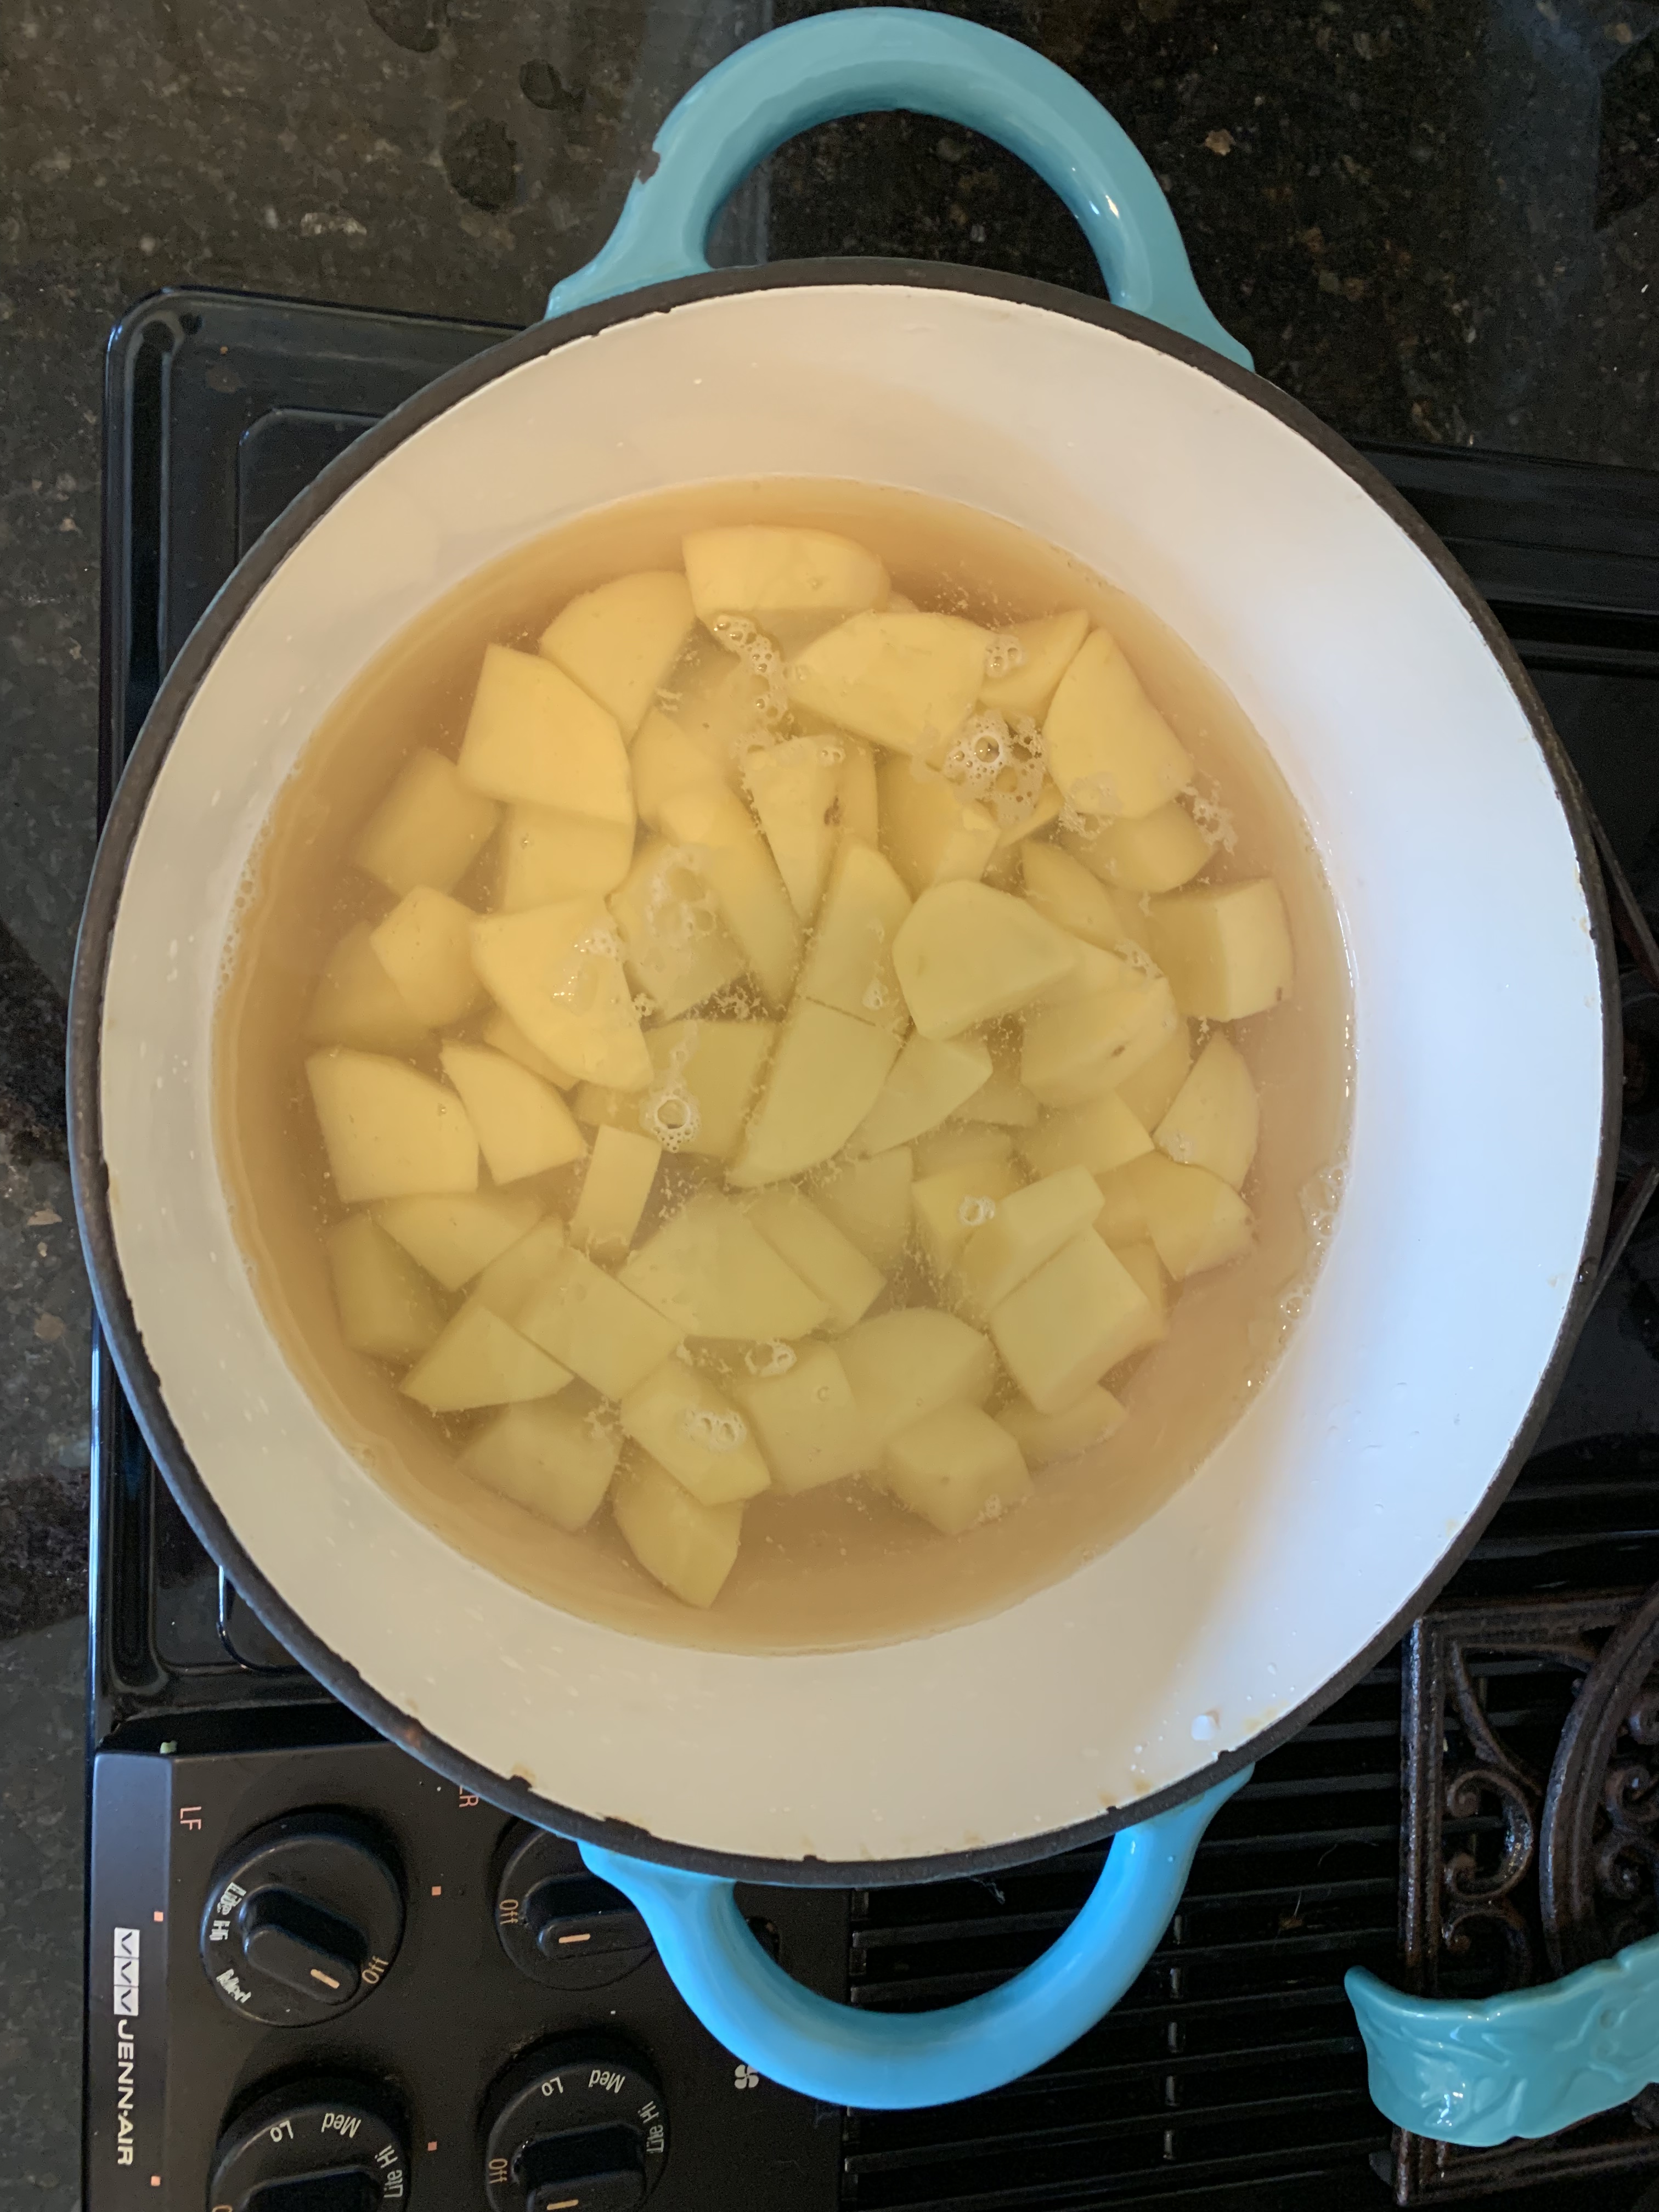
Bring water to a boil. Reduce heat to prevent overflow of water, and continue to boil potatoes for approximately 15 minutes or until potatoes are fork-tender. Use a fork to test whether the potatoes are cooked all the way through by poking the largest cube of potato you can find in the pot. If the fork slides in easily, you will know the potatoes are cooked through and ready to be drained.
Drain potatoes in a colander. Allow potatoes to steam in the colander, untouched for approximately 2-3 minutes. This will “dry” out the potatoes.
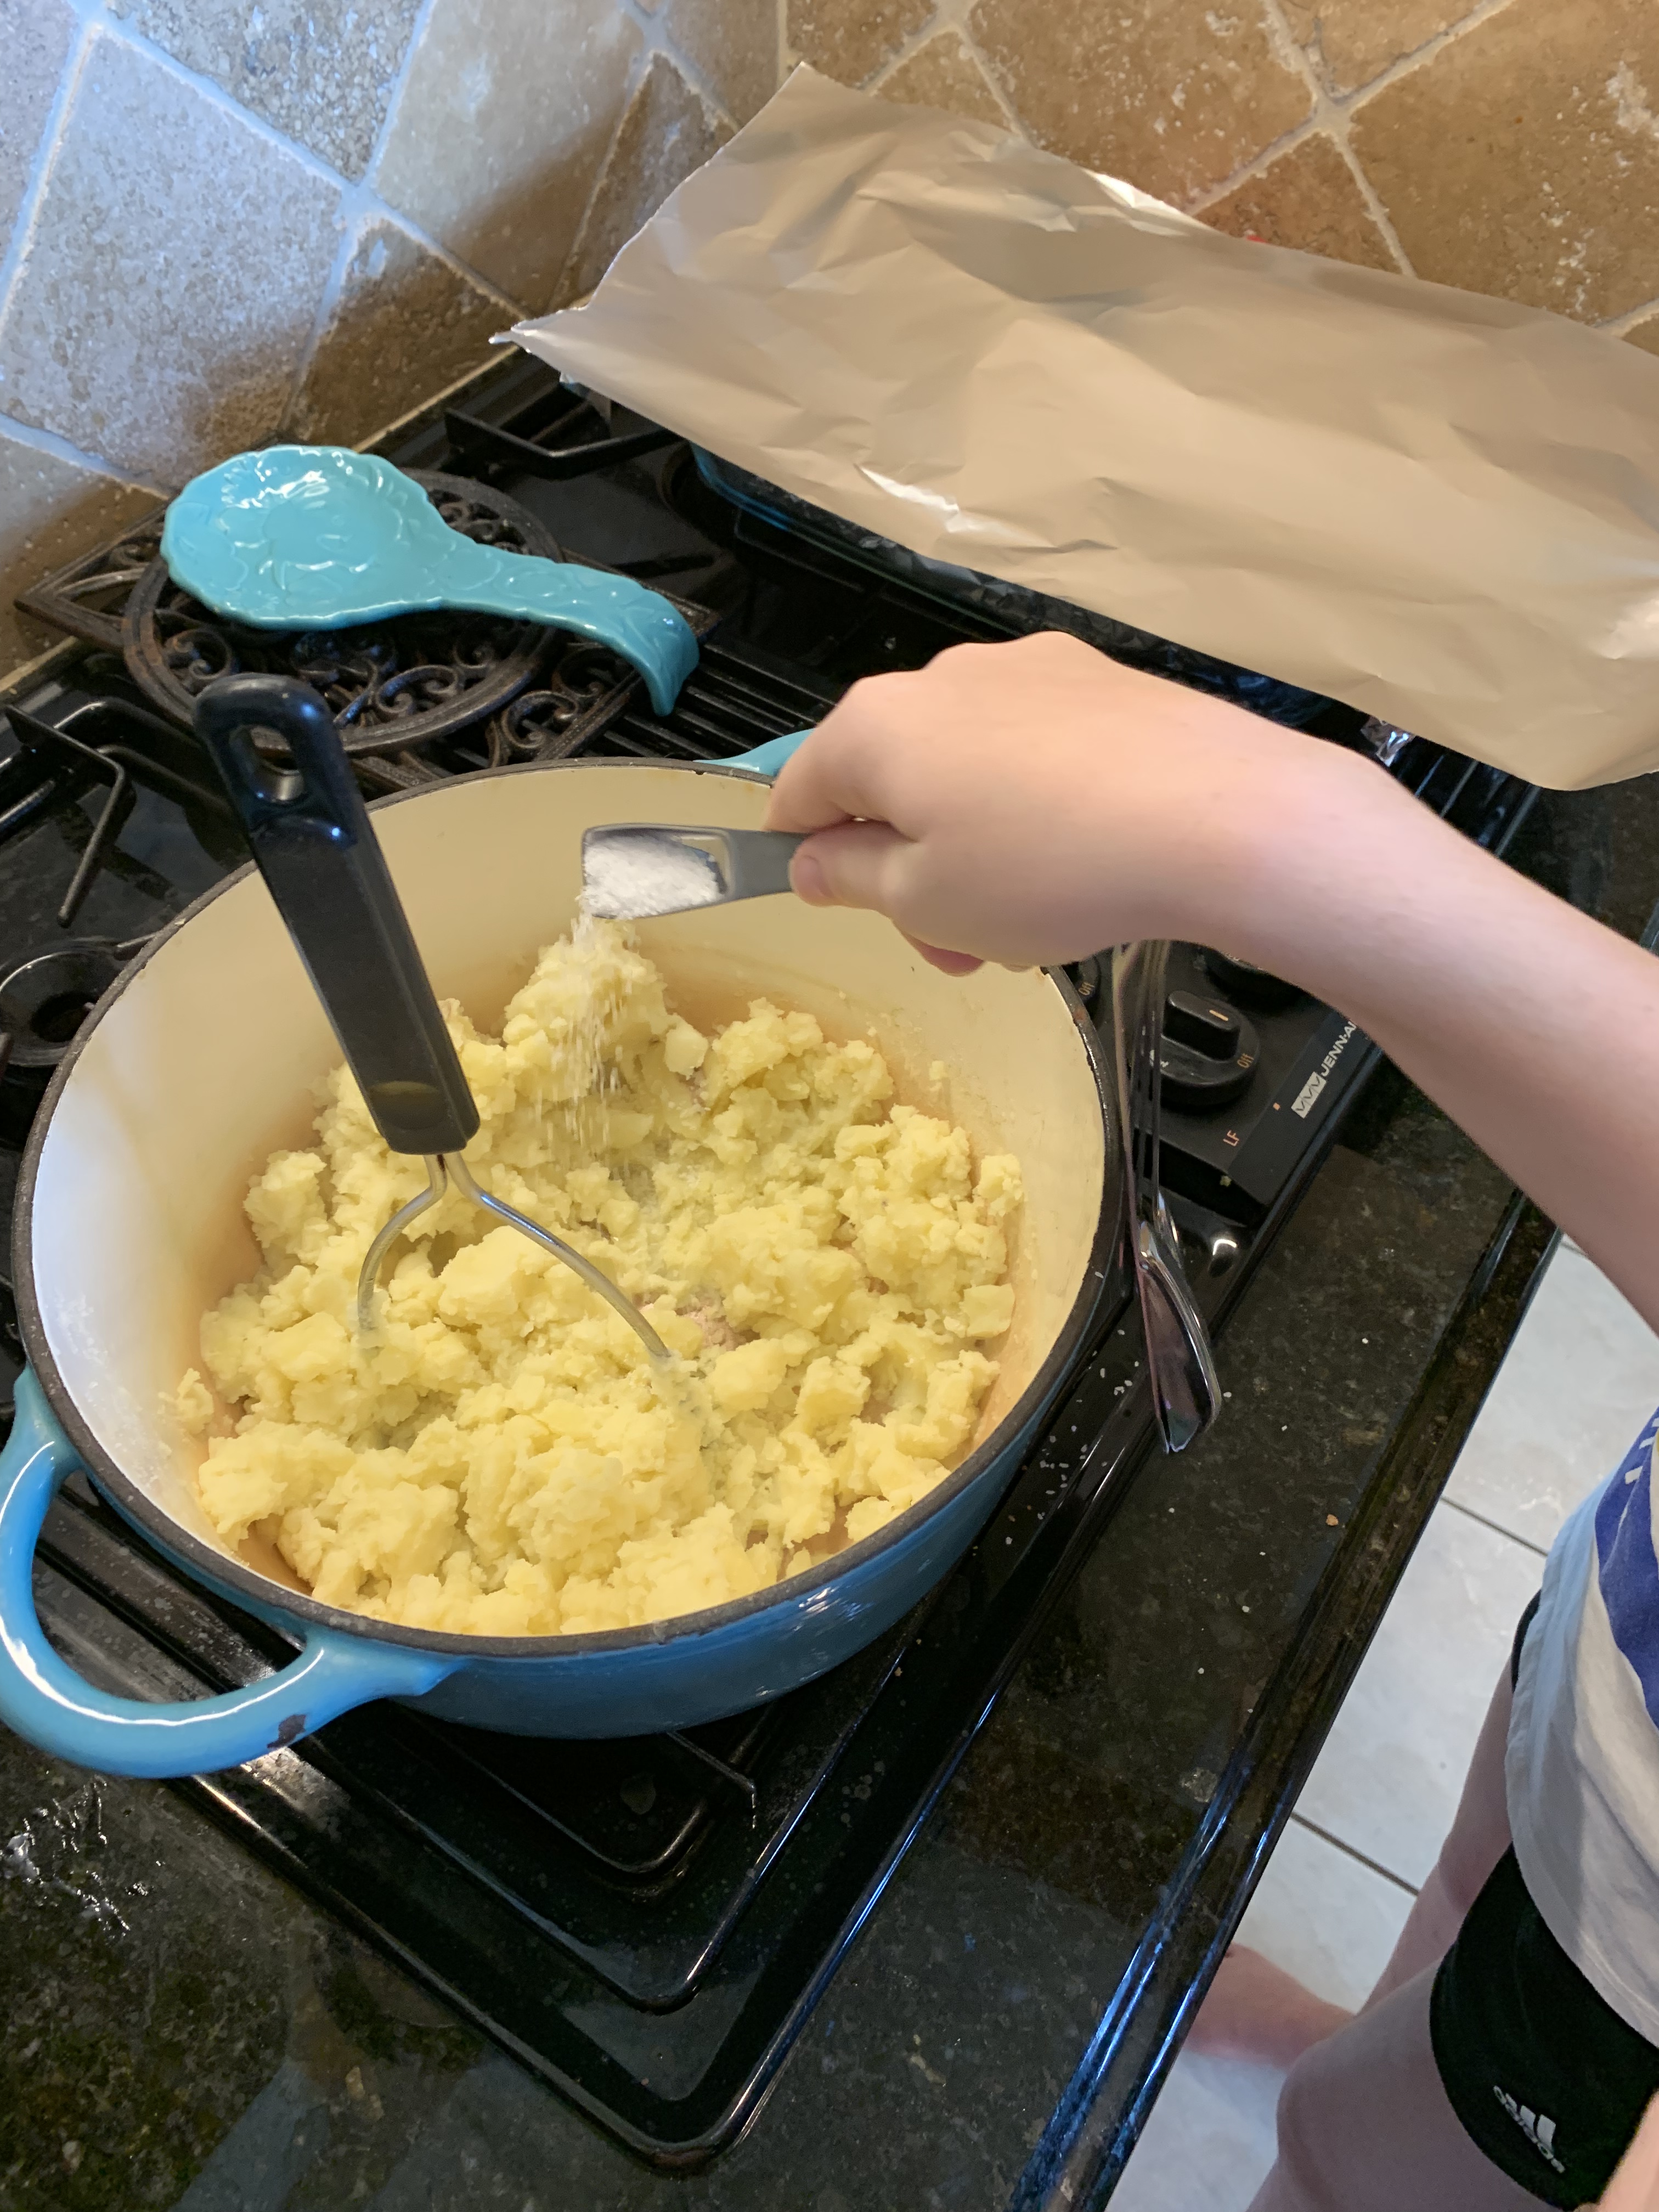
While potatoes steam in the colander, place the original pot back on the stove on low heat and add heavy cream and butter. Allow butter to melt while the cream warms in the pot. Once warm, add the “dry” potatoes to the butter and cream mixture and mash in the pot until creamy. Add additional cream and butter until potatoes reach your desired consistency.
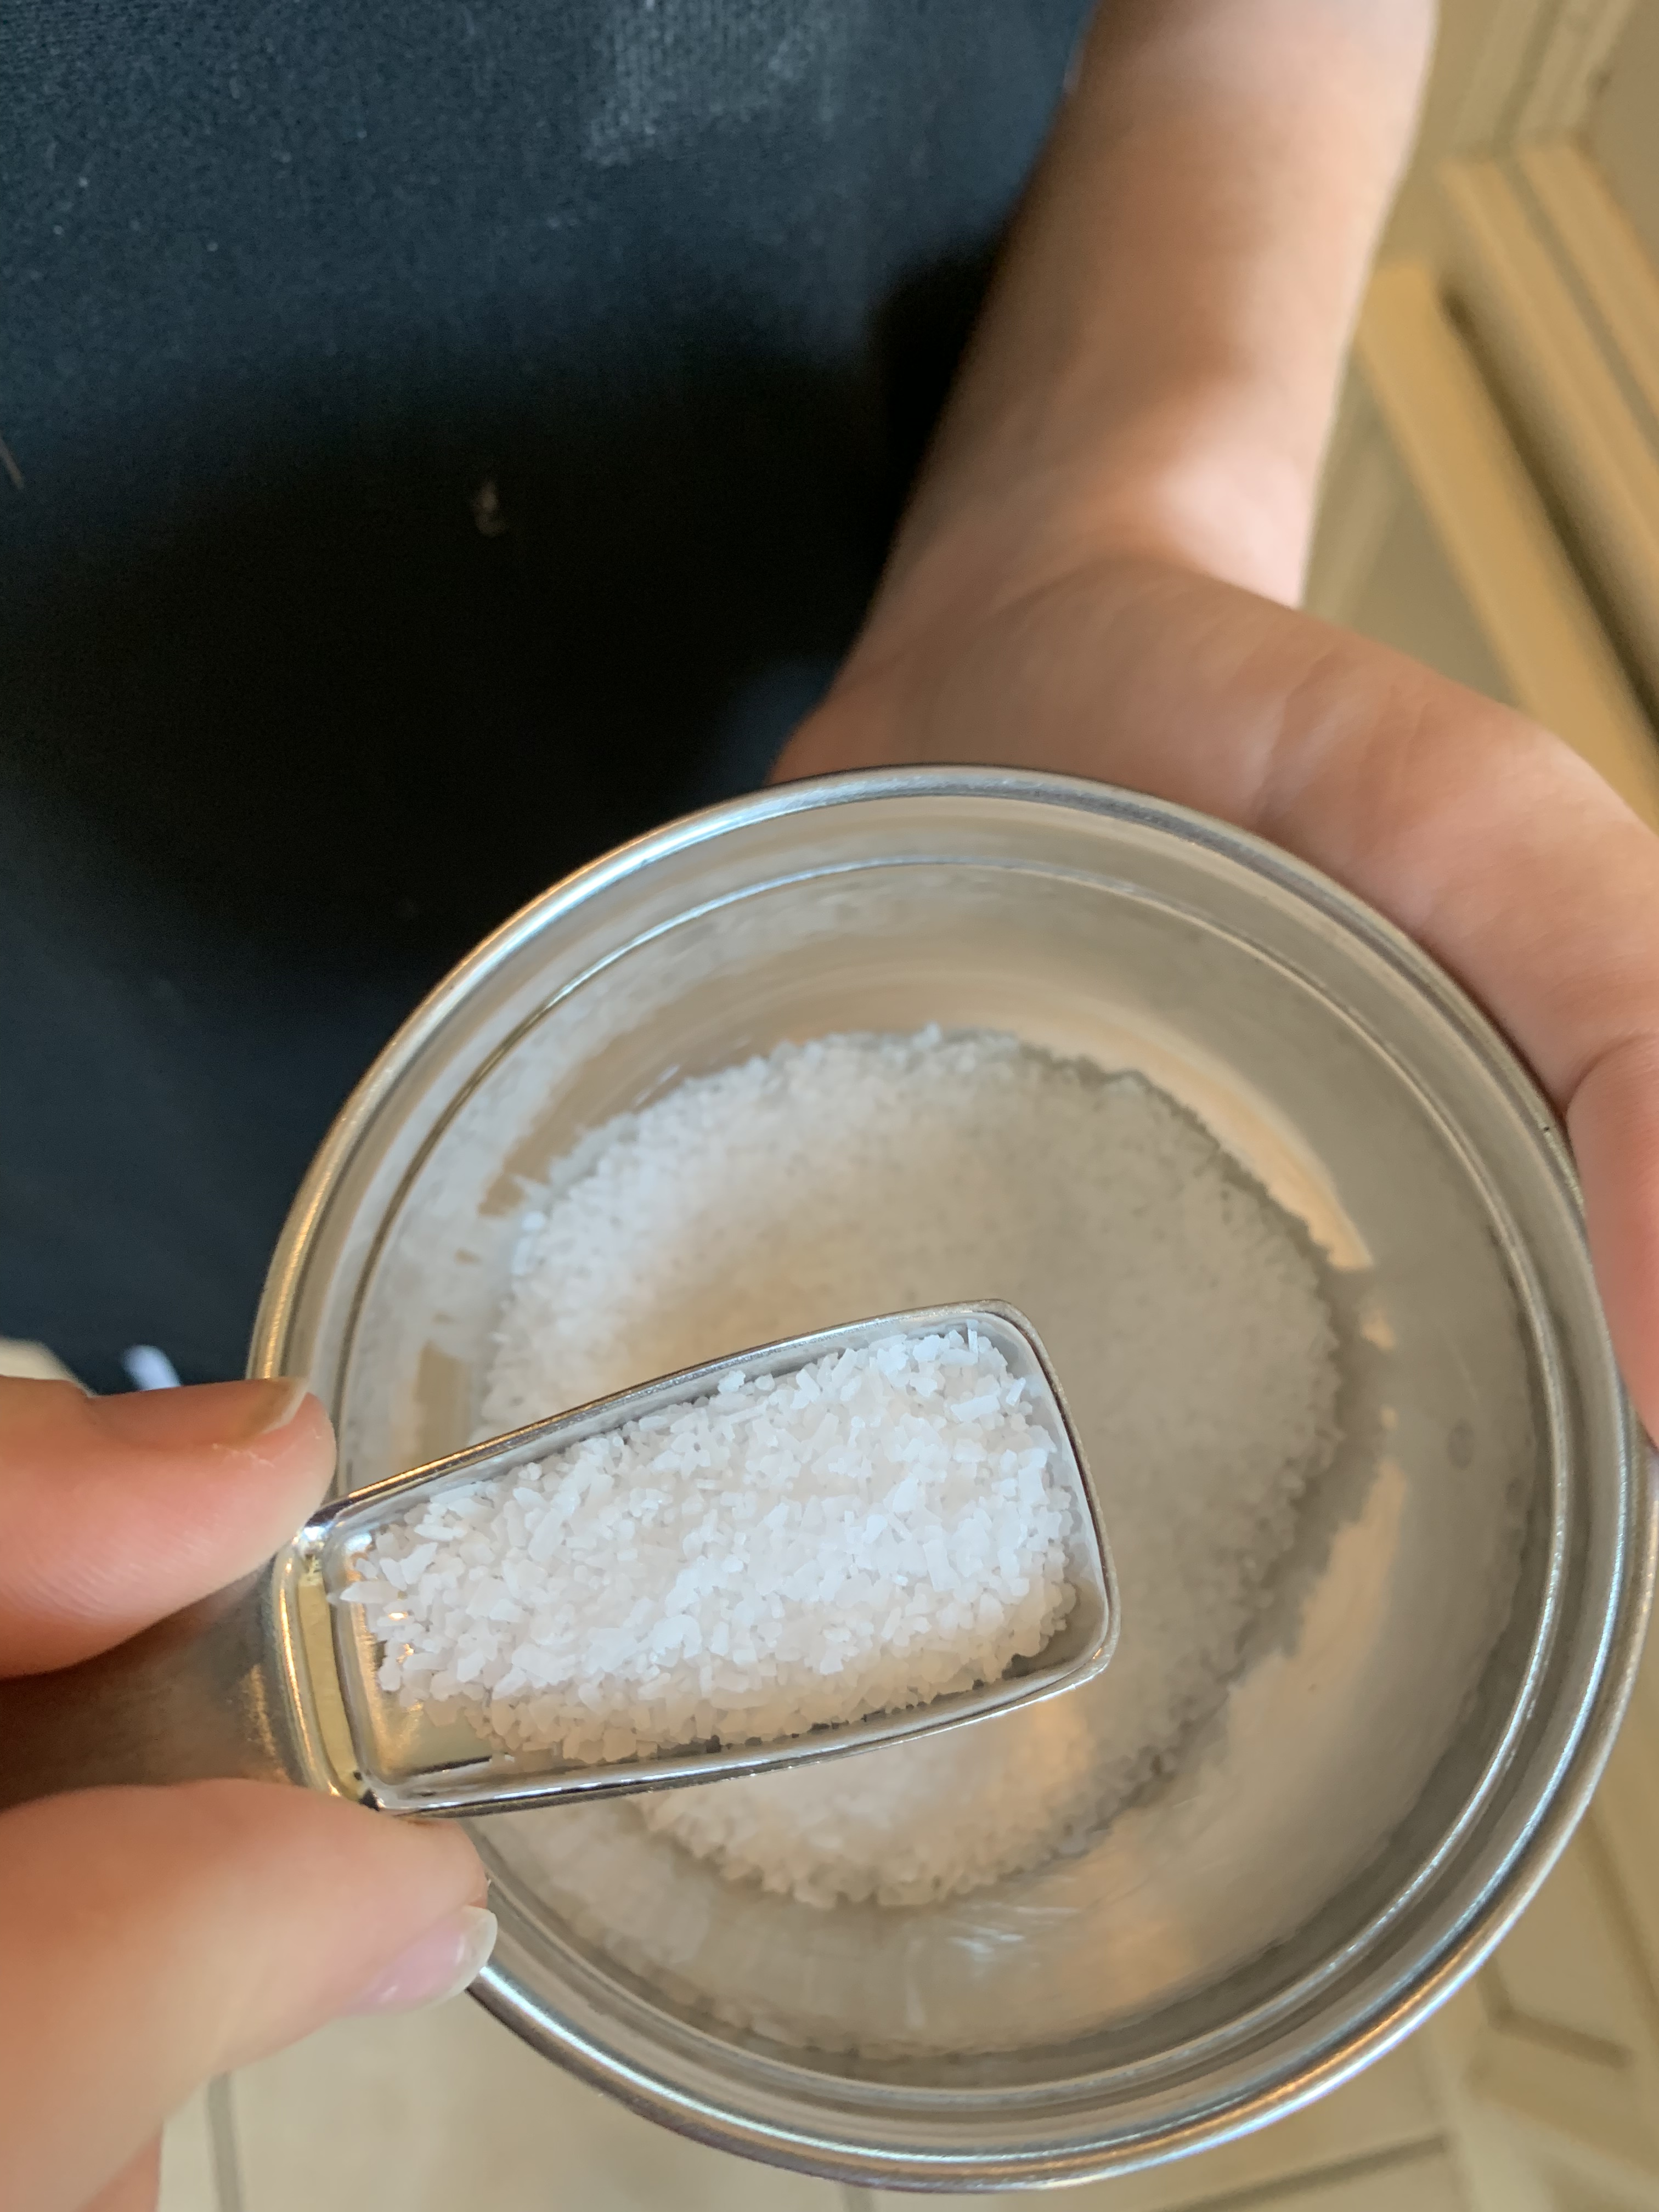
Add salt and pepper (and any additional spices) to taste. *Note: I enjoy adding roasted garlic or garlic powder to my potatoes – but I’ll save that recipe for “Advanced Recipes for Growing Up”.
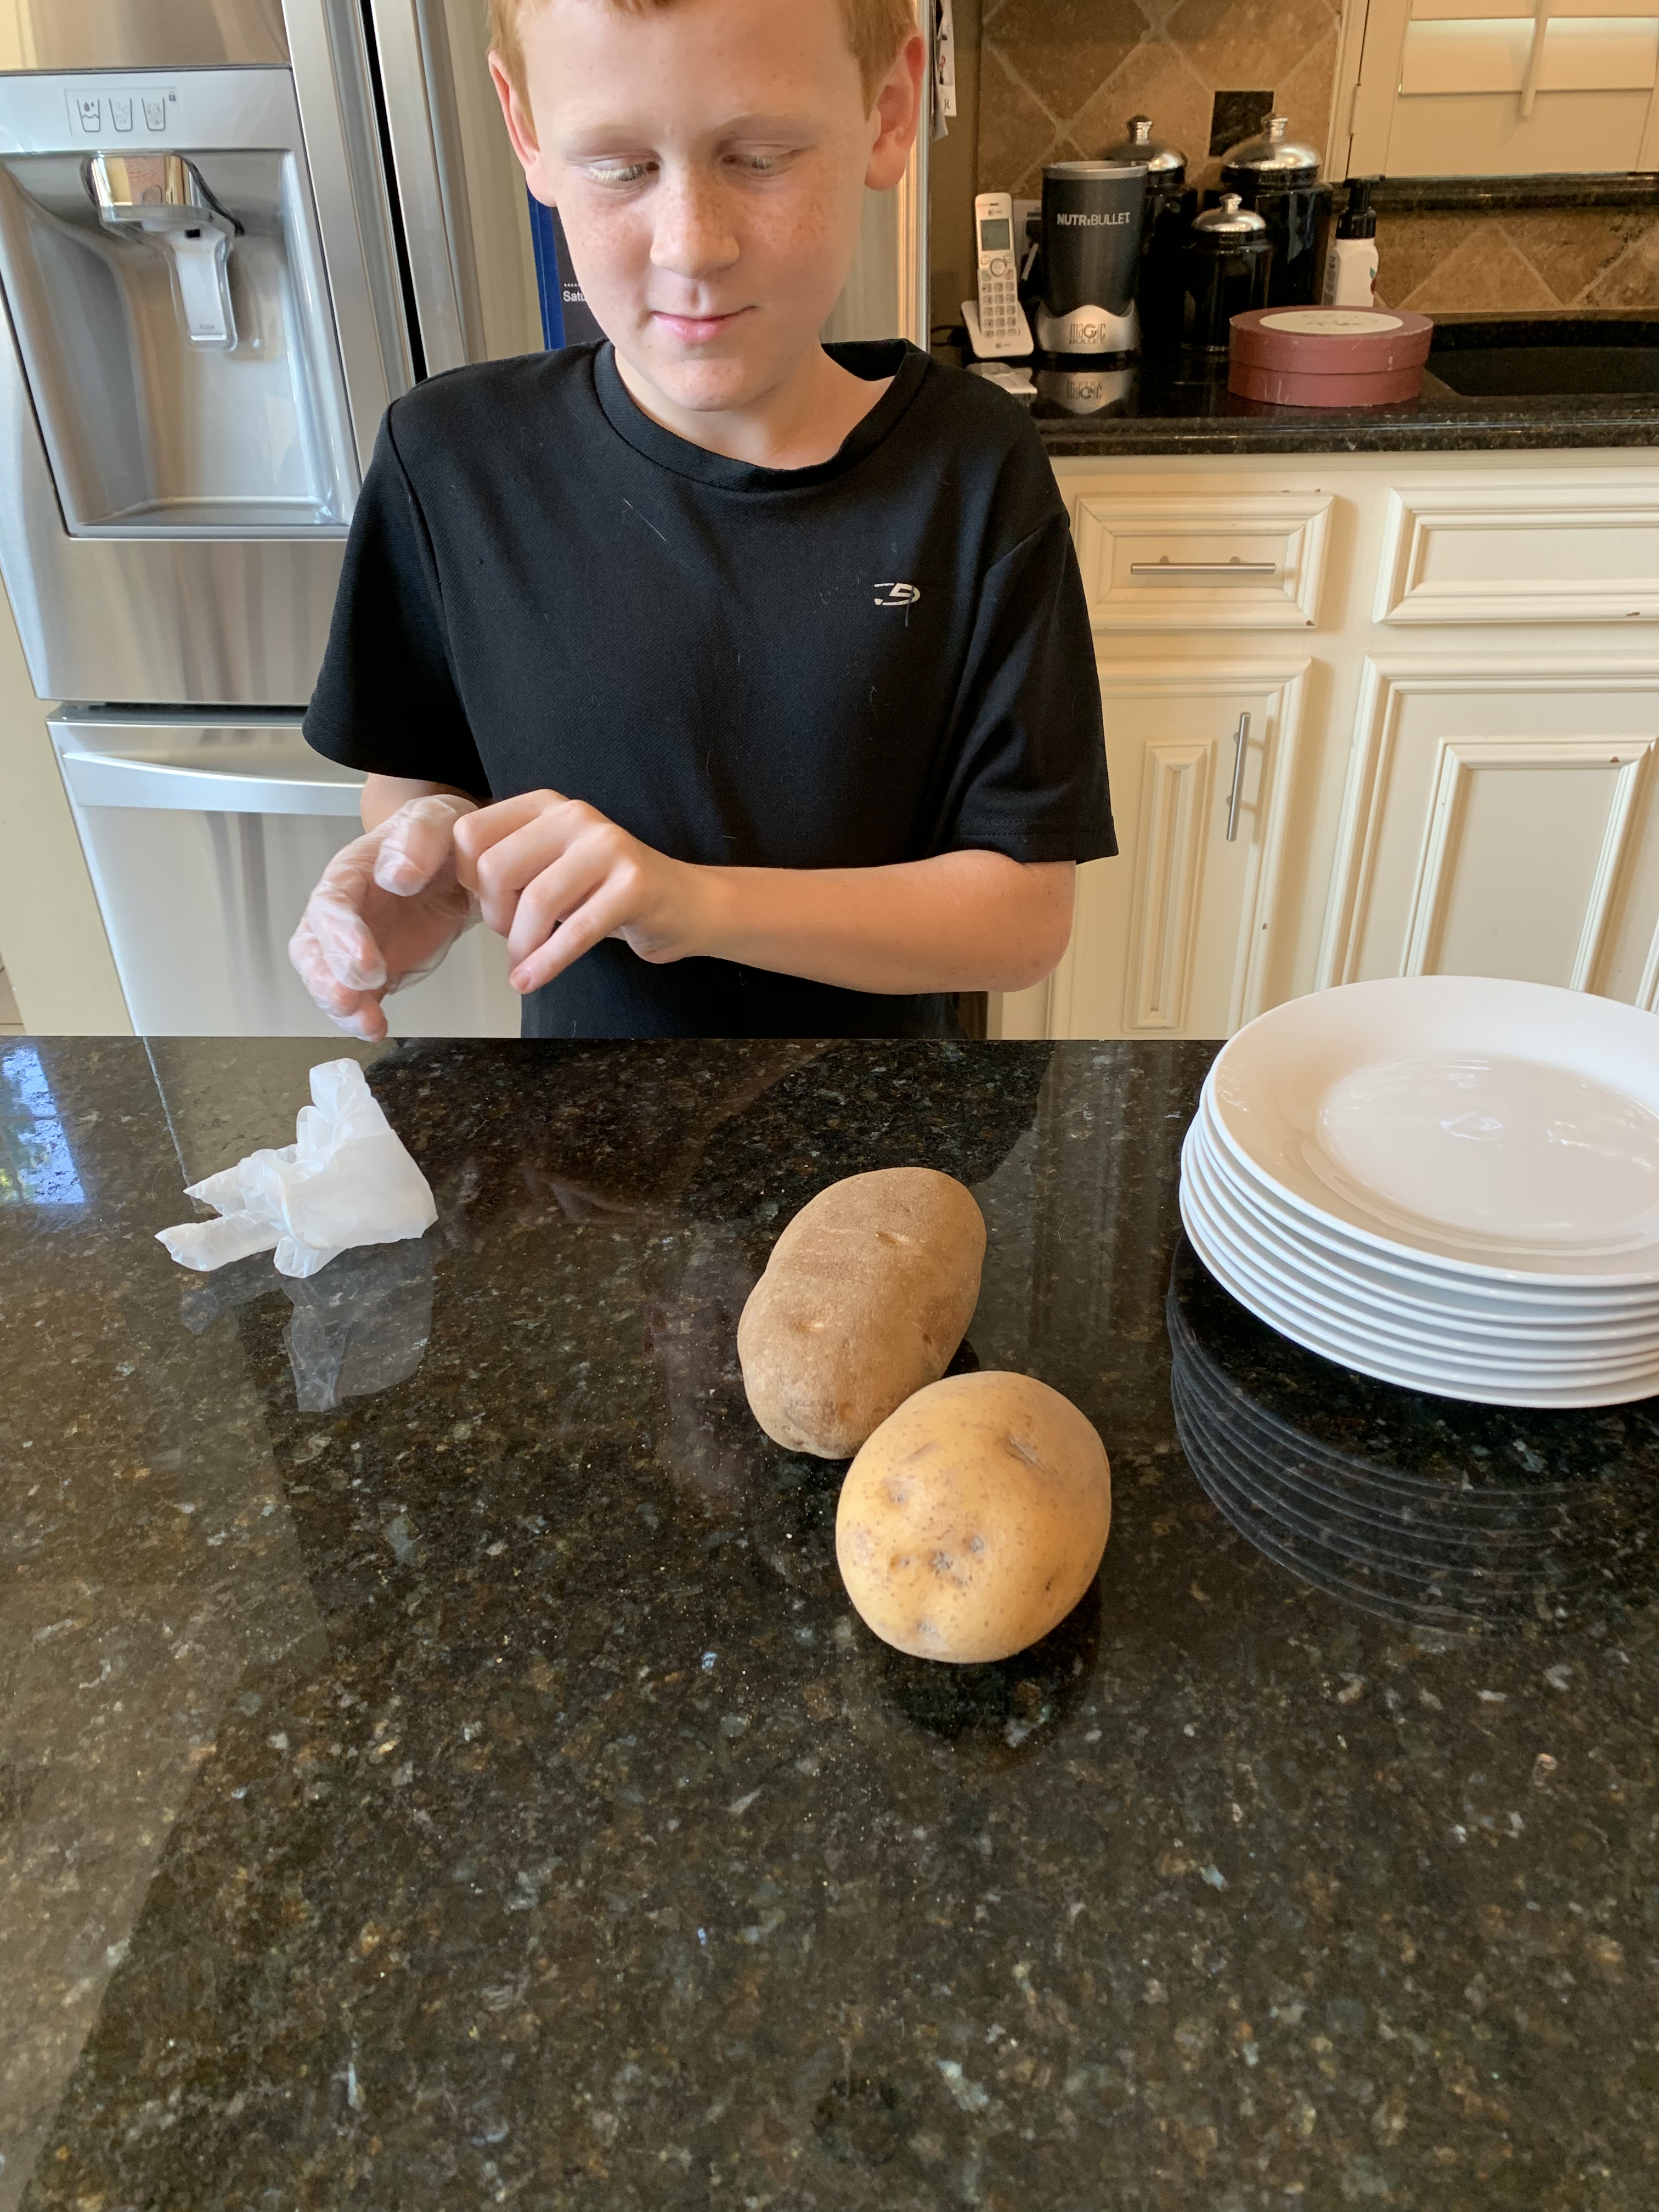
**Note: Yukon Gold potatoes are the best potatoes for mashed potatoes. They have just the right amount of starch which leads to the fluffiest (least gummy) mashed potatoes. I showed the kids how there is a difference between the potatoes on the inside and the outside and it does make a difference. Below you can see George examining a gold potato on the right with a russet potato on the left. Will a different type of potato be sufficient in a pinch? Hell yes. Potatoes are delicious and satisfactory when prepared in any fashion with enough fat. (Read: butter, oil, and/or cream).
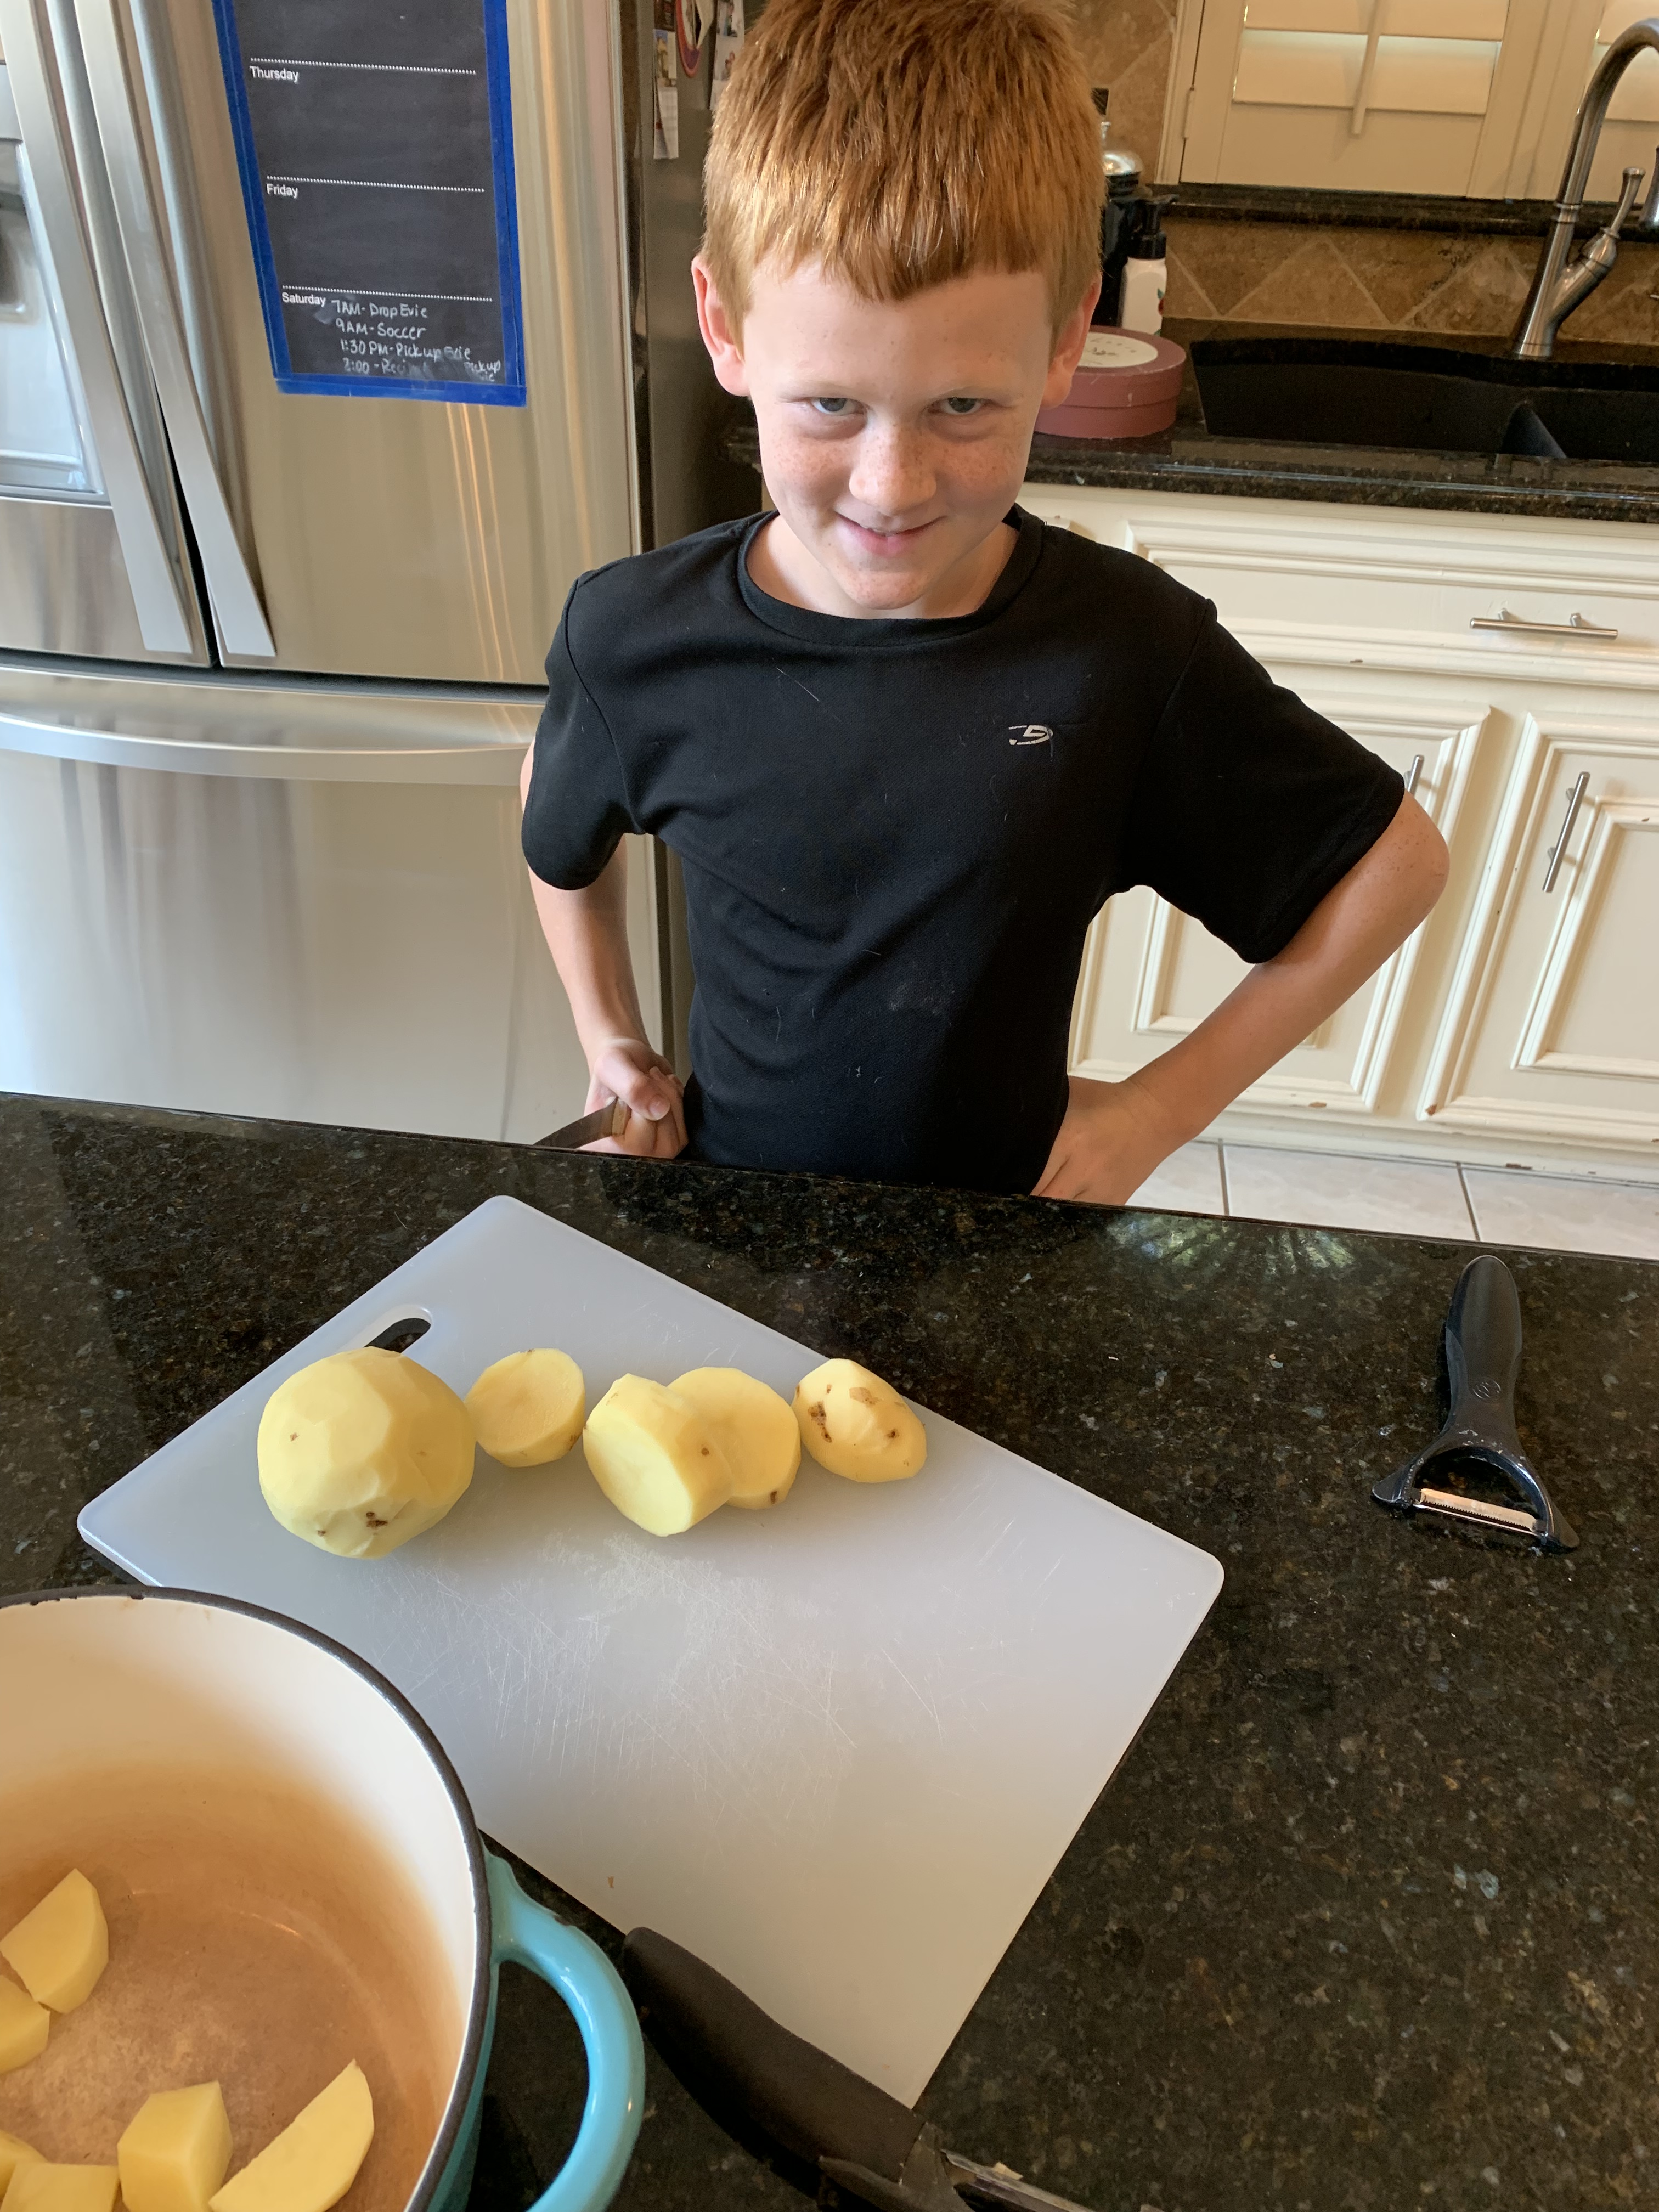
Begin by peeling your potatoes. This took much longer than expected in our house, but the job was done sufficiently, if not efficiently.
Peel potatoes.
Next, dice potato into cubes that are approximately the same size. This is a tricky lesson because, it takes a bit to process the fact that similarly sized cubes will cook at the same rate so that they are all finished cooking at the same time to the same level of done-ness. I recommend cubes that are approximately 1-inch cubed.
Evie dicing potatoesGeorge wielding a knife with very little precision.
Next step is to add the cubed potatoes to a large pot and cover with cold water (approximately 1 inch above the top layer of potatoes).
Evie held the heavy dutch oven as we added cold water. Miss Muscles!
Place the pot of potatoes and cold water on the stove and bring to a boil over high heat.
G turning the gas on high.Salt the water if desired. I tend to add salt with the cream and butter.
Once the water boils you can lower it as long as the water is still boiling and the potatoes are cooking. Boil for approximately 15 minutes or until the potatoes are fork-tender – meaning when you poke them with a fork, the fork will go into the potato easily because the potato has cooked until it is tender. If you don’t cook it long enough, then you will end up with little lumps of uncooked potato in your mashed potatoes. For that reason, always test with the larger chunks of potatoes so you know that the biggest cubes of potato are cooked all the way through.
George checking for tenderness..
Drain the potatoes in a colander. Allow the potatoes to steam in the colander. This allows the potatoes to “dry” out a little bit. If you steam them, they lose some of their moisture so that they will soak up more butter and cream. This makes them creamier instead of watery.
Those are my hands handling the heavy pot full of hot water and potatoes.
While the potatoes are steaming, add the cream (or half and half or milk) to the pot along with your butter. Allow the butter to melt while the cream warms in the pot. Once warm, you can pour the “dry” potatoes back into the pot and start mashing it all together.
Evie measured out the whipping cream.George added butter and stirred it until melted.George added potatoes to the heated butter and cream.Evie mashed.
If your potatoes aren’t creamy enough, add additional cream and butter until you are at the right consistency. Finally, add salt (and pepper, if desired). We used a potato masher, but you can also use a potato ricer (as I mentioned above), or even use a hand mixer to blend the potatoes up nice and smooth.
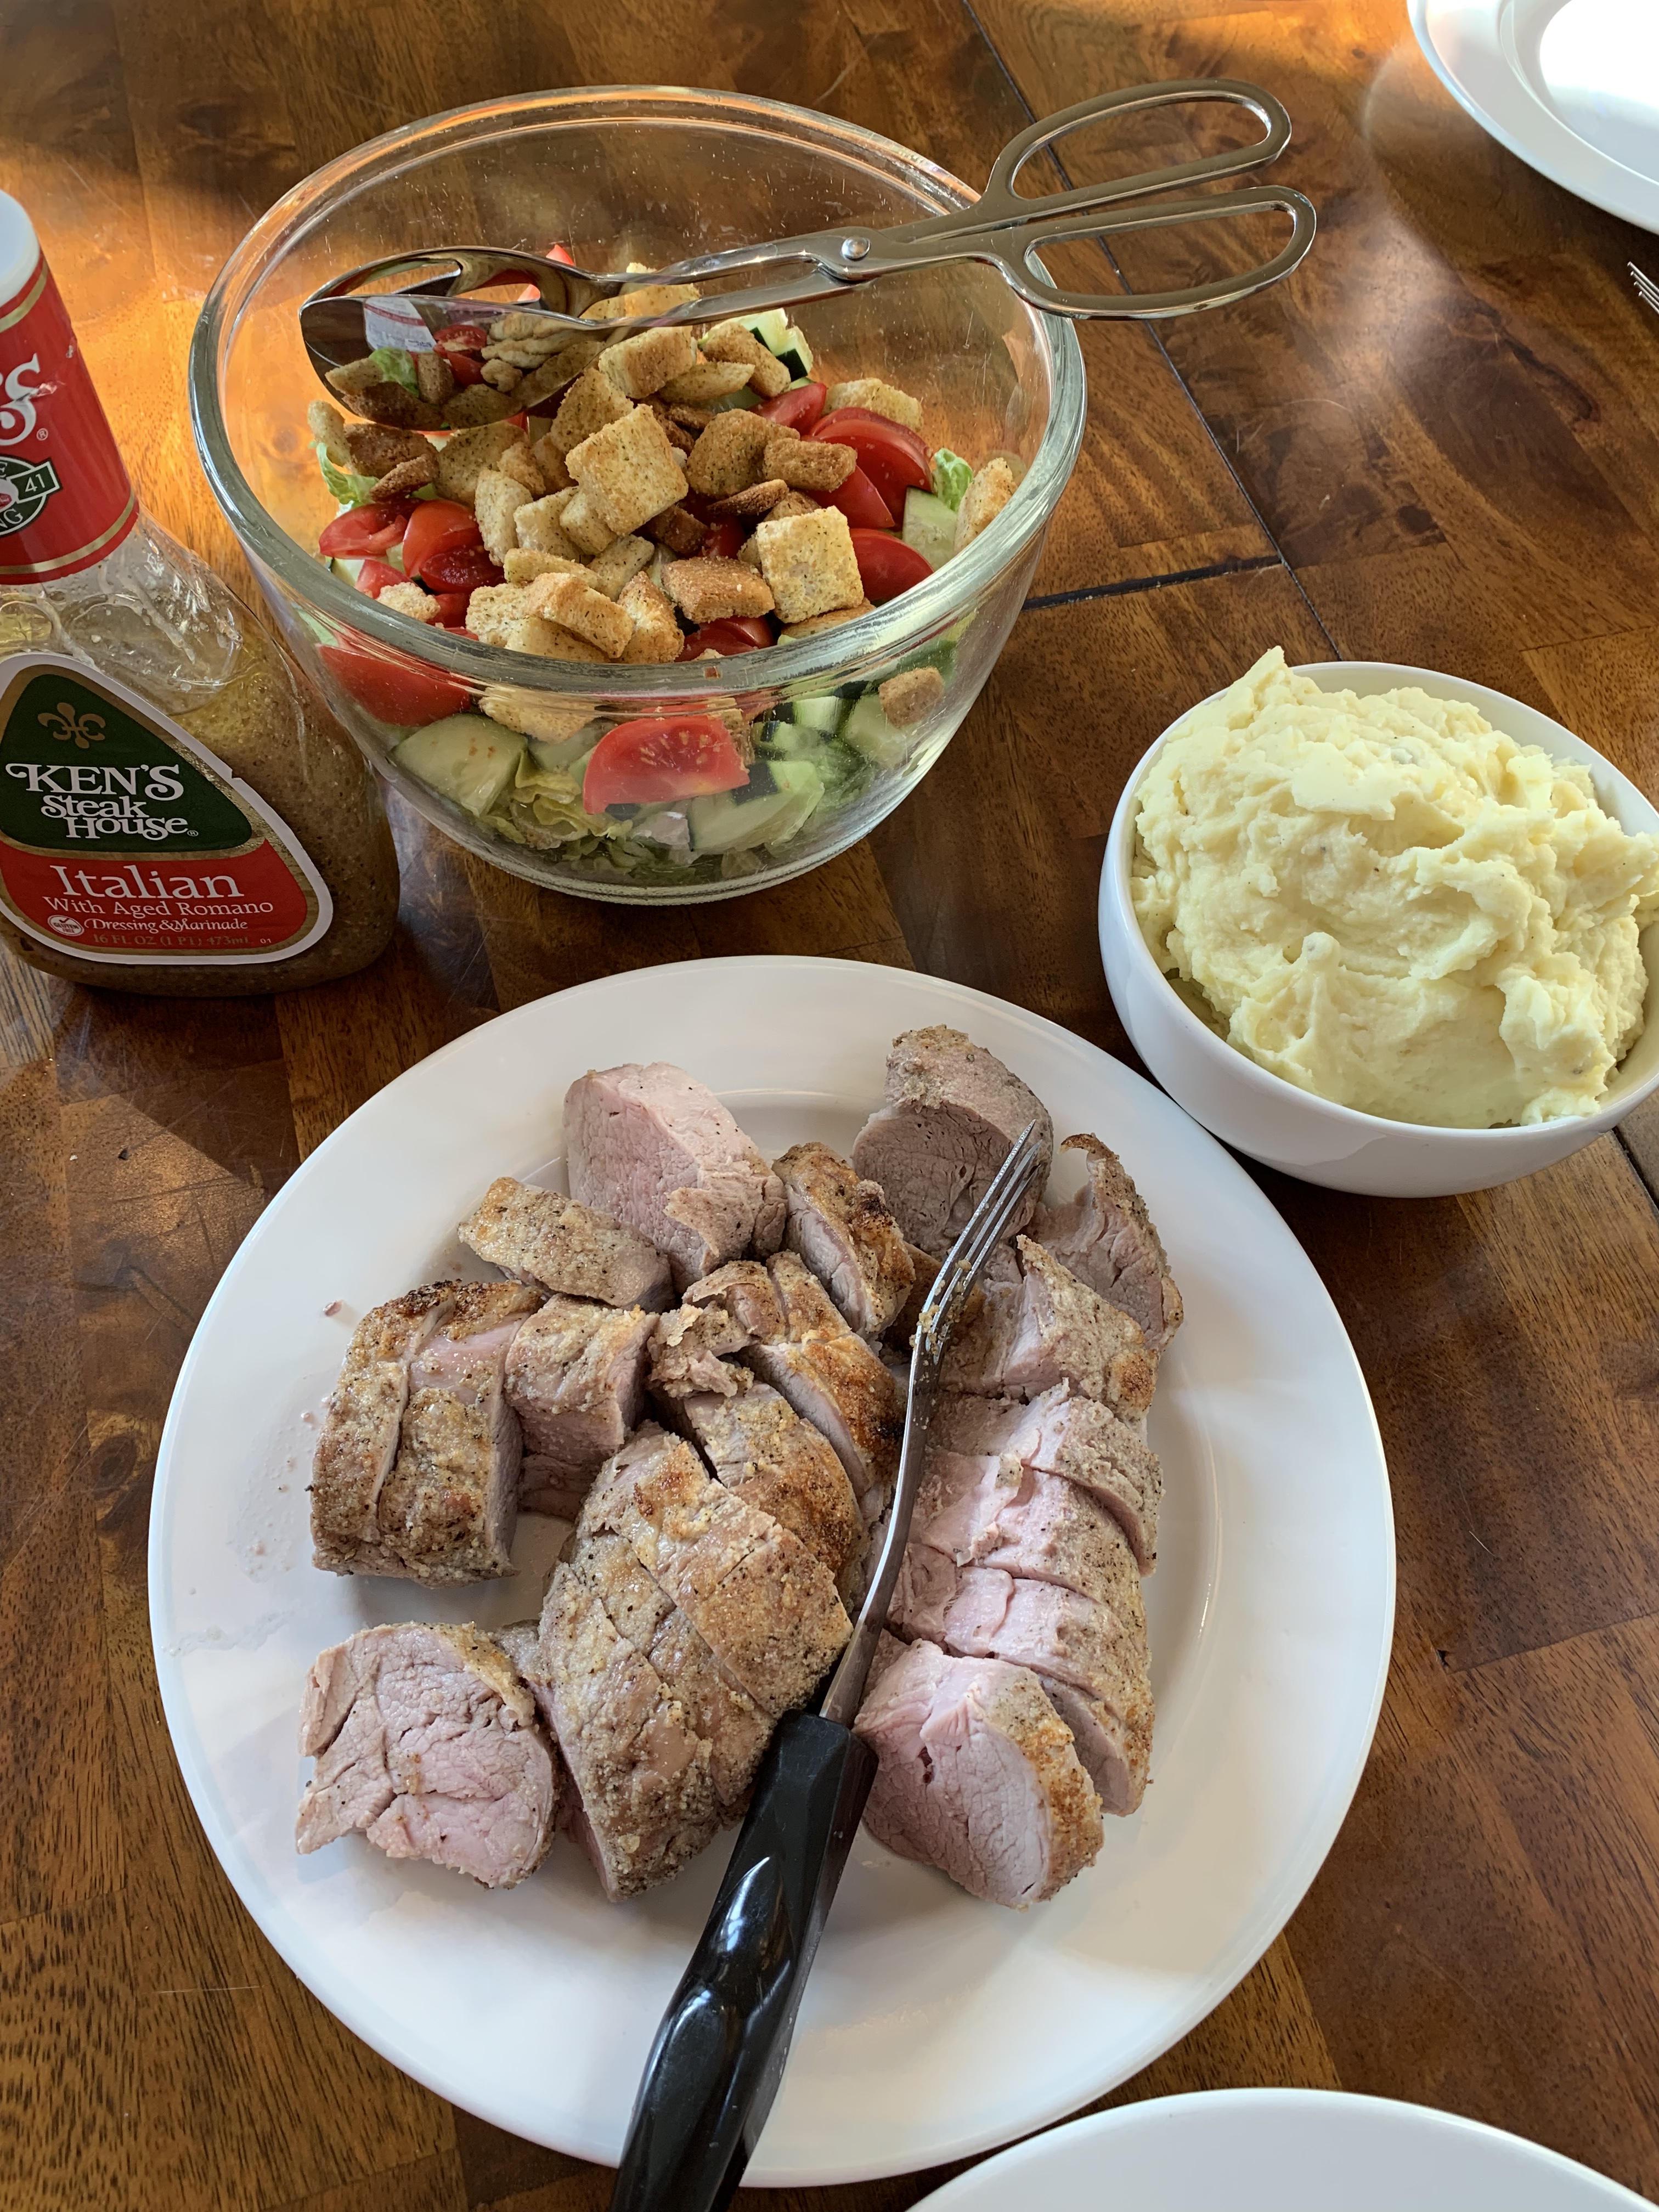
Evie added salt and pepper.Served our mashed potatoes along side the perfect pork tenderloin and a salad.
I’m pleased to announce that there were no lumps in these potatoes and they were devoured by everyone except the picky boys!
We’ve been cooking, but also traveling as we soak up our last little bits of summer. I have several recipes to post and catch up on but, we’ve had some pretty yummy meals around here. Here are some teaser pictures …
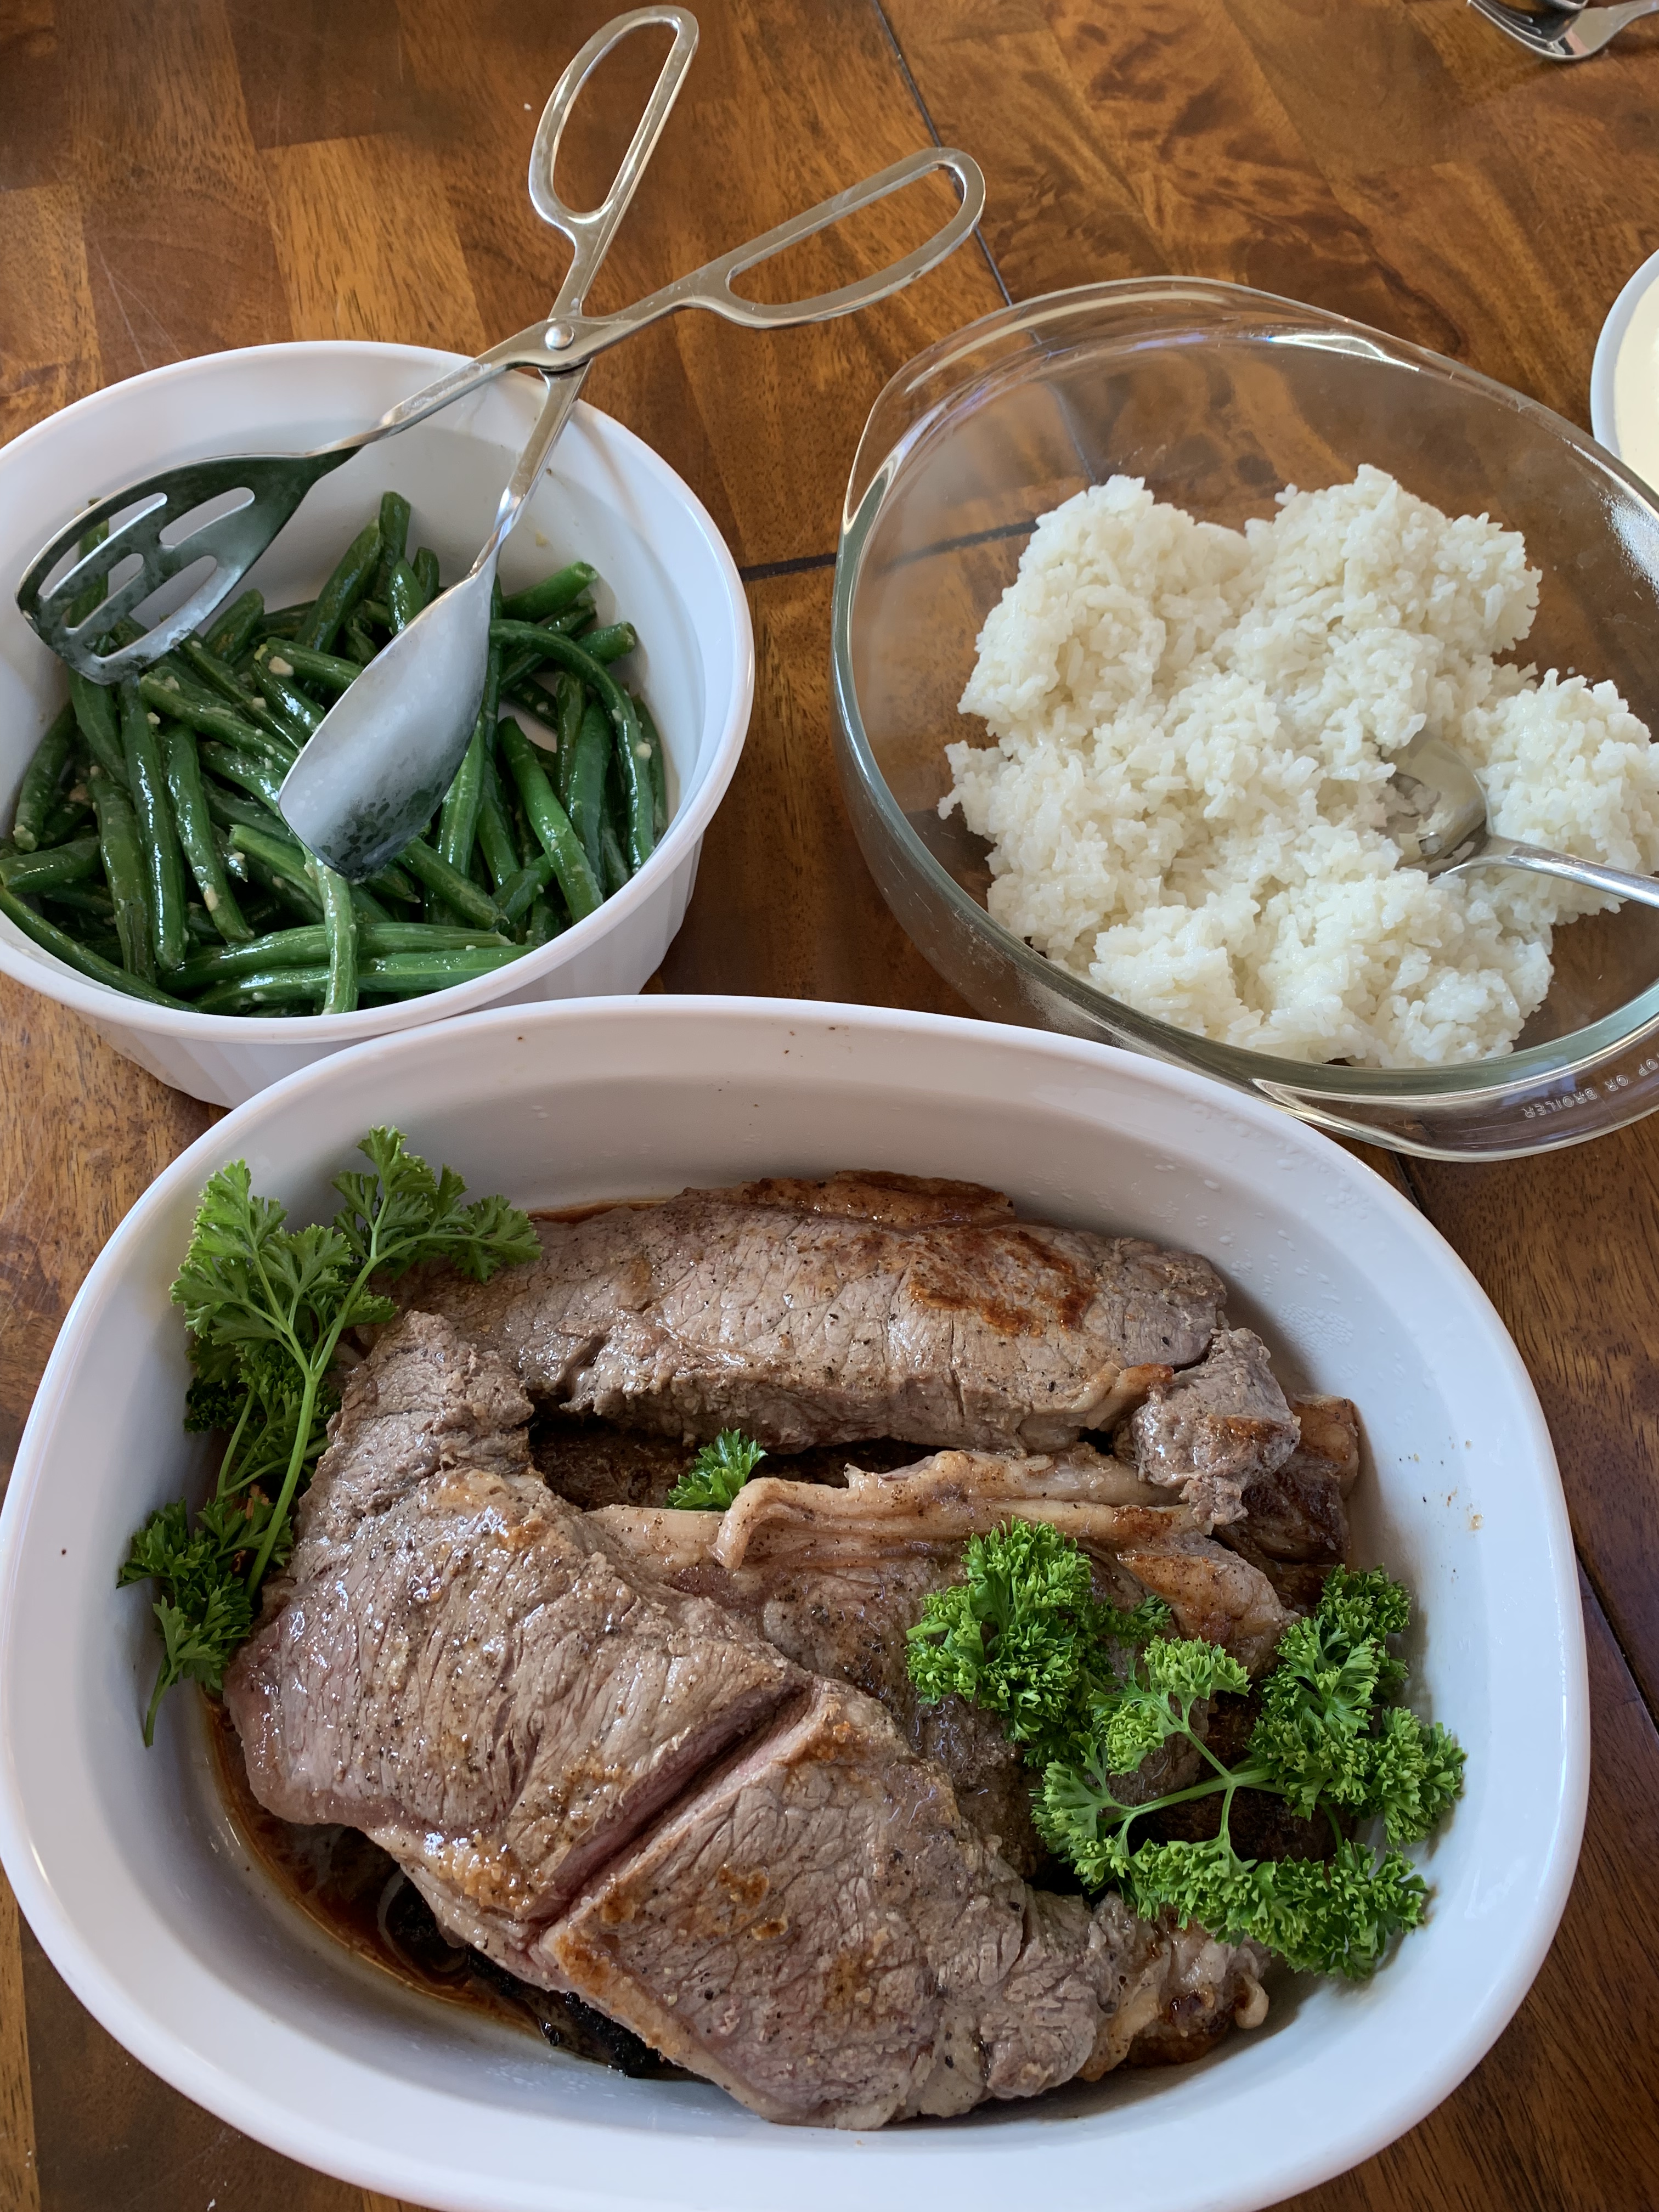
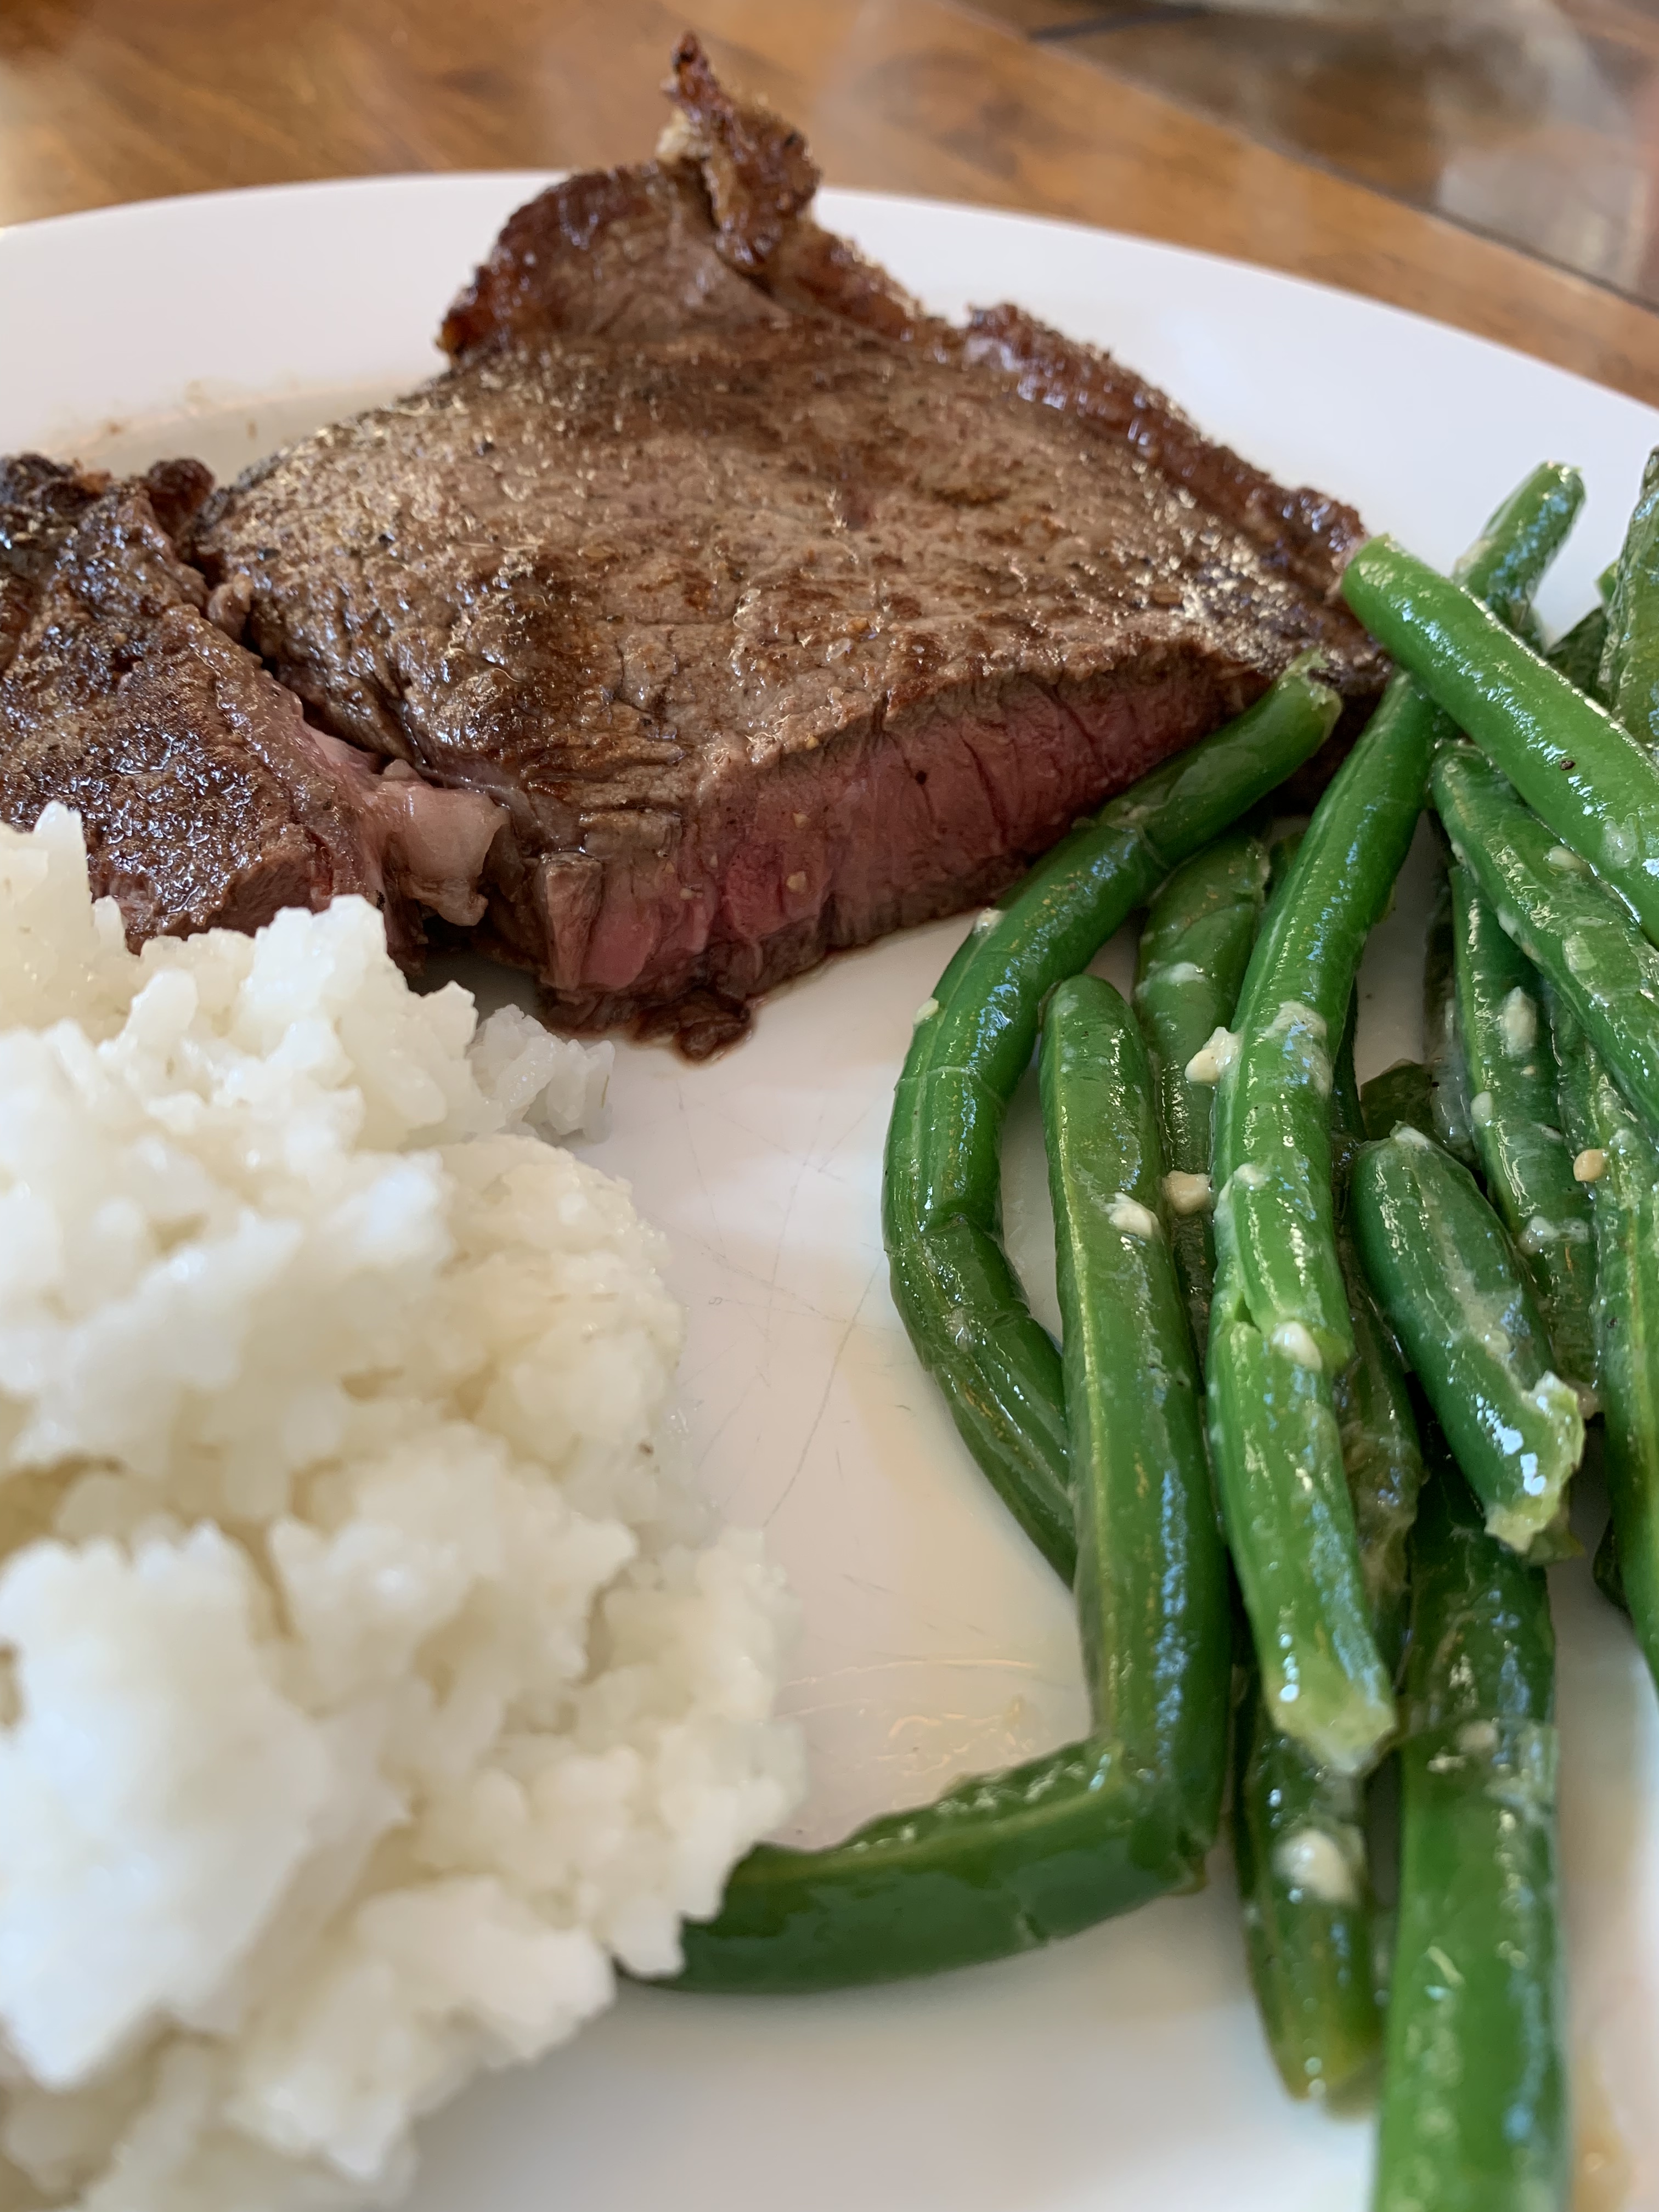
George picked out our first recipe lesson and asked to learn how to cook steak. He added green beans (not his favorite) and rice (definitely his favorite) to the dinner menu. We invited Grandma over to join us for dinner and a game of cards before and after, and a good time was had by all . . . although this summer ADD (without their medicine) is starting to wear on me. Whew.
The finished product! Steaks, white rice, garlic green beans.
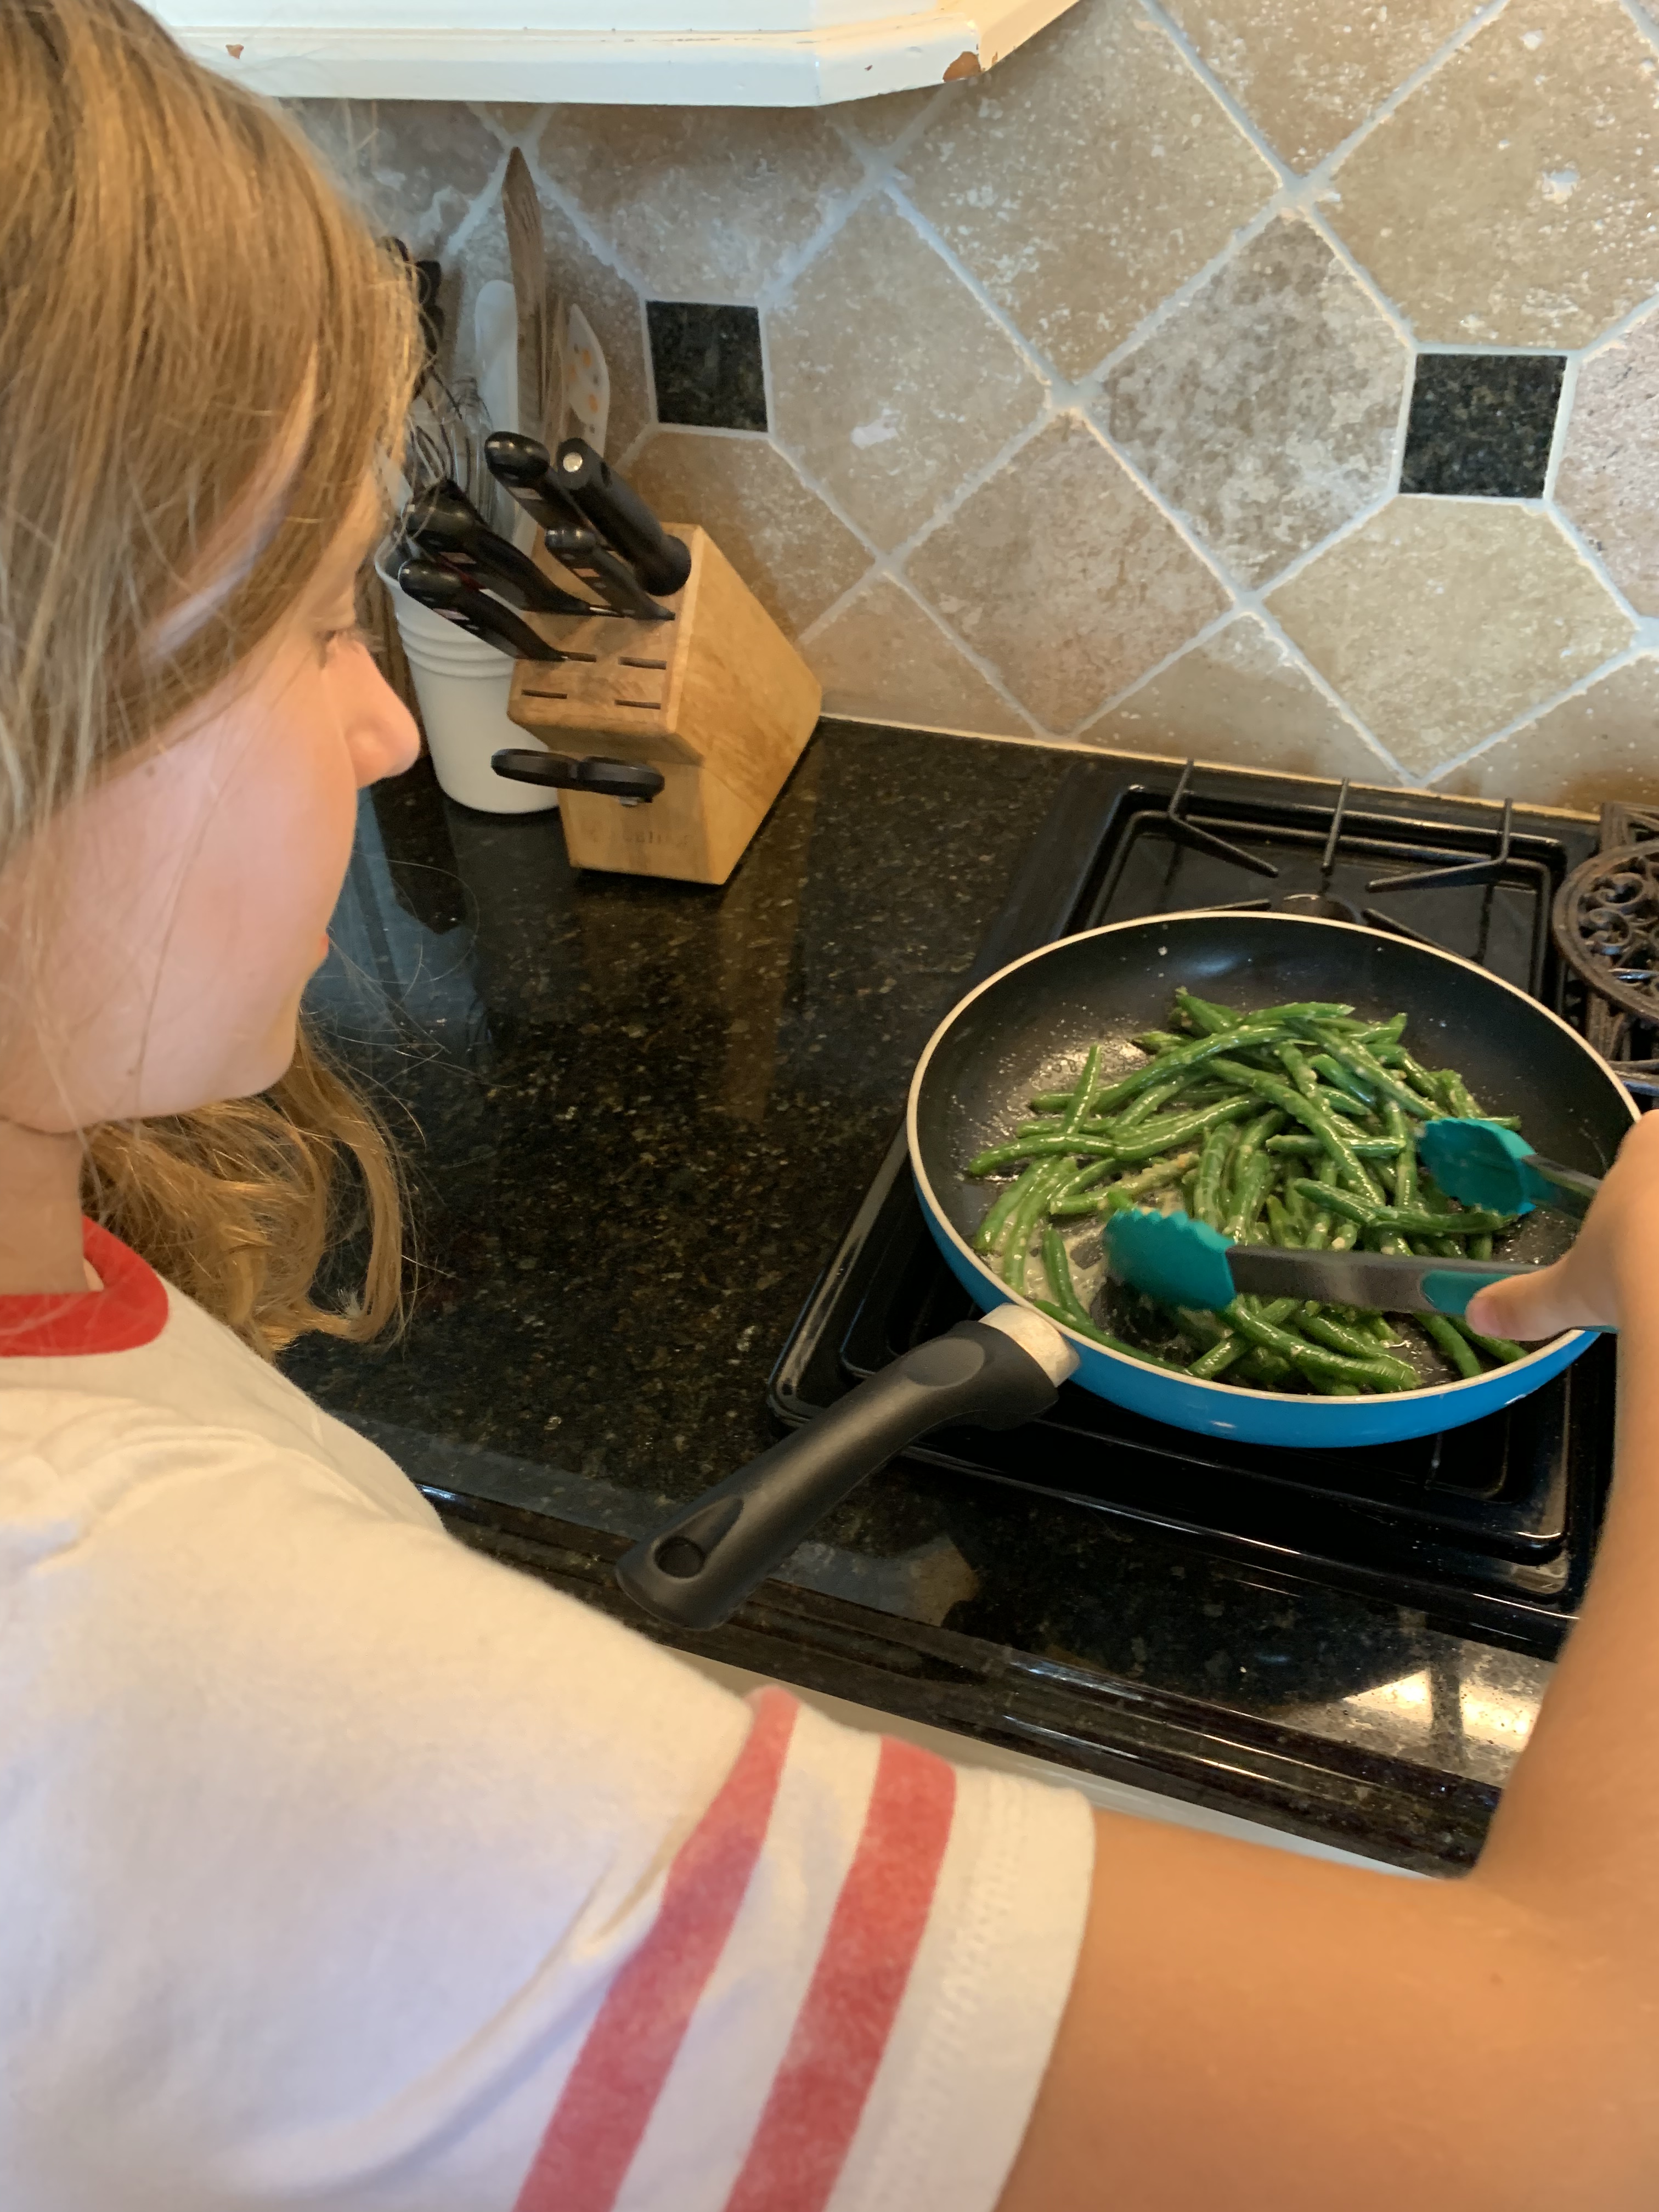
Luke and George were the main cooks last night, but Evie swooped in near the end to help with quick preparation of the green beans. Let me go ahead and tease you with the fact that dinner was delicious and everyone pretty much cleared their plates!
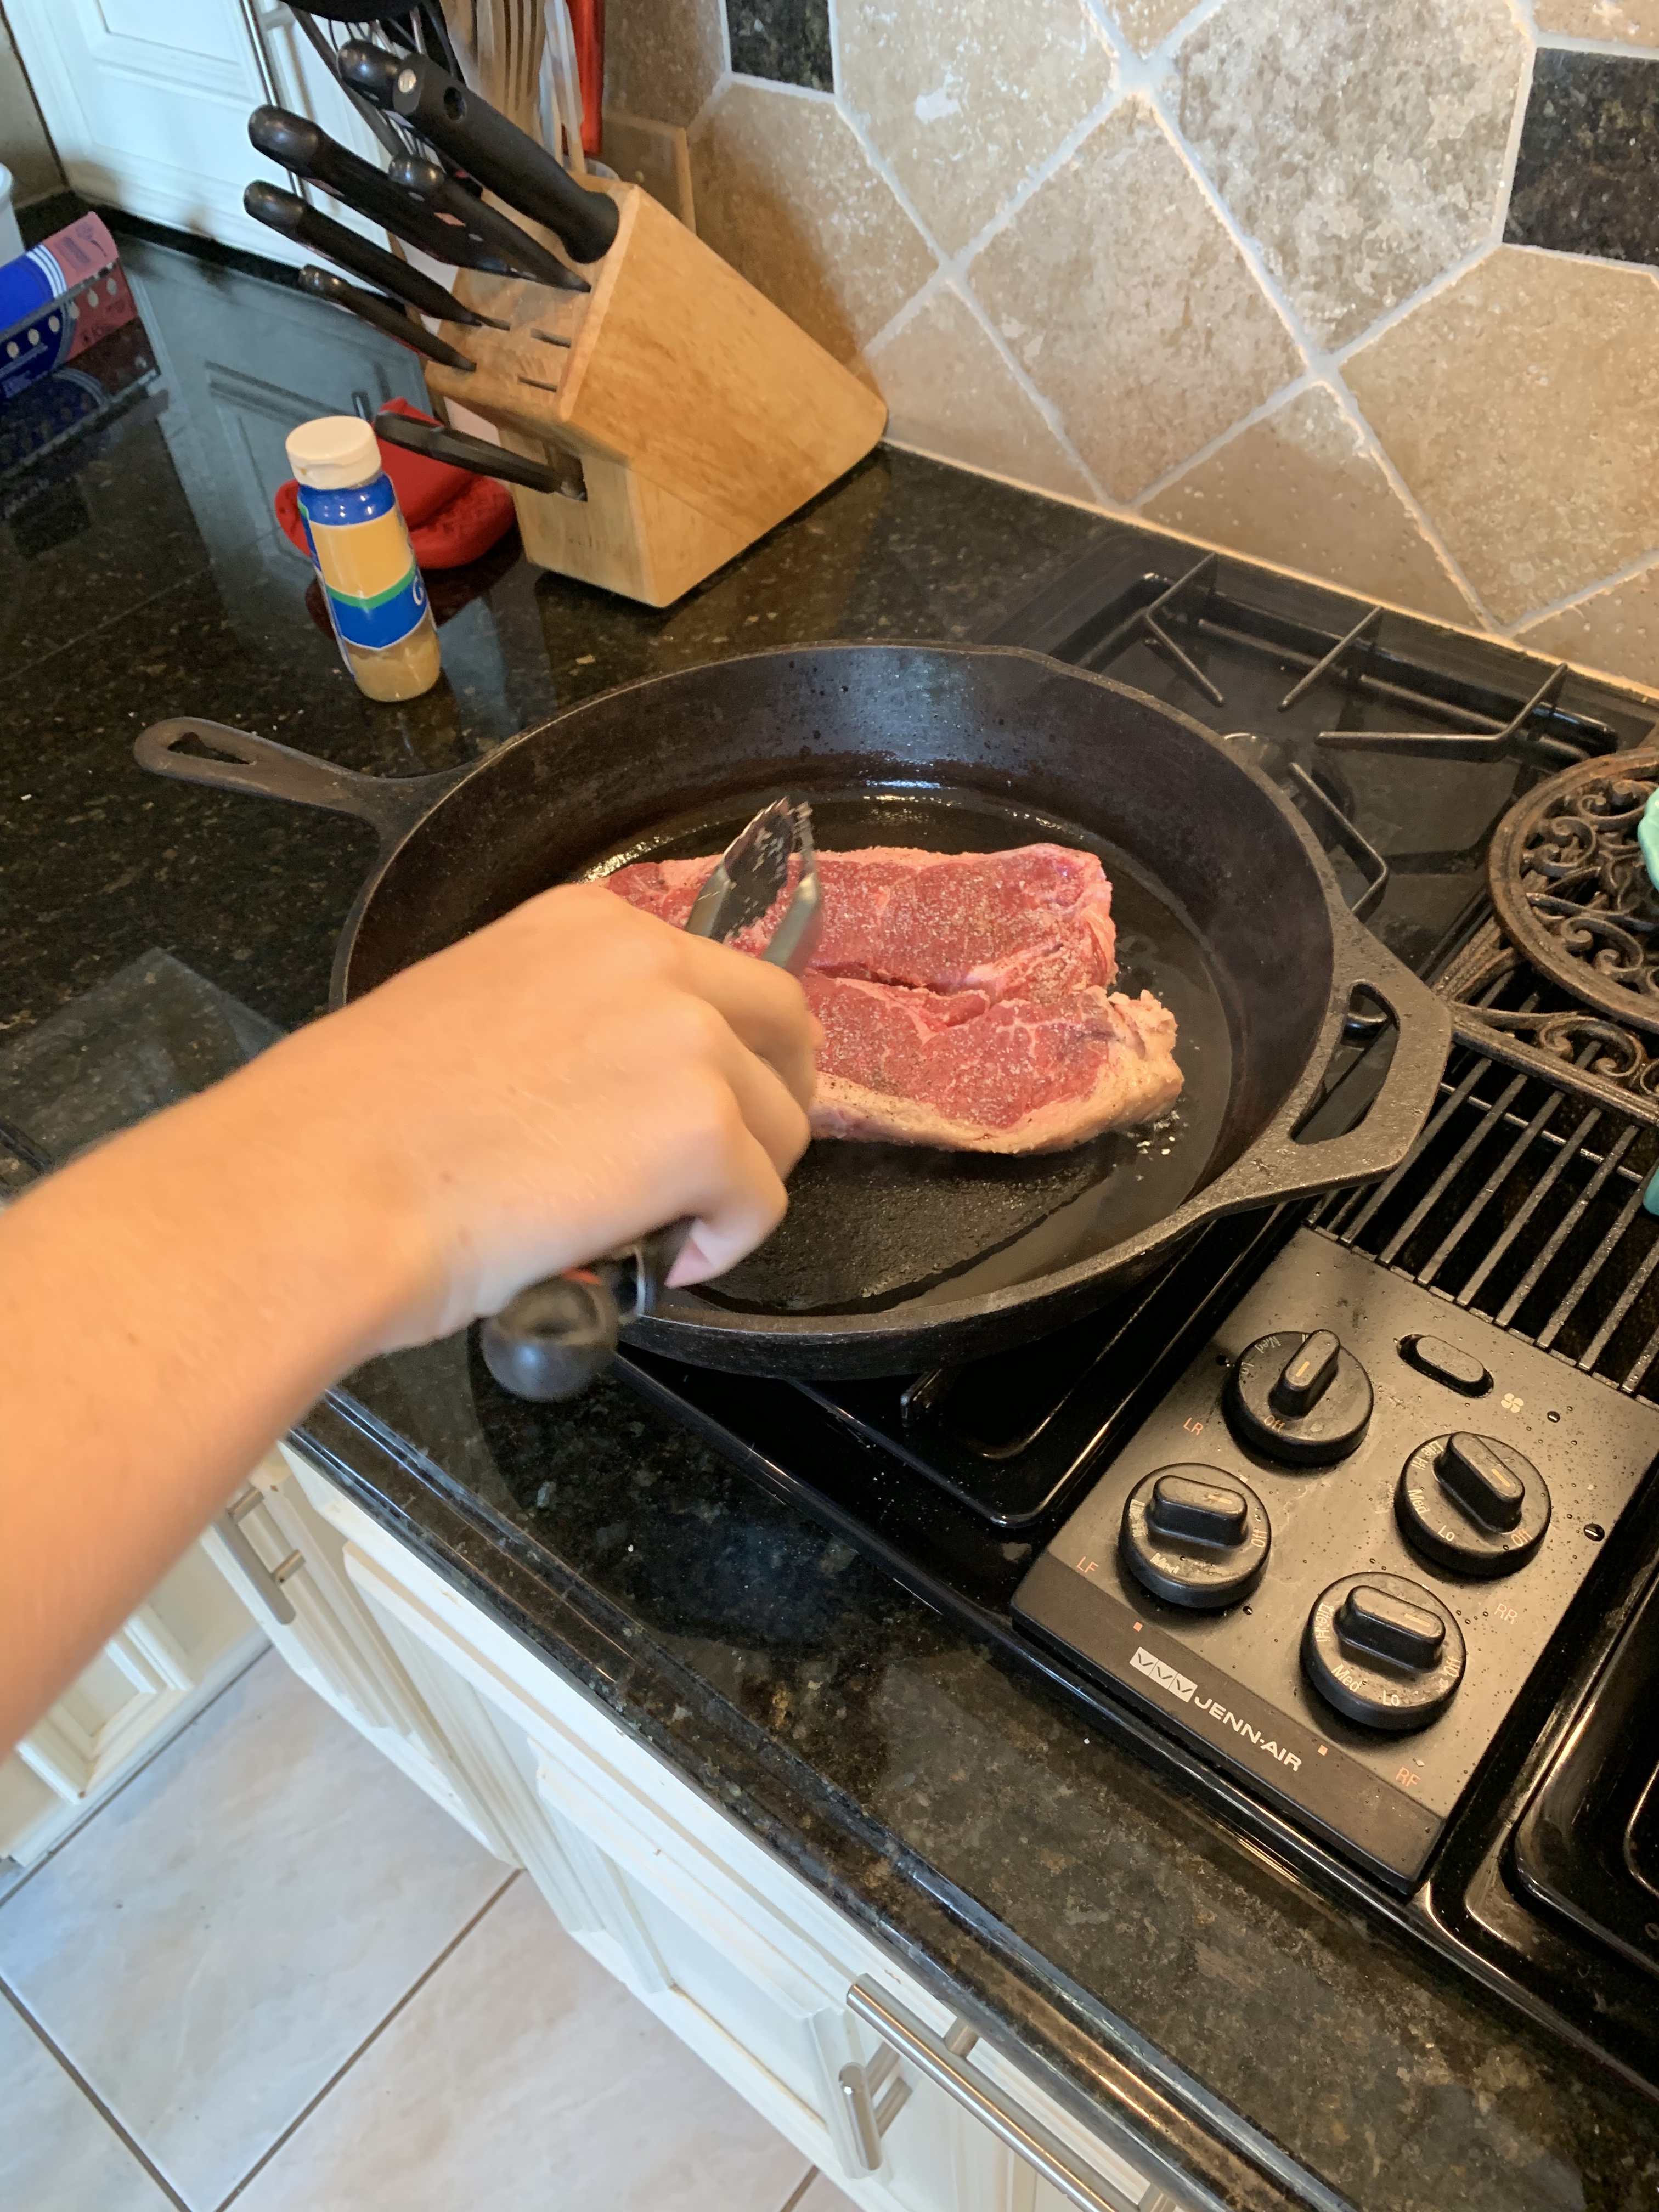
We started with the steak, which was part of a bovine purchased at the Houston Stock Show and Rodeo auction and split between four couples. We have a quarter of a cow and trust me, this is more than enough to feed my family for the year. Luckily, we get several cuts of steak, so that’s what we used.
I’m a traditionalist, so my style of cooking steak (whether on the grill, in the oven, or on the stove) is to let the flavor of the meat stand mostly on its own so there was no marinating involved.
STEAK RECIPE
INGREDIENTS:
Beef steaks of your choice (we used Strip Steak)
High Temperature Oil (we used Grapeseed Oil)
Salt and Pepper to taste
INSTRUCTIONS:
Pull out defrosted steaks at least one hour prior to cooking and allow them to come to room temperature. This will allow them to cook more evenly and I’ve found it is the best way to make sure you can achieve the exact “doneness” of the steaks (e.g. rare or medium rare – which is the only way to make the steaks in our house). Do not use frozen steaks.
WASH HANDS!!!! I know you know this, but my kids have to be reminded daily. I also have to make sure they don’t contaminate their hands by petting the dog, pushing their hair around, picking up a baseball, or wiping their hands on their shirts during the cooking process. It seems obvious, but trust me, it’s not obvious to kids.
Once the steaks reach room temperature and you’re ready to start cooking them, pat them dry using a CLEAN paper towel(s).
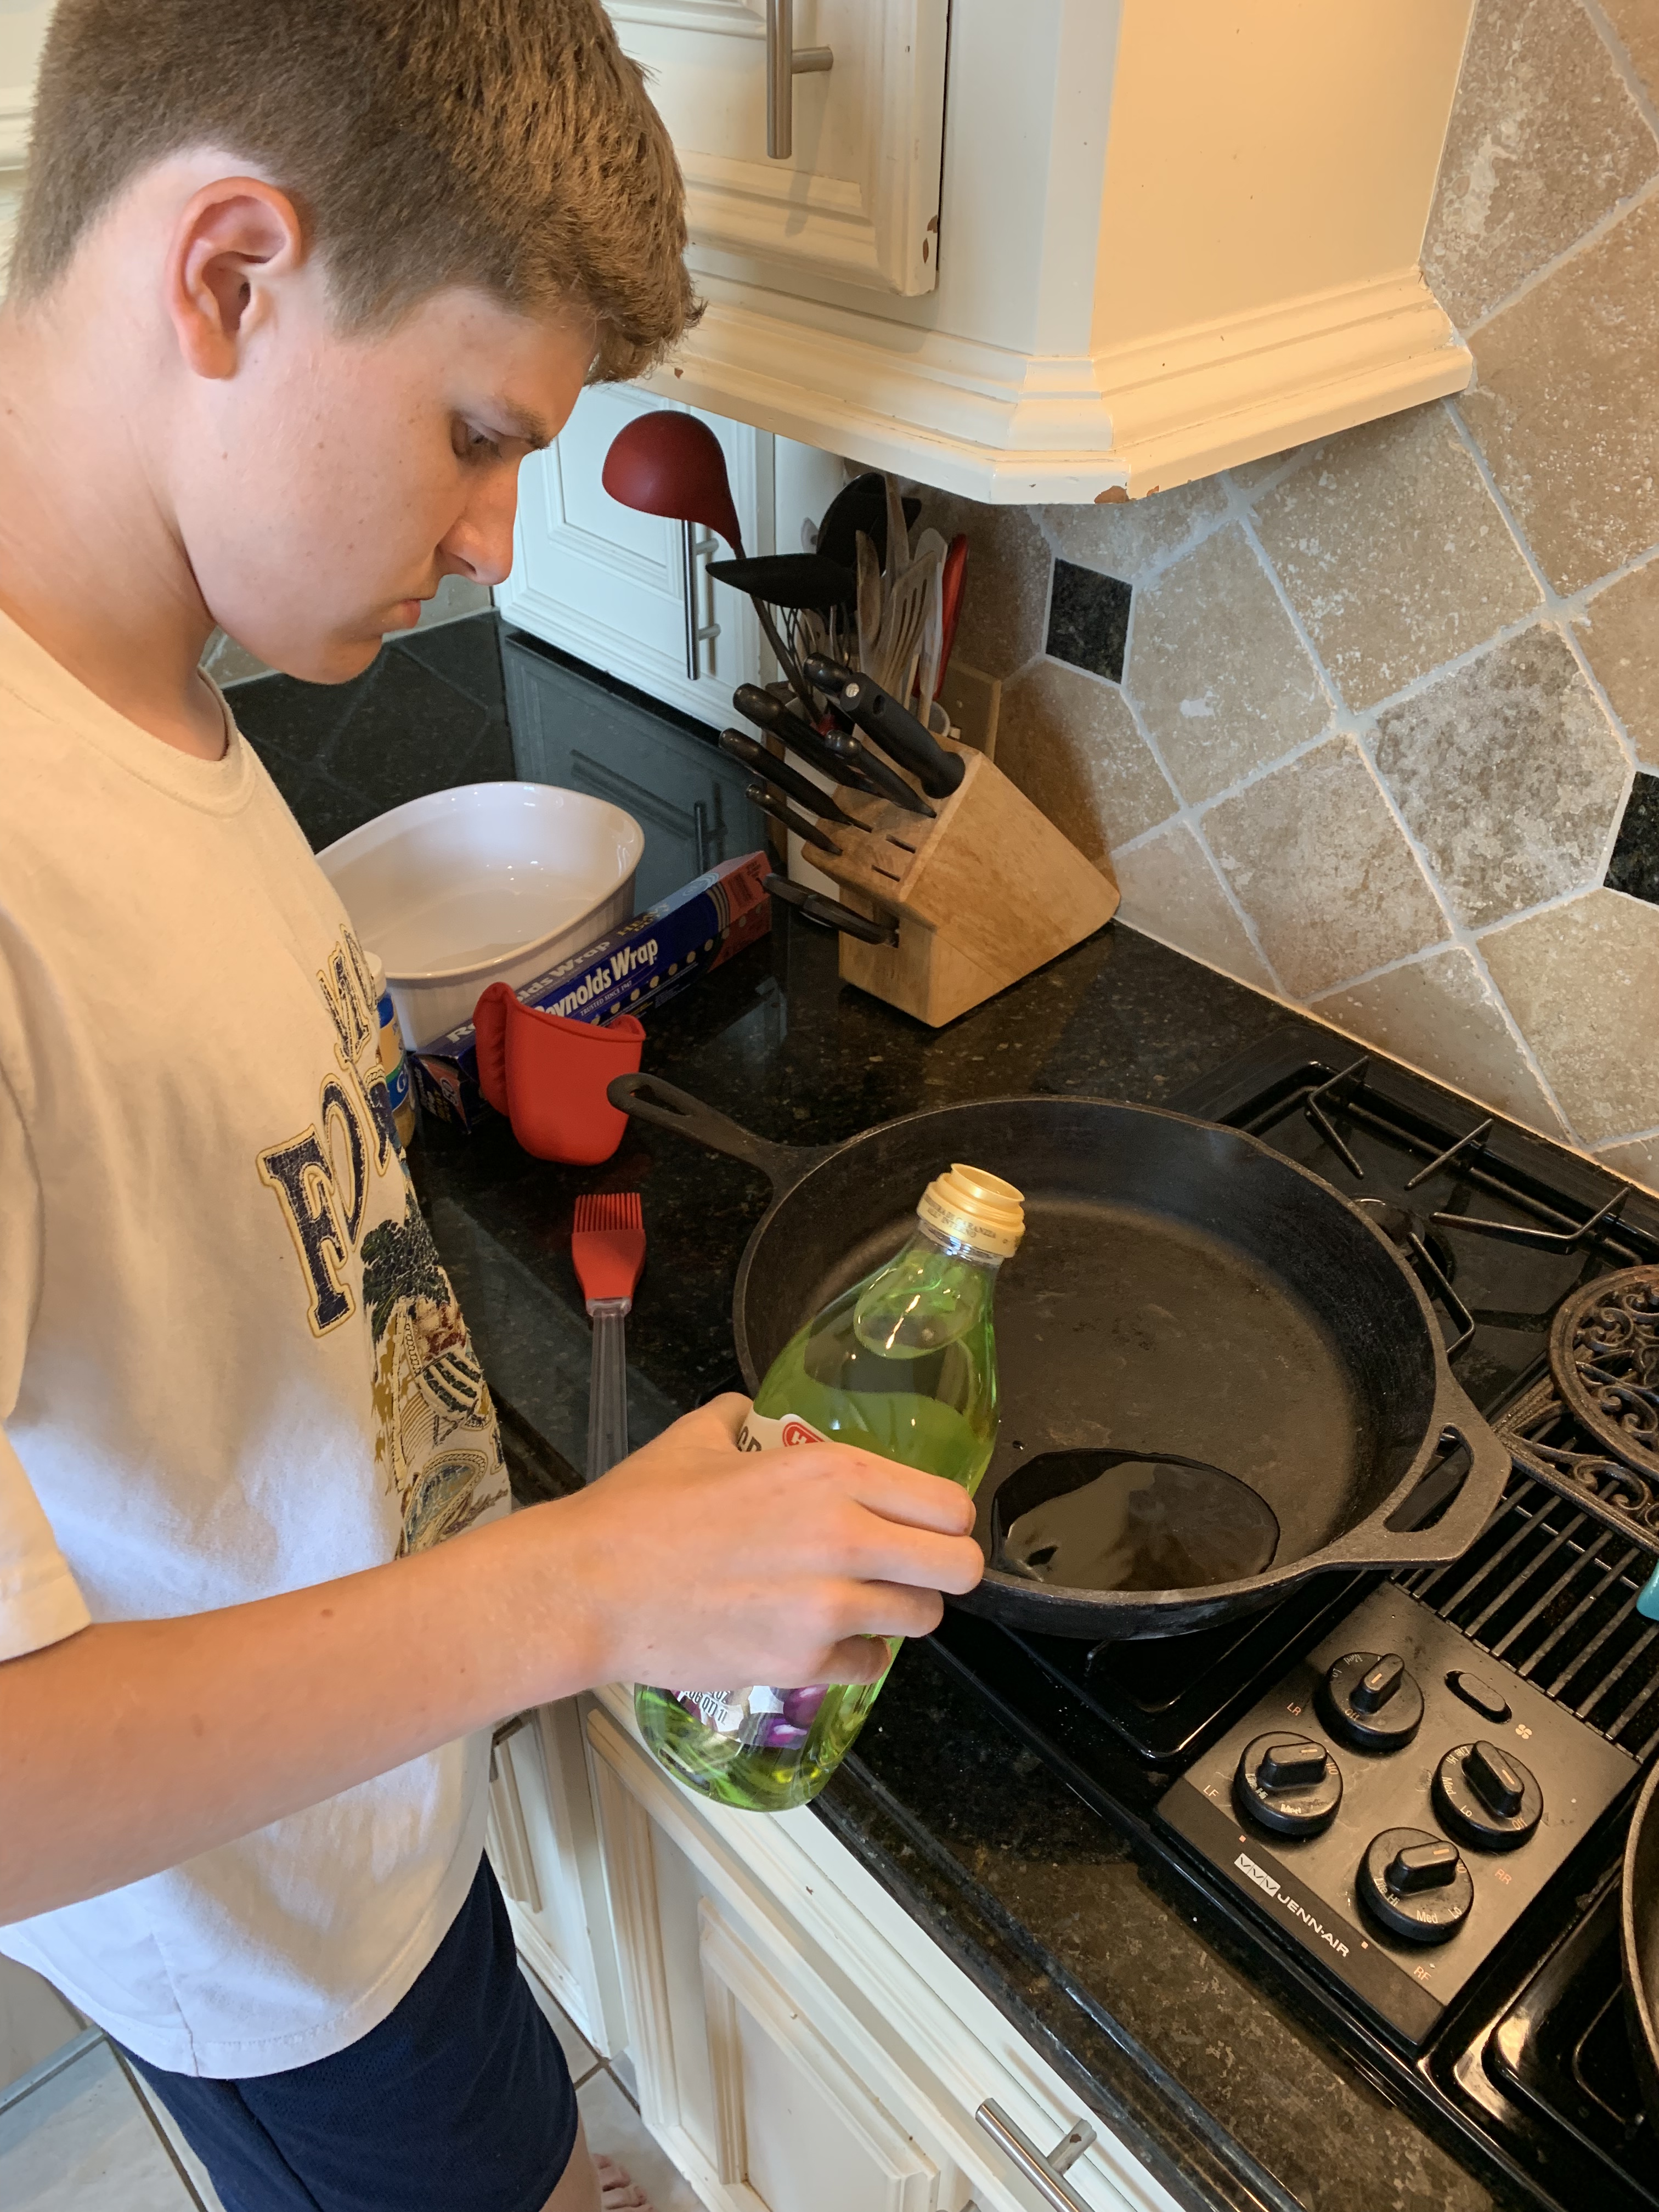
Generously coat cast iron skillet with grapeseed oil (don’t get too carried away, because the more oil there is, the more likely it is to splatter). Heat on high until the oil begins to shimmer and smoke just slightly. You will know when it is hot enough when you sprinkle water on the pan and it sizzles and jumps, but the first clues work just as well and involve no splatter.
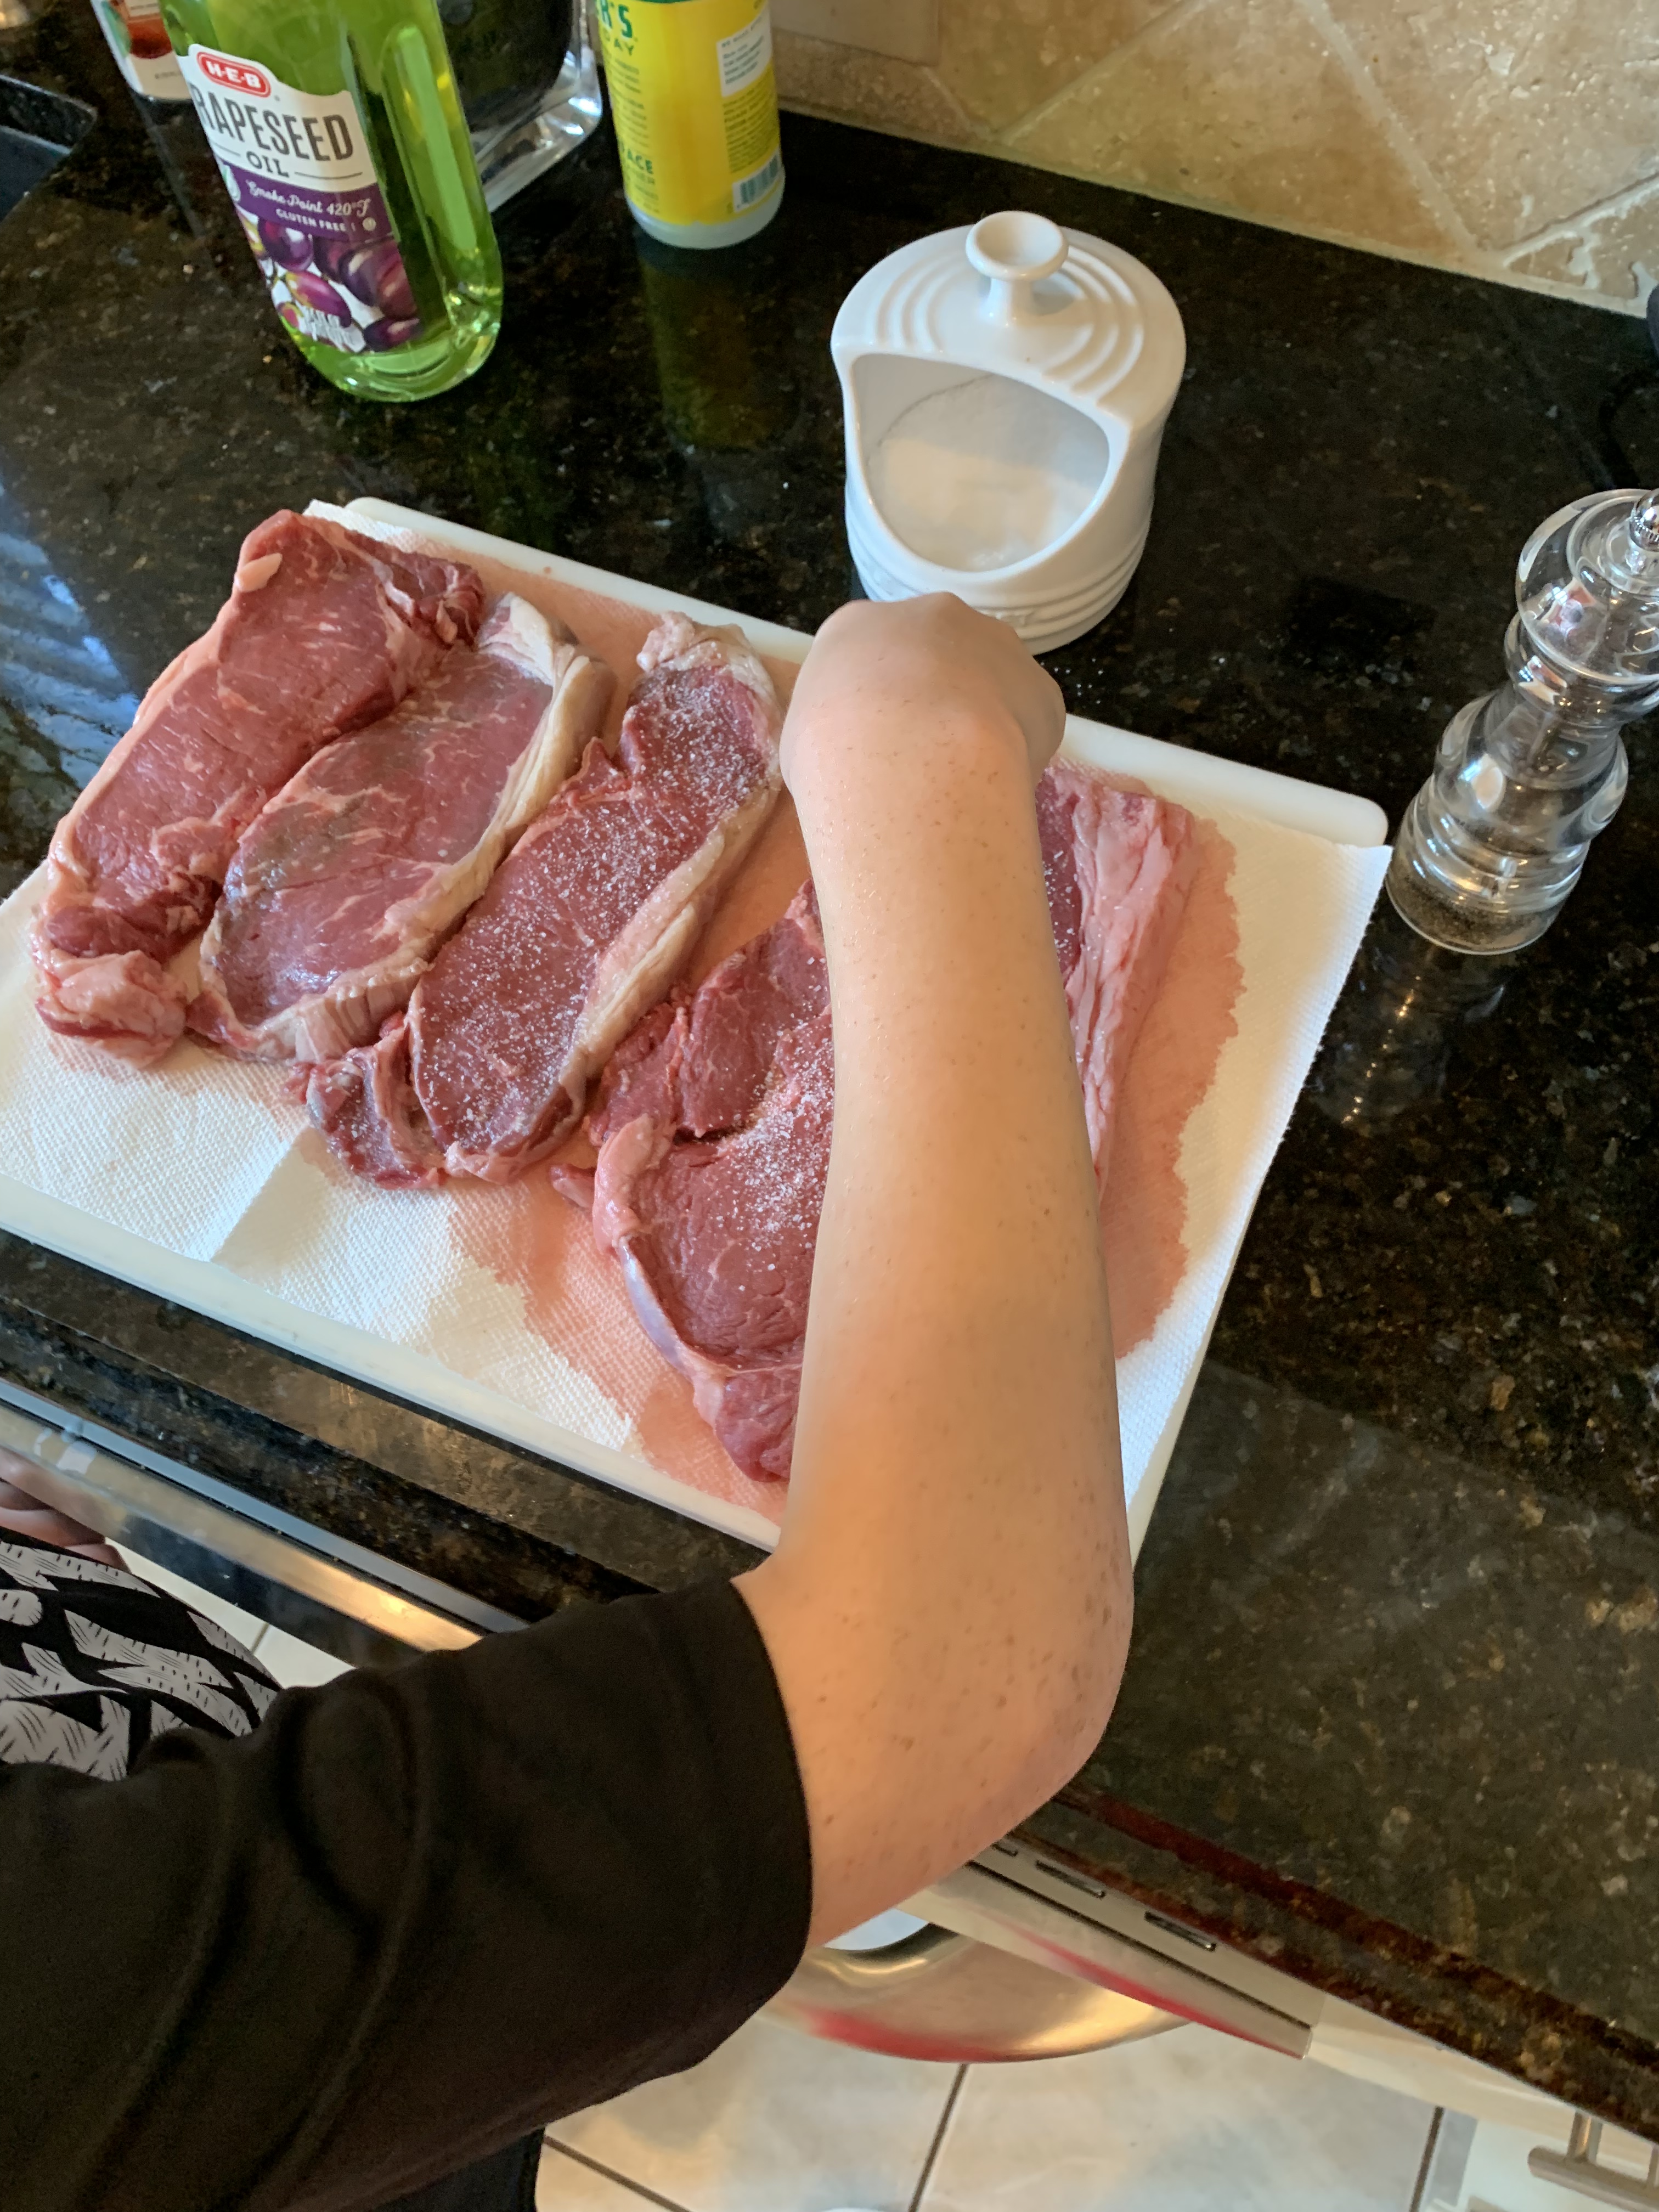
As the pan is heating up, go ahead and season the steaks generously with salt and pepper. These are the only spices we use, so you want to make sure there is plenty of salt and pepper on them, but if you prefer something less salty, make sure you season to your taste. Luke went heavier on the salt and I preferred it over George’s steak, but Grandma is more sensitive to salt and preferred George’s steak instead. Again, it’s all a matter of taste. Don’t season the steaks until you are just about to put them in the pan because you want the steaks to be dry so that they sear with a lovely crust on the outside. If you add the salt ahead of time, the steak will release moisture and it won’t be dry when you place it in the pan.
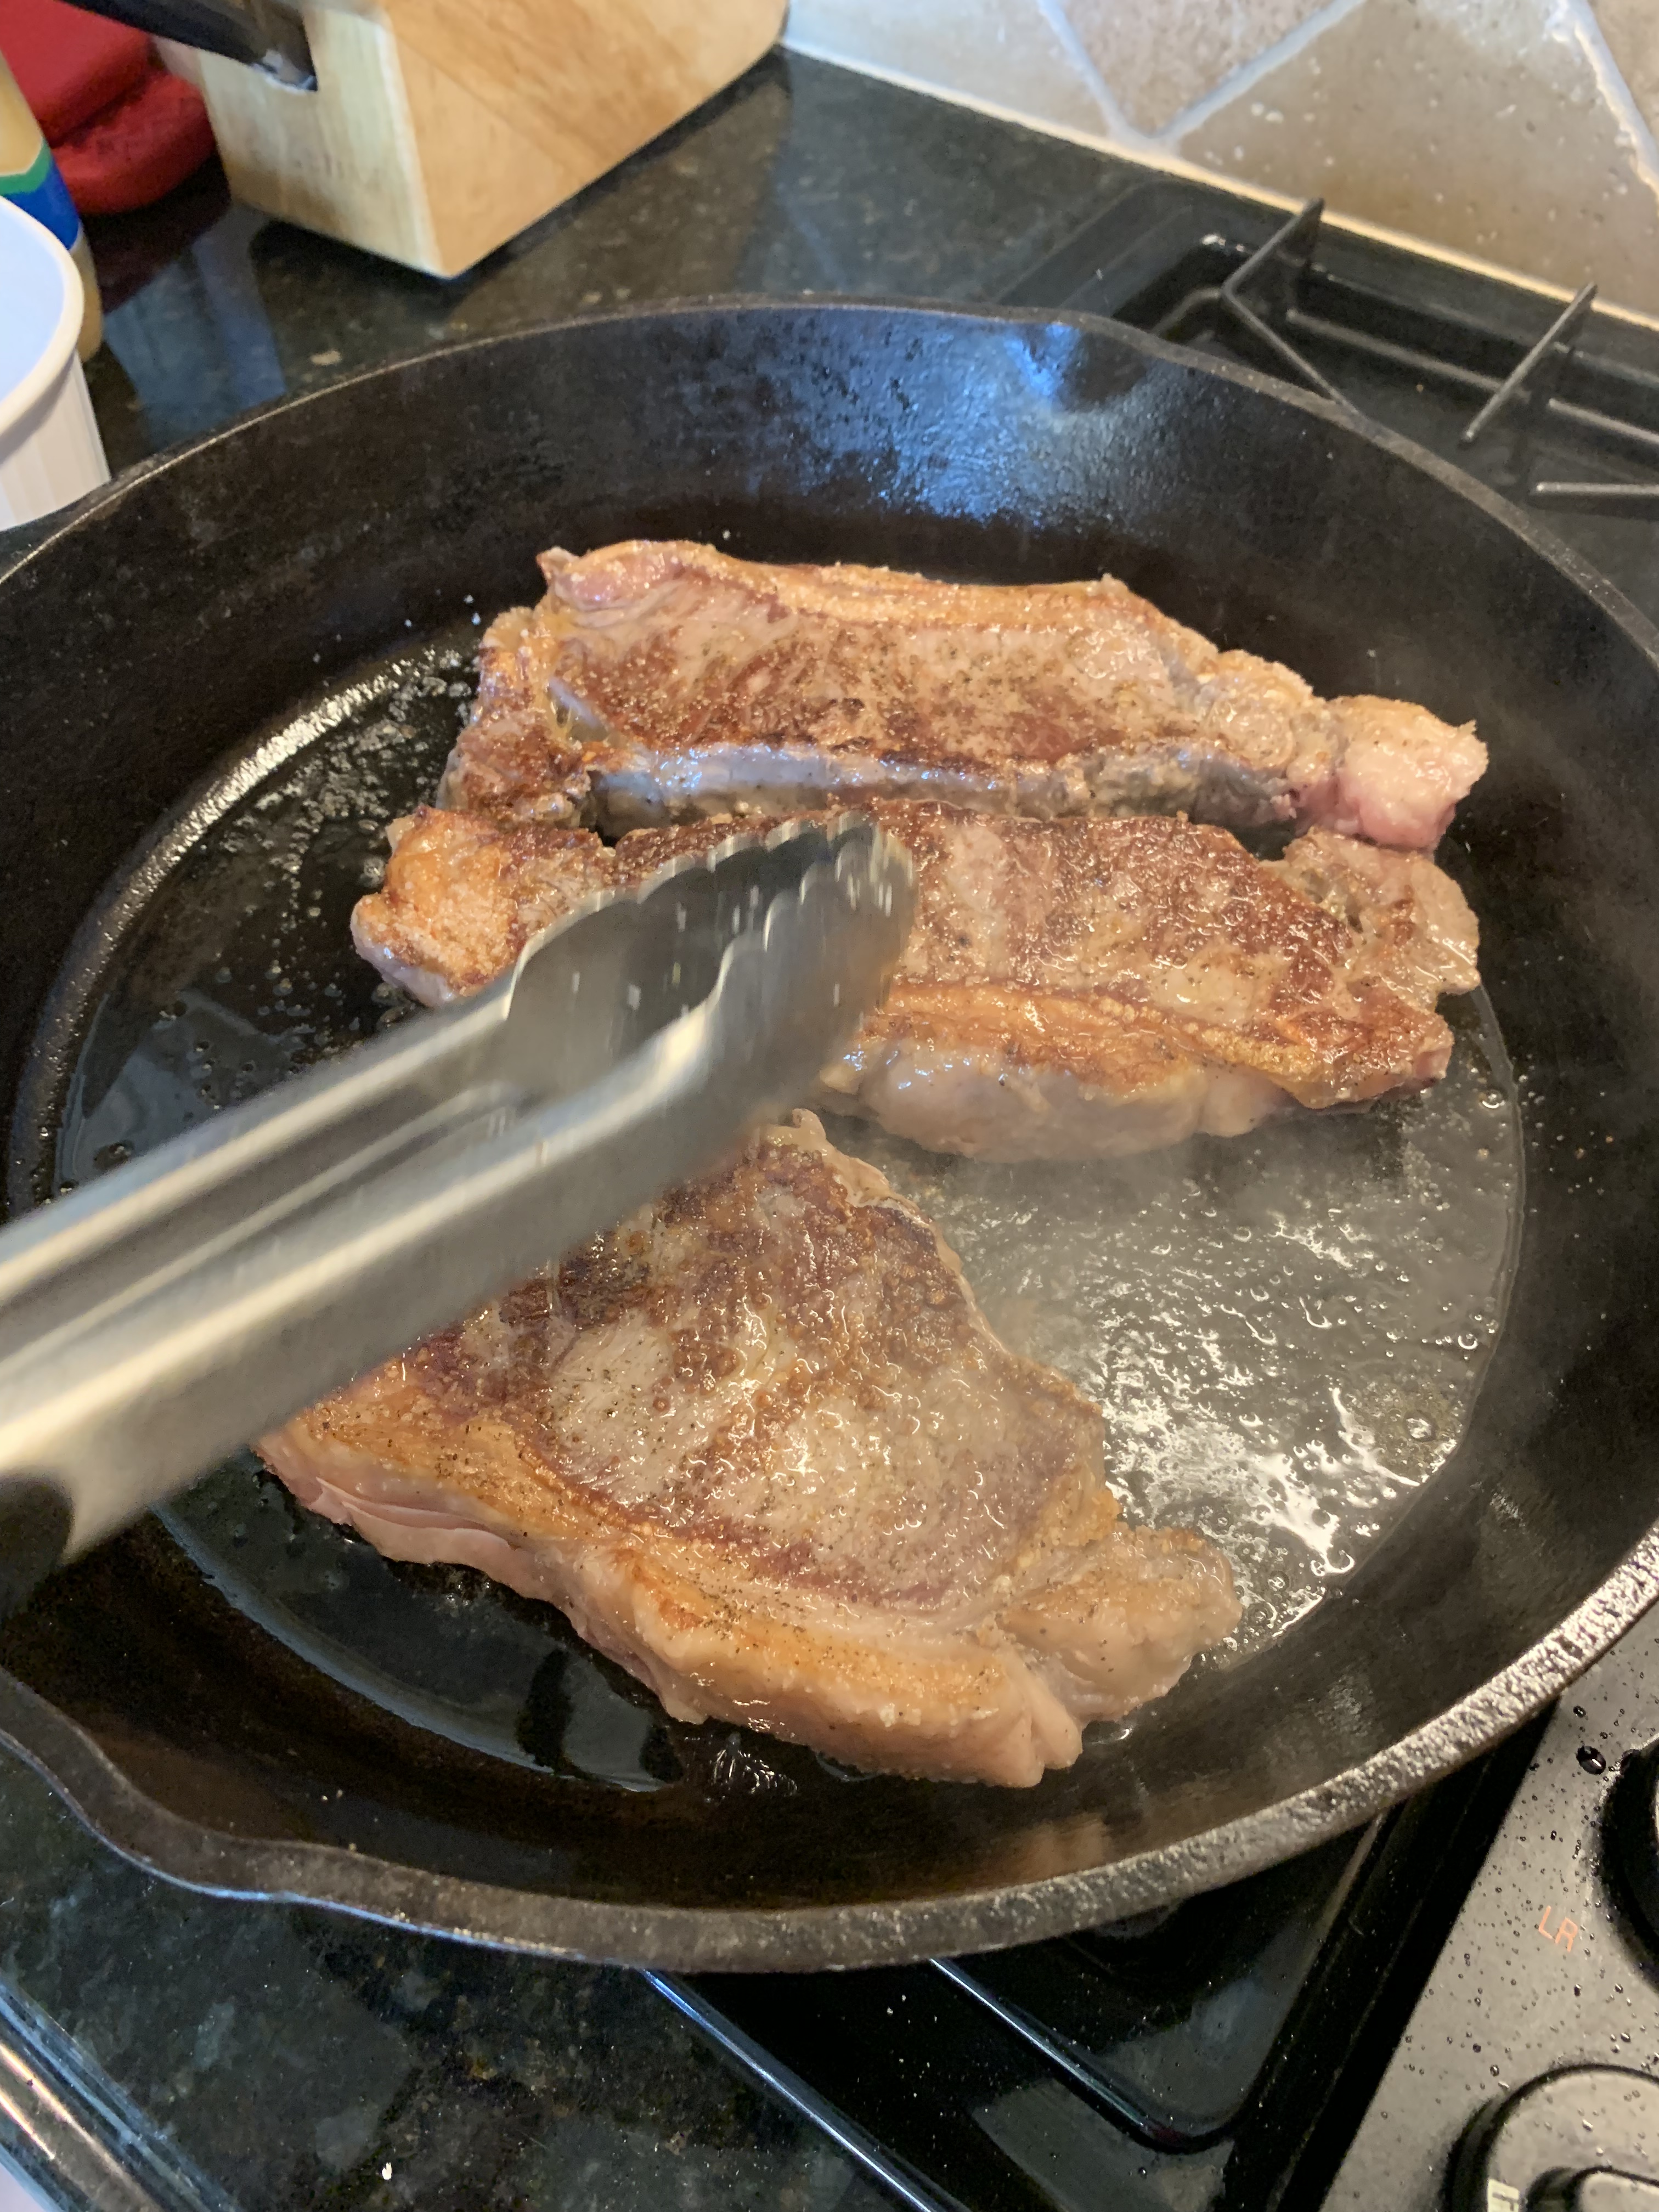
When the pan is fully heated (per instructions above), place steaks in pan and it should sizzle and splatter – this is the perfect temperature! Do not move the steaks once you have put them in the pan until it is time to turn them. Our steaks (and most steaks) are approximately 1-inch thick, and I recommend cooking the steaks for 3 minutes on each side depending on how high the “high” temperature on your stove is. We have a gas stove so it got pretty hot and 3 minutes on each side was almost too long to achieve medium rare. Flip the steaks after 3 minutes and cook another three minutes without moving the steak.
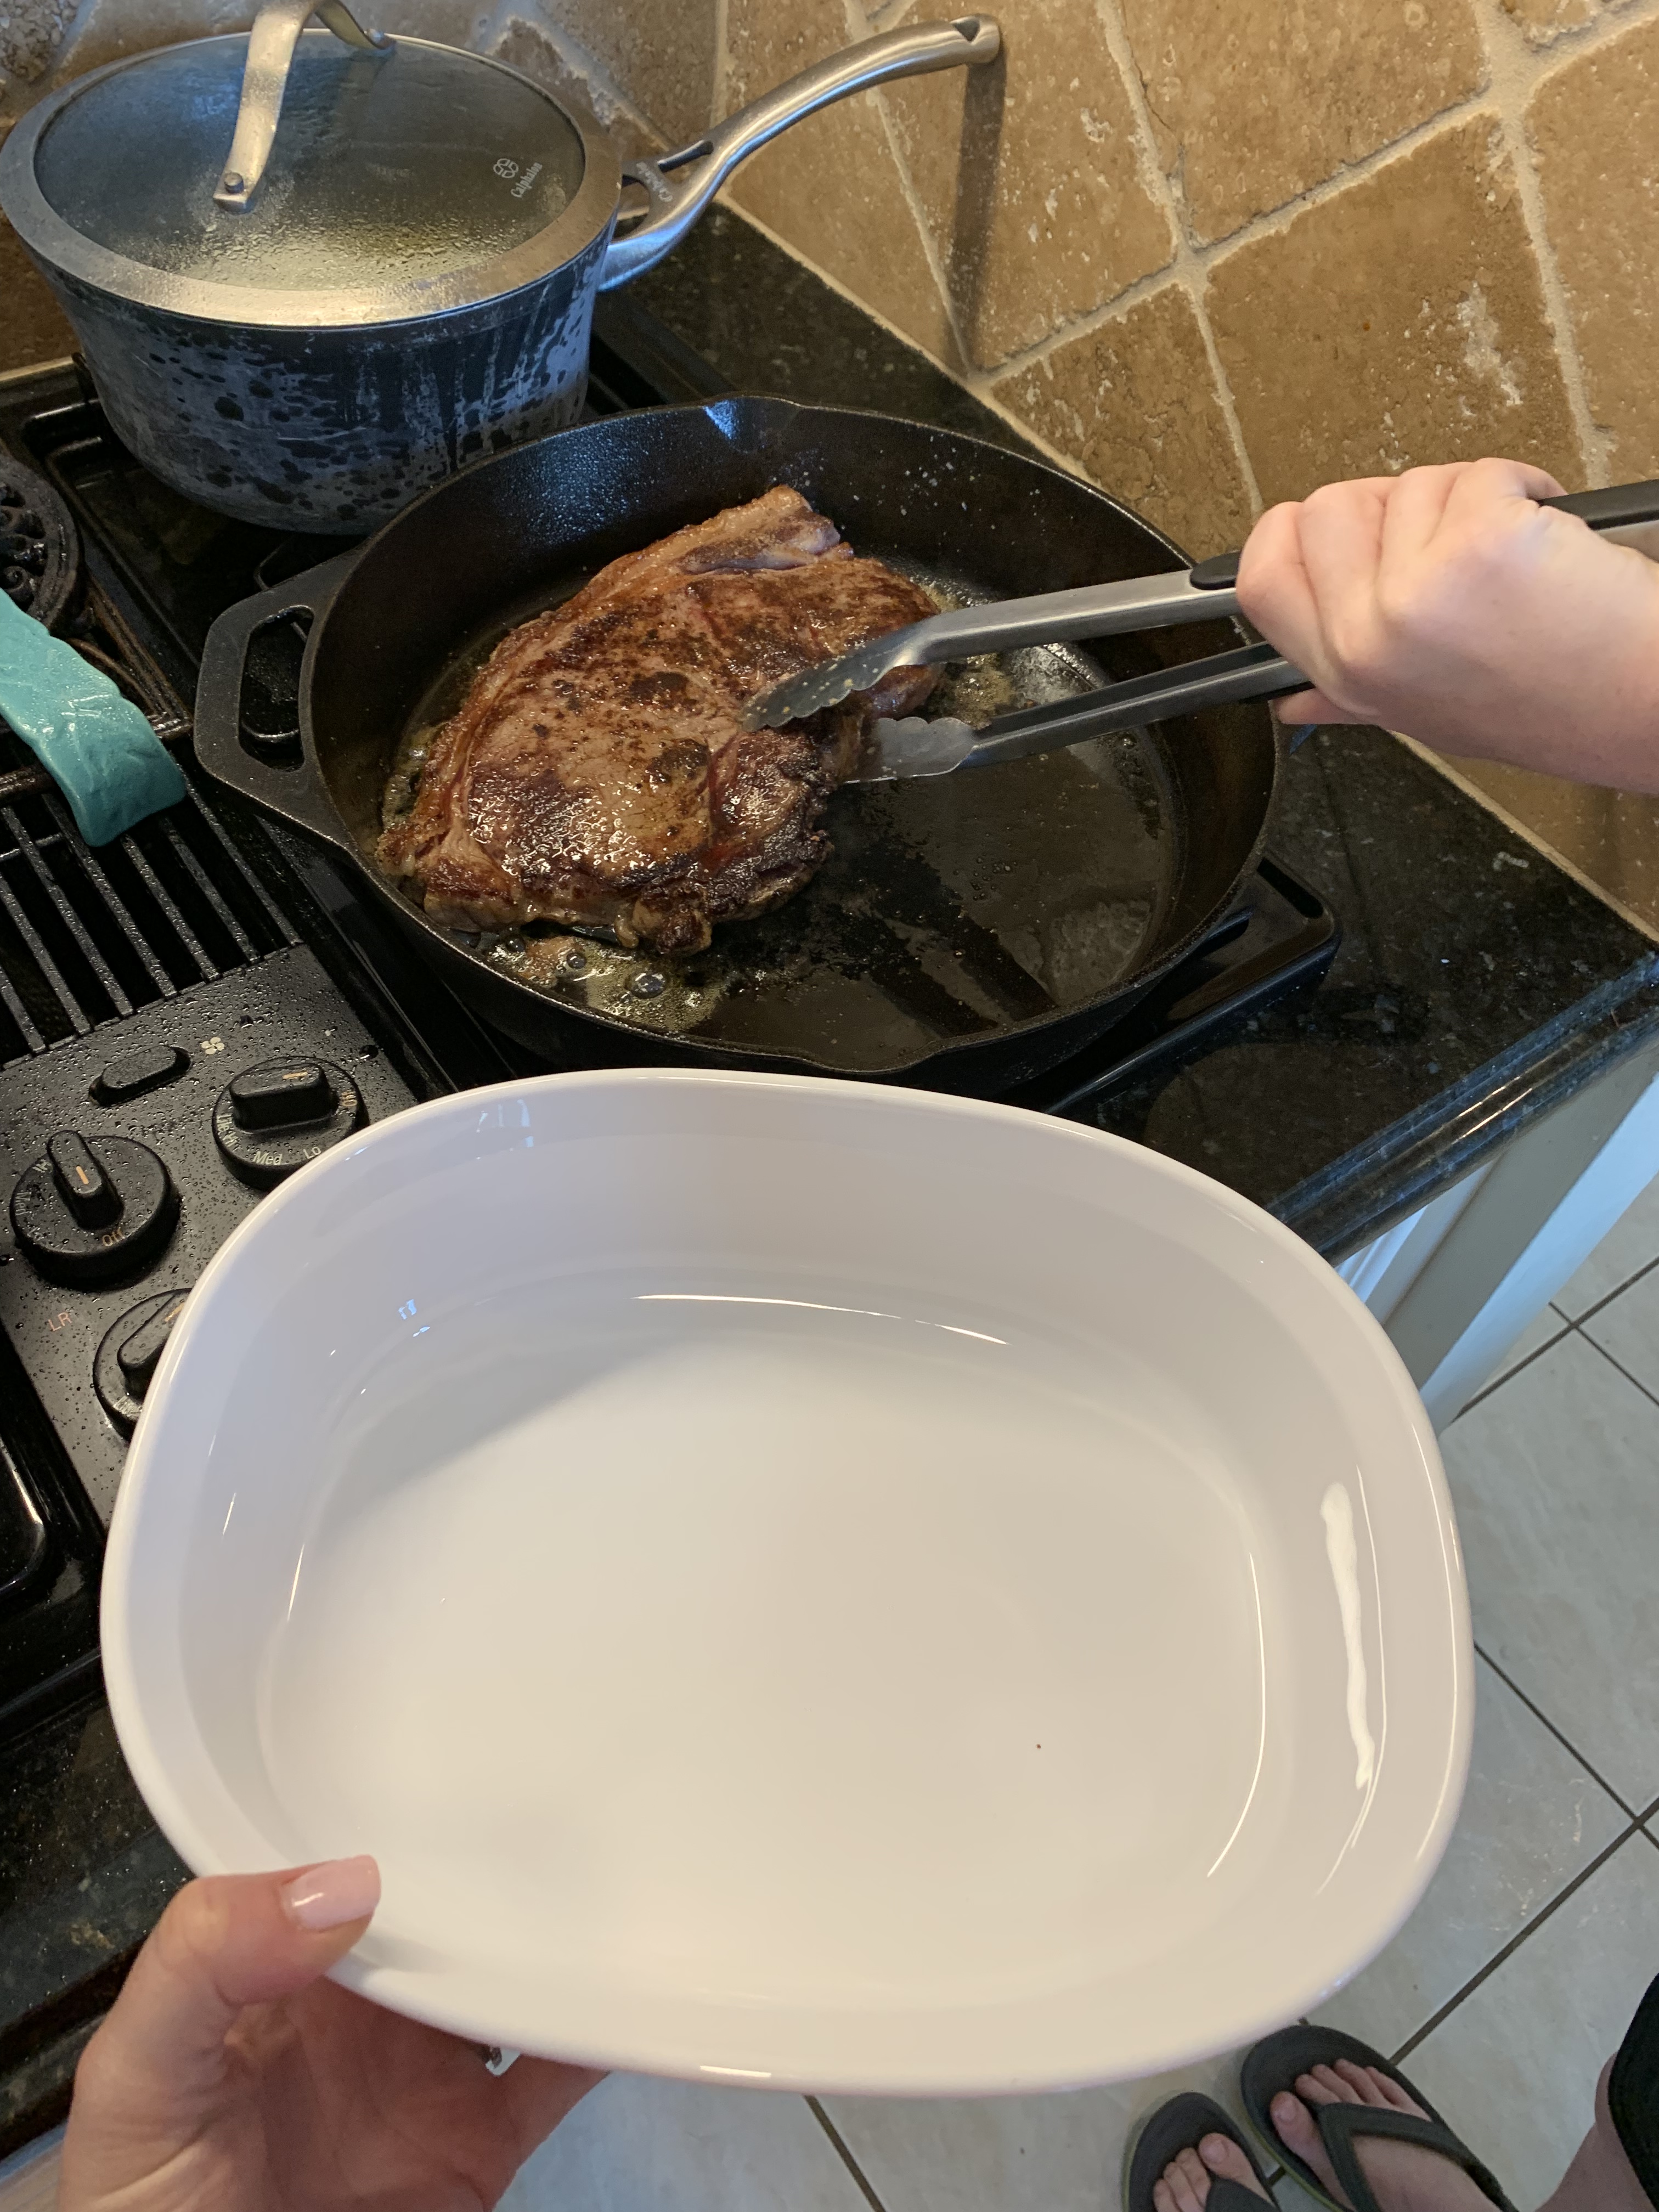
Remove the steak and place on a plate or serving dish and allow the steak to rest for 5 minutes. Keep in mind that the steaks will continue to cook for another 5 minutes after you remove them from the heat so be sure you don’t overcook them. I prefer to tent my steaks to keep the heat in, but others don’t do that. You parents can tell me how you prefer to do it.
If you’re feeling ambitious, I love to put a pat of butter (or compound butter) on my steak at this point. It elevates the steak to divine standards, but we are going simple so minimal ingredients and minimal steps for us.
Pat dry the steaks with a paper towel. Add grape seed oil to cast iron pan and coat the bottom. Season room temperature steaks with salt and pepper. Add steaks to heated pan. Flip steak after searing for 3 minutes. Cook for another 2-3 minutes depending on temperature of pan. Remove steak from pan. Allow steak to rest for 5 minutes.
HOW TO TELL IF STEAKS ARE DONE: The best way is to use a very accurate meat thermometer, but I emphasize that it must be an accurate thermometer, and I’ve had poor luck with the cheap thermometers you get at the grocery store so we kept it simple. I did allow the kids to try using a digital thermometer that I have primarily for making pork tenderloin. Our steaks were 125 degrees Fahrenheit when we pulled them off the pan.
RARE: 125 degrees Fahrenheit, red inside, cool interior
MEDIUM RARE: 135 degrees Fahrenheit, red inside, warm interior
MEDIUM WELL: 150 degrees Fahrenheit, slightly pink inside, warm interior
WELL: 160 degrees Fahrenheit, no pink, hot interior
The only correct ways to cook these steaks in our house are either Rare or Medium Rare. I was thoroughly disappointed when a couple of the steaks came out more Medium than Medium Rare, and none of the steaks we cooked came out rare. Boo.
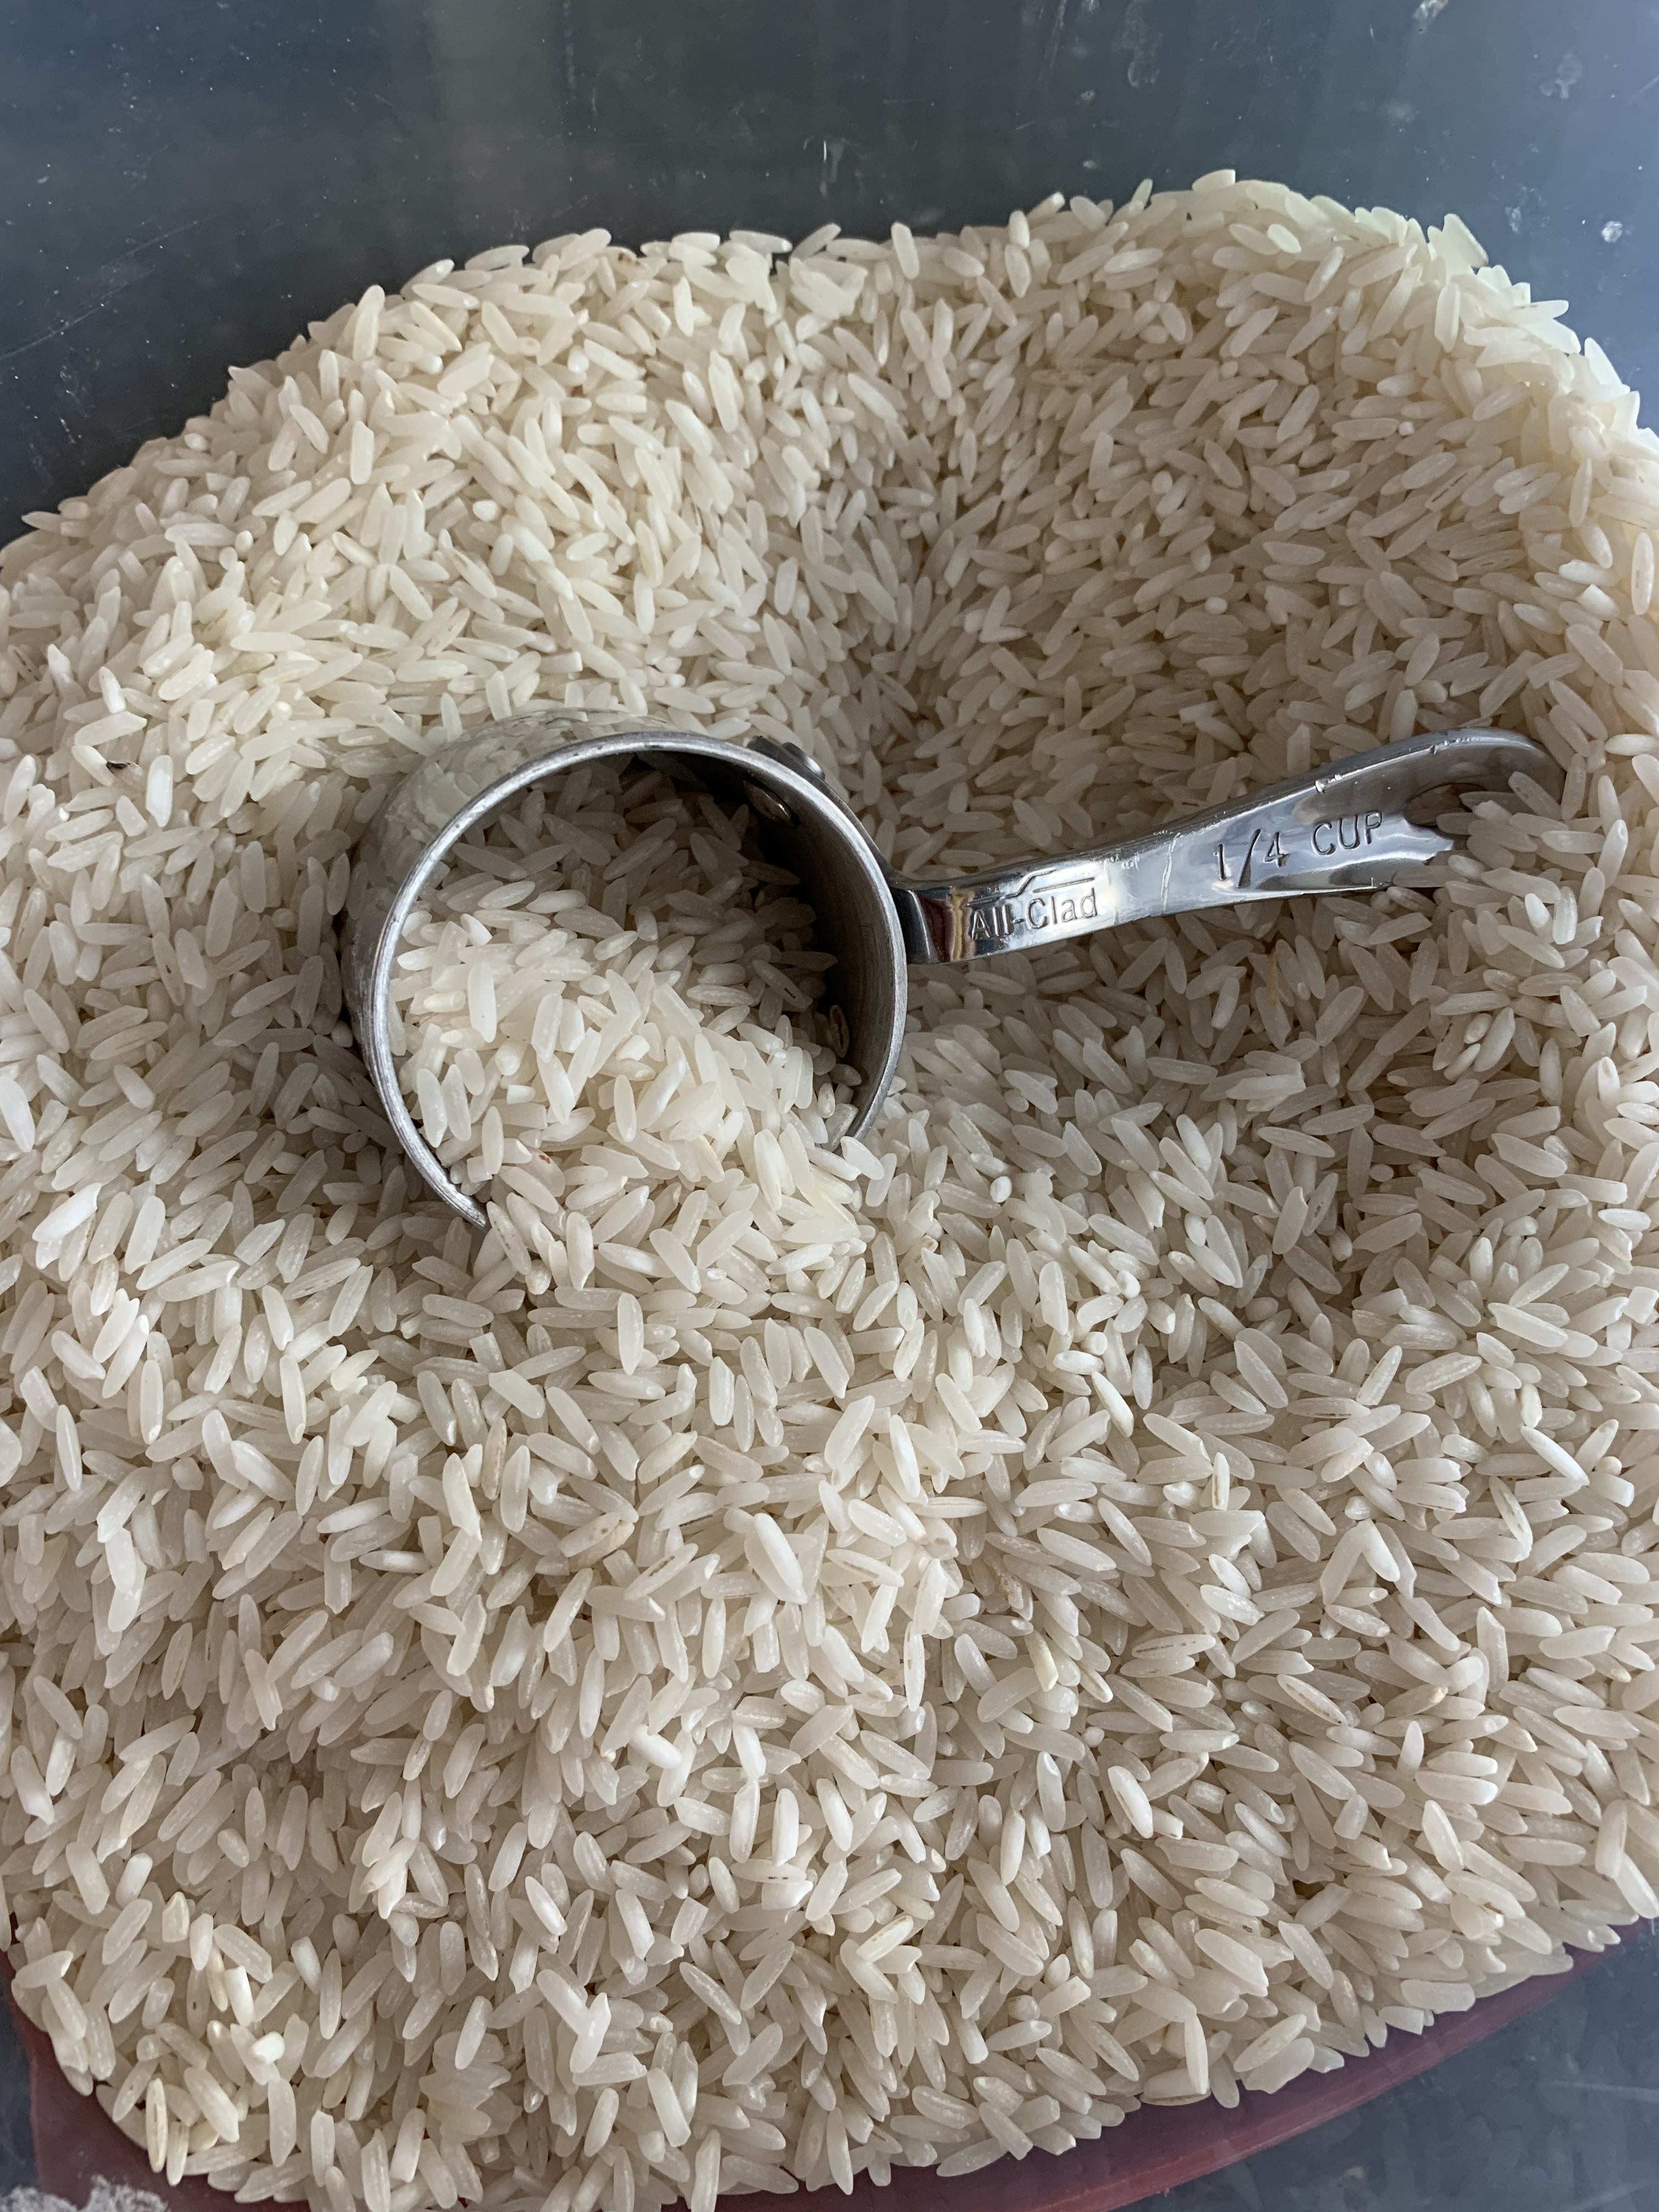
WHITE RICE RECIPE
INGREDIENTS:
1 cup long grain white rice
2 cups water or broth
Pinch of salt
Bay Leaf (optional)
INSTRUCTIONS:
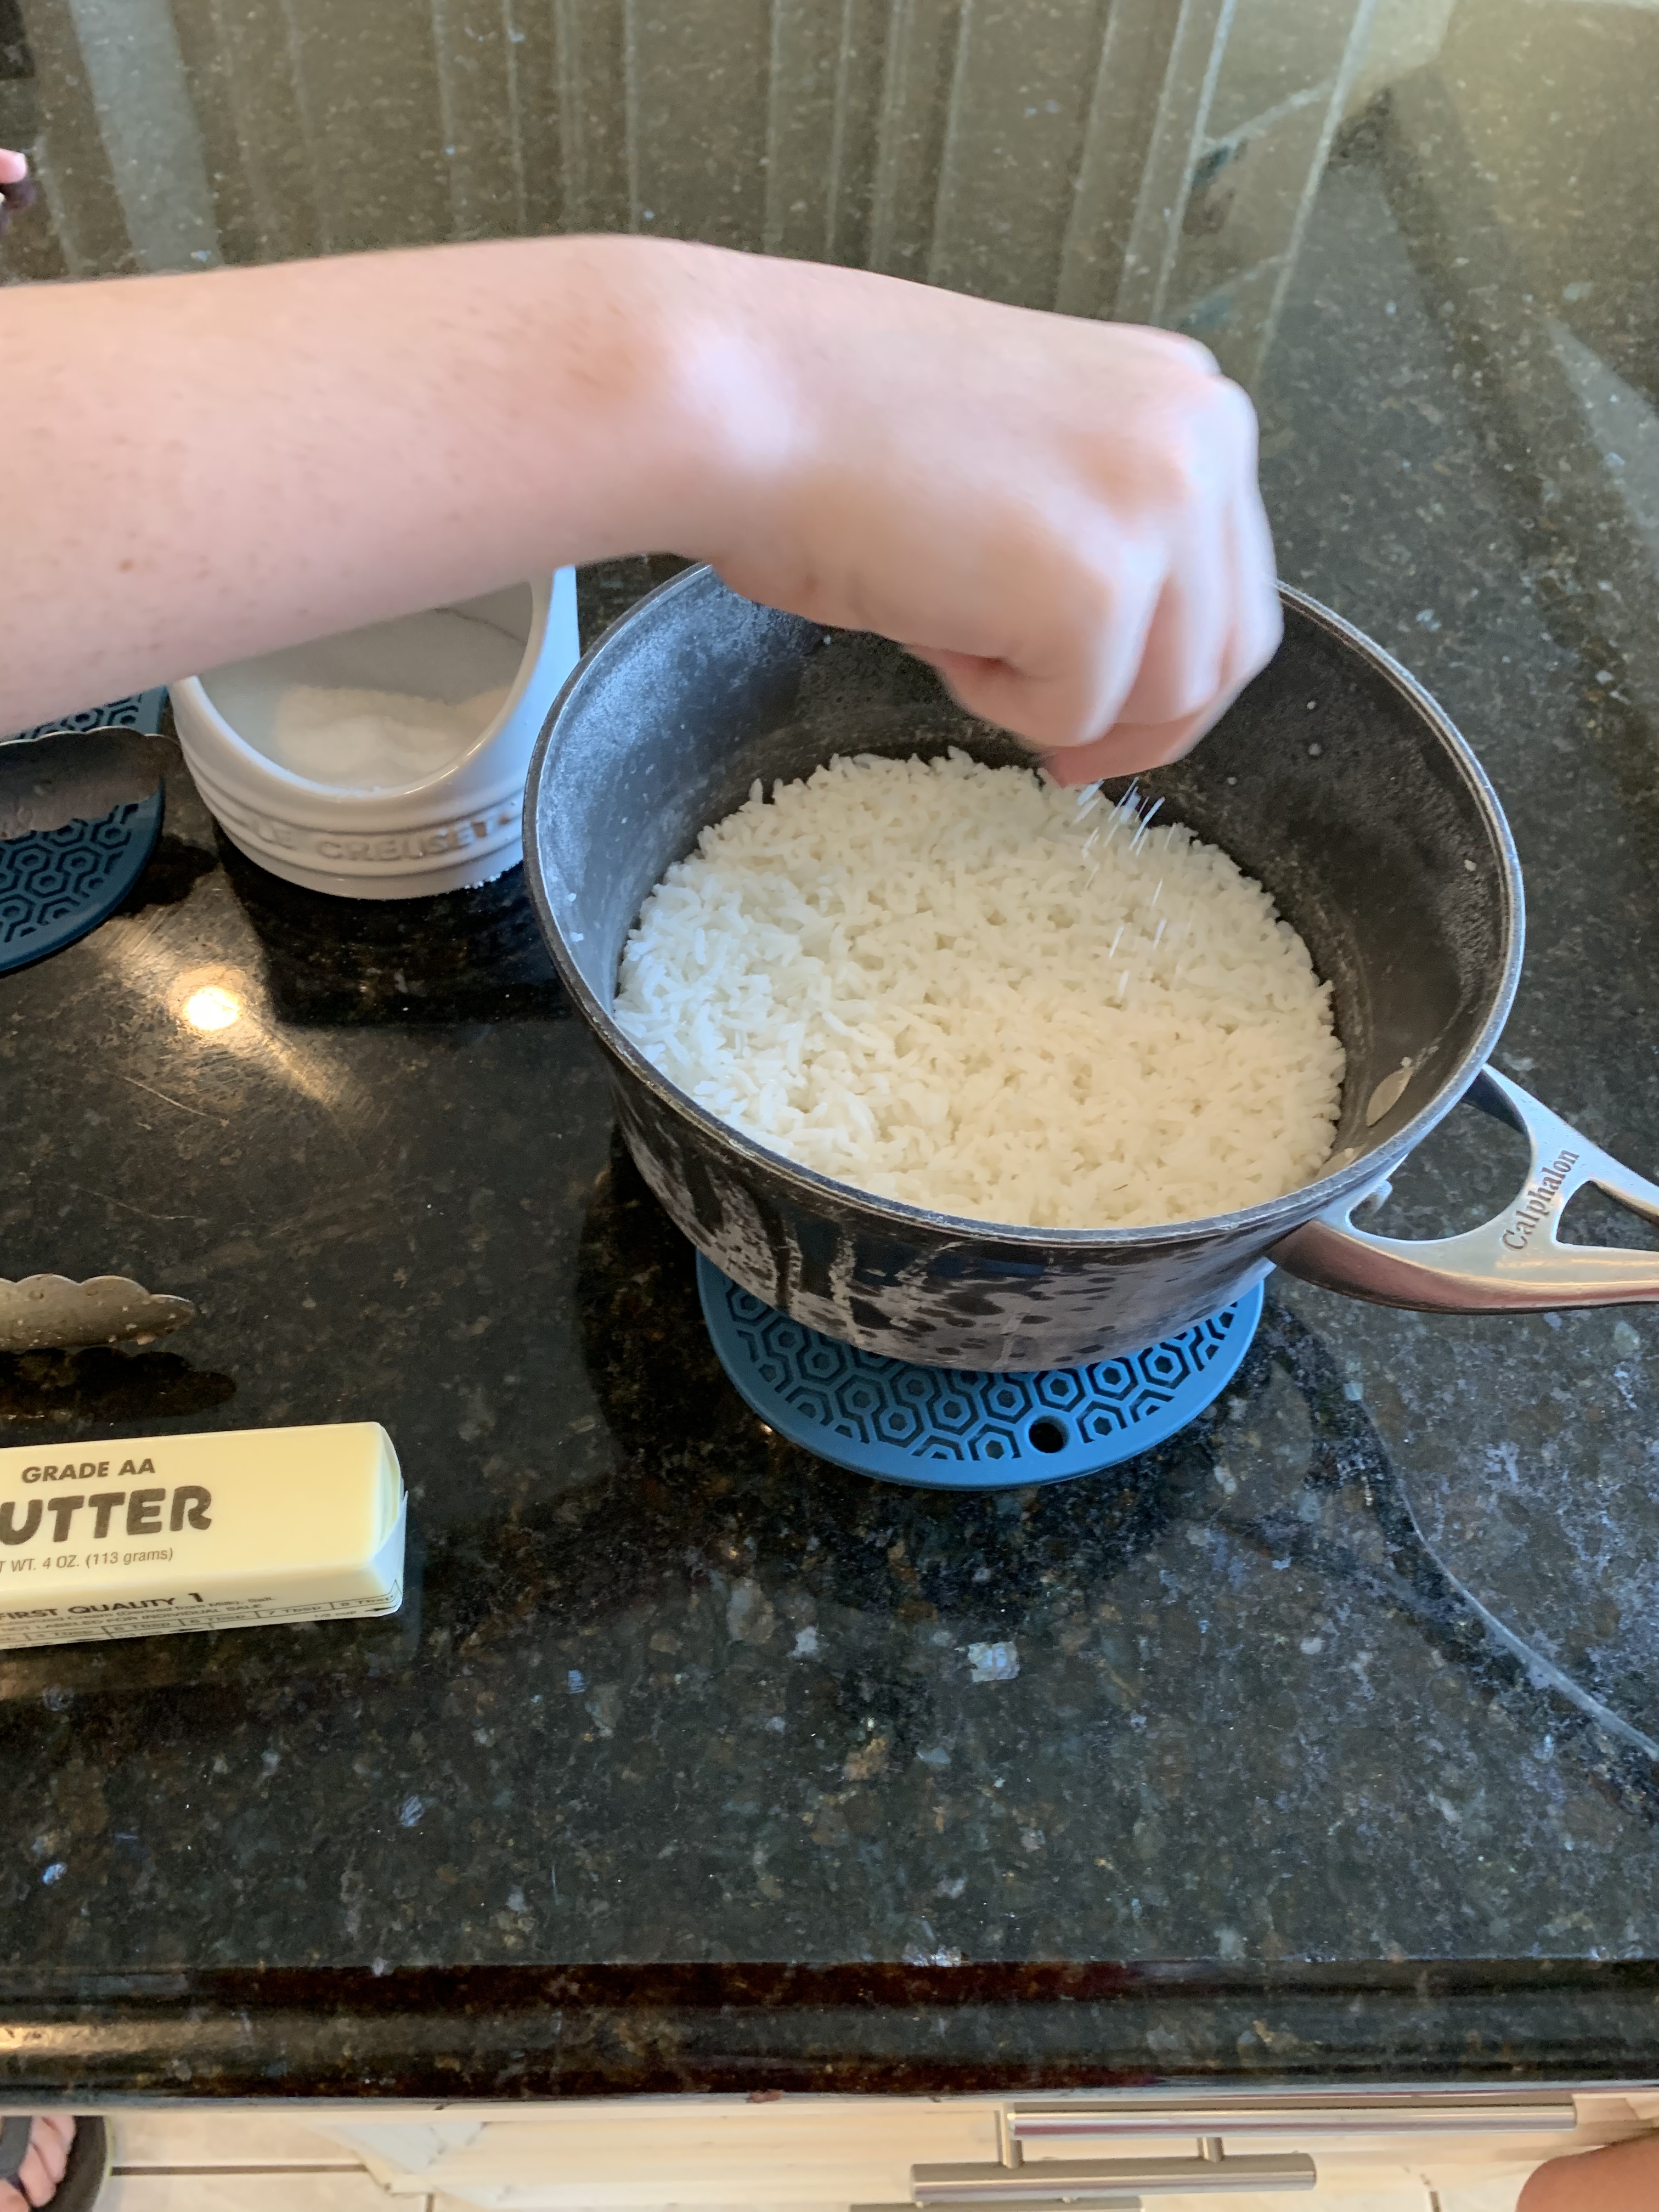
Place rice in strainer and rinse until water runs clear. If you don’t have a strainer, you can pour the rice into a bowl of water and mix it about with your CLEAN hands. Pour out the cloudy water and repeat the process until the water is no longer cloudy. My kids were super annoyed by this “time consuming” process, which isn’t really all that time consuming. So, what’s the purpose of this? You are rinsing the excess starch off of the grains of rice so that when you cook them they don’t stick together and clump. You’ll notice that our rice was still a little clumpy, so we should have rinsed a bit longer.
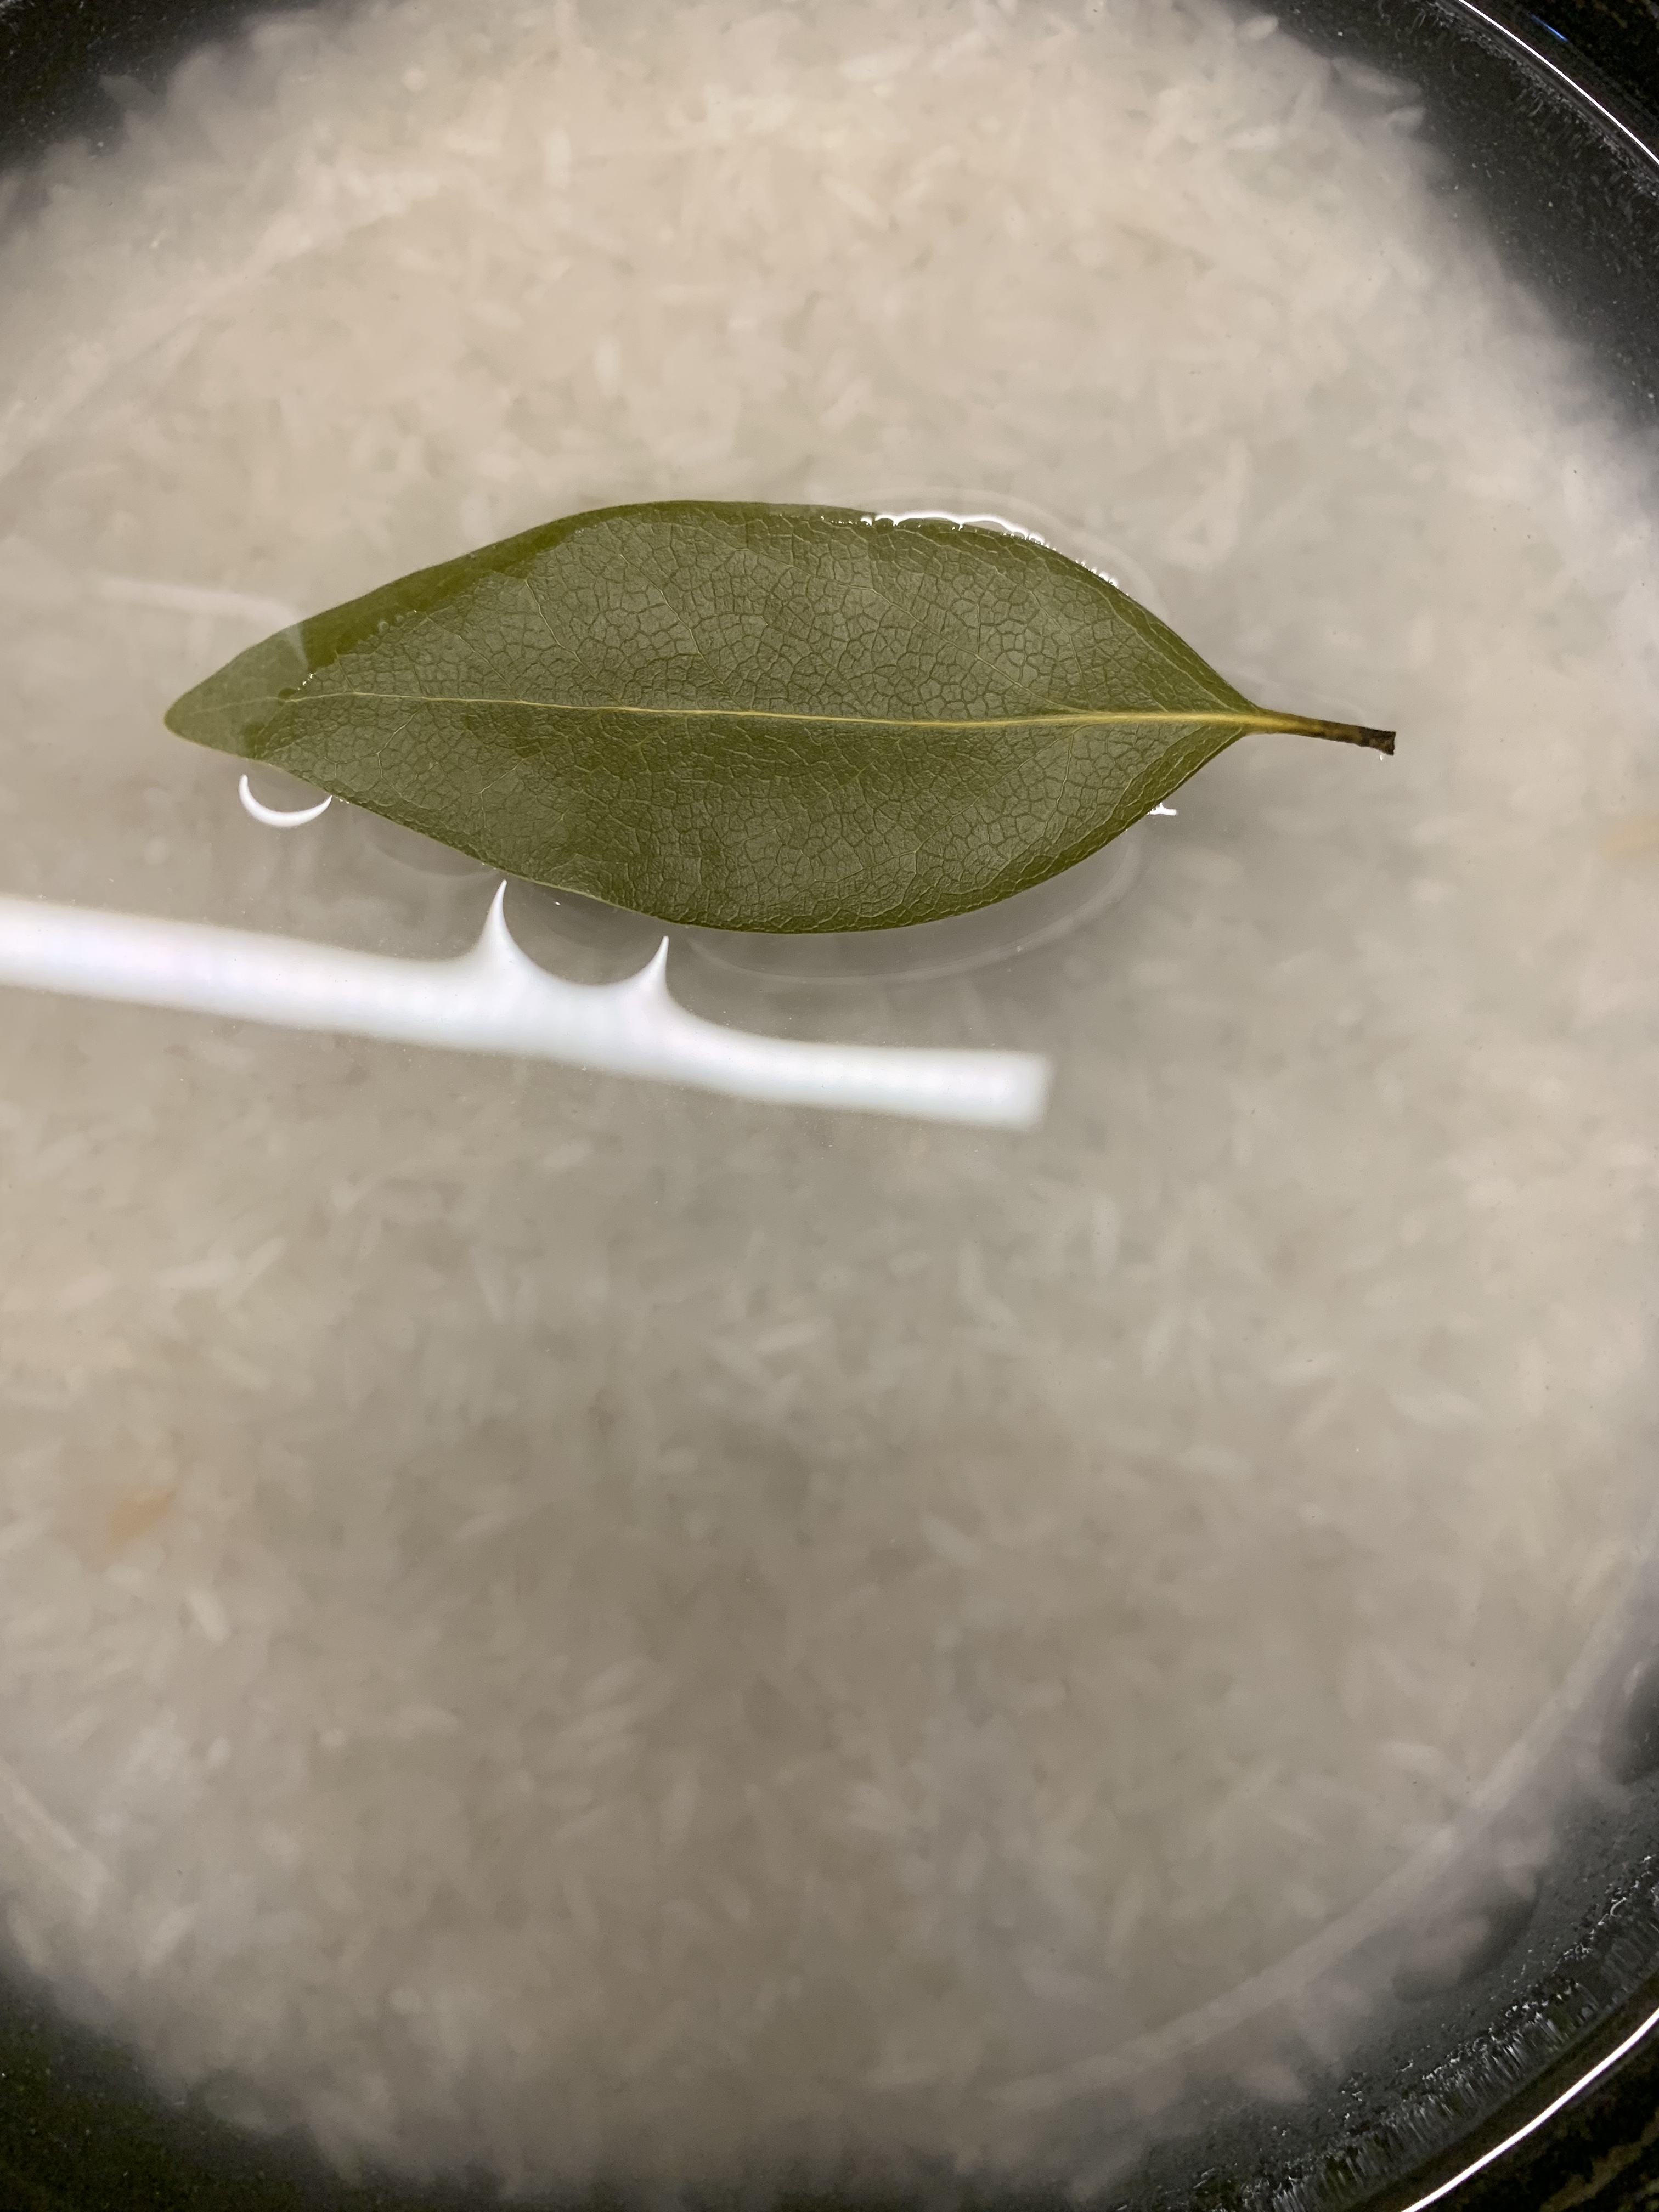
Place the fully rinsed rice into a pot and add water or broth. We used water, but chicken or vegetable broth will add a depth of flavor. Add a pinch of salt. OPTIONAL: I recently discovered that some people add a bay leaf to their rice while it is cooking, and I really liked the result. I think it gives rice more depth – especially if you’re not using broth for the liquid. I encouraged the kids to do this and they were very reluctant and concerned about having something green in their rice. I heard no complaints at the dinner table and I encourage you to give it a try sometime to see if you like it!
Bring rice and liquid to a boil, uncovered. Once the liquid is boiling, reduce heat to very, very low and cover. Leave rice covered and untouched for 20 minutes. At the end of 20 minutes, the rice should be fully cooked.
Remove the bay leaf, if using, and fluff rice before serving. If you adequately rinsed the rice, it should be light, fluffy, and non-clumpy. We are gluttons, so we add salt and two tablespoons of butter to make the rice extra delicious.
NOTES: There are lots of ways to dress up your rice, but we are saving that for the more advanced lessons in the future. I’d love to really master Spanish Rice, so if anyone has a great recipe for that, please send it to me!
Measure amount of rice you plan to cook and place in strainer. Rinse rice until water runs clear. Add rinsed rice to pot and add water. Add salt and bay leaf. Bring to a boil over high heat. Cover, lower heat as low as it will go and cook, untouched, for 20 minutes. Remove from heat, remove bay leaf.Add butter and salt and mix together.
GREEN BEANS RECIPE
We cheated on this recipe, and that’s okay! We used bagged green beans that we could steam in the microwave. You can get this at most grocery stores these days and it’s a quick, healthy addition to any meal and way better than canned green beans. We dressed ours up at the end with a quick saute in butter and garlic with a little salt and pepper. Easy peasy, and Evie’s favorite part of dinner!
INGREDIENTS
1 Bag of fresh green beans (the bag will indicate whether it can be steamed in the microwave)
1 tablespoon of butter
1/2 tablespoon fresh garlic, minced OR 1/2 tablespoon minced garlic bottled or canned
Salt and pepper to taste
INSTRUCTIONS
Microwave green beans according to instructions, but reduce microwave time by 1 minute so it isn’t quite fully cooked. We will finish cooking on the stove.
Heat skillet to medium high and heat butter until melted.
Add the microwaved green beans and top with minced garlic.
Toss green beans to coat with the butter and garlic for 1 minute.
Add salt and pepper to taste and then serve.
NOTE: If you use fresh minced garlic, add that to the pan before the green beans and let it cook for about 20-30 seconds before adding the green beans. It should take the edge off the bite of the fresh garlic, but make sure you don’t burn it or everything will taste like burned garlic. Yuck. If you don’t like garlic, just omit it. No problem!
Melt butter in pan. Add green beans, garlic, salt and pepper, and toss for 1 minute.
DINNER IS SERVED!
Plate your food items in serving dishes and garnish to make it look pretty! George was skeptical of the garnish but I assured him that the standby parsley was just for looks.
My plate of delicious food!
Clean Plate Club!
We finished the evening (after dishes) with a lively game of Rummy. The kids are addicted and the love playing with Grandma!
Our first lesson was foiled by a very important date for all the kids at the movie theater. Stay tuned because we are going to learn how to pan fry sirloin steaks on a cast iron skillet and make rice. George is the leader for this meal because he fell in love with “6-inch sirloin steaks” on multiple Carnival cruises. It’s definitely his favorite meal!
We are just a regular family trying to make it through each day while raising three growing kids. It is time for those kids to start getting ready to fly the nest – all fully out on their own wings in about 10 years total. This blog is our way of helping them stretch their wings by learning how to do the very basics of cooking and more. It all started with a popular Facebook post on my personal profile in which I asked family and friends to suggest basic cooking recipes that my kids need to learn to survive. And with all the suggestions, this idea was born! So welcome to our family through this blog which will serve as a tool to remind my kids of how to cook all these “basic” recipes. I hope you will follow along and maybe contribute suggestions or even learn something new from our modest family.
Hope you’ll join our crazy adventures as we try to succeed (but will likely fail now and again) at teaching my kids how to make basic foods that they can depend on for the rest of their lives.